Published 2022-03-28.
Last modified 2024-10-27.
Time to read: 9 minutes.
jekyll collection.
This article builds upon Explanations and Examples of Jekyll Plugins and discusses a code generator that you can use to start writing your next Jekyll plugin or Ruby on Rails plugin.
Nugem
Igor Jancev originally wrote Creategem
to generate Ruby on Rails gems.
The project uses thor for code generation, which I wrote about in
Ruby Gem Scaffold Generation With Thor.
After the project had no updates for 7 years, I forked and updated it,
then added the capability to generate Jekyll gems.
Igor did not respond when I asked if he was interested in including my work in his gem,
so I republished the new version under the name nugem.
Rails support includes Rails engine plugins, including mountable engines. Jekyll plugin support includes filters, generators, tags and block tags.
All generated plugins:
- Are structured and implemented as Ruby gems. It is surprisingly easy to publish Ruby gems.
-
Gems are set up for publishing to
RubyGems.orgor to a privategeminaboxrepository. - Have Rubocop and Visual Studio Code support baked in.
Generated Jekyll plugins also:
-
Set up their own custom loggers, as described in
Custom Logging in Jekyll Plugins.
Separate loggers are predefined for the tag plugins,
as well as five loggers for the five major categories of Jekyll hooks:
clean,documents,pages,posts, andsite.
Generated Jekyll tags and block tags also:
-
Use
jekyll_plugin_supportto accept parameters, using standardized and convenient parameter parsing. -
Provide Jekyll
site,pageandmodevariables to scopes that need those variables. The generated code is structured to help you avoid wasting time on undocumented or under-documented details.
Installing Nugem
You could type along with the remainder of this article if you install nugem:
$ gem install nugem
Successfully installed nugem-0.8.0
Parsing documentation for nugem-0.8.0
Done installing documentation for nugem after 0 seconds
1 gem installed
If you are using rbenv
to manage Ruby instances, type:
$ rbenv rehash
Syntax
Here is the top-level help message for nugem:
$ nugem help
  nugem help [COMMAND]  # Describe available commands or one specific command
  nugem jekyll NAME     # Creates a new Jekyll plugin scaffold.
  nugem plain NAME      # Creates a new plain gem scaffold.
  nugem rails NAME      # Creates a new Rails scaffold.
  -o, [--out-dir=OUT_DIR]                                     # Output directory for the gem.
                                                              # Default: generated
  -e, [--executable], [--no-executable], [--skip-executable]  # Include an executable for the gem.
                                                              # Default: false
  -h, [--host=HOST]                                           # Repository host.
                                                              # Default: github
                                                              # Possible values: bitbucket, github
      [--private], [--no-private], [--skip-private]           # Publish the gem on a private repository.
                                                              # Default: false
  -y, [--yes], [--no-yes], [--skip-yes]                       # Answer yes to all questions.
                                                              # Default: false
  -q, [--quiet], [--no-quiet], [--skip-quiet]  # Suppress detailed messages.
                                               # Default: true
  -t, [--todos], [--no-todos], [--skip-todos]  # Generate TODO: messages in generated code.
                                               # Default: true
Here is the help message for creating plain gems using nugem:
$ nugem help plain
    [--host=HOST]                      # Repository host.
  # Default: github
  # Possible values: bitbucket, github
[--private], [--no-private]        # Publish the gem in a private repository.
[--executable], [--no-executable]  # Include an executable for the gem.
[--host=HOST]                      # Repository host.
  # Default: github
  # Possible values: bitbucket, github
[--private], [--no-private]        # Publish the gem on a private repository.
[--quiet], [--no-quiet]  # Suppress detailed messages.
# Default: true
[--todos], [--no-todos]  # Generate TODO: messages in generated code.
# Default: true
Creates a new plain gem scaffold with the given NAME, by default hosted by GitHub and published on RubyGems.
Following is the help message for creating Ruby on Rails plugin gems using nugem.
This article will not mention Rails again.
$ nugem help rails
  [--engine], [--no-engine]          # Create a gem containing a Rails engine.
  [--test-framework=TEST_FRAMEWORK]  # Use rspec or minitest for the test framework (default is minitest).
                                     # Default: minitest
                                     # Possible values: minitest, rspec
  [--executable], [--no-executable]  # Include an executable for the gem.
  [--host=HOST]                      # Repository host.
                                     # Default: github
                                     # Possible values: bitbucket, github
  [--mountable], [--no-mountable]    # Create a gem containing a mountable Rails engine.
  [--private], [--no-private]        # Publish the gem on a private repository.
  [--quiet], [--no-quiet]  # Suppress detailed messages.
                           # Default: true
  [--todos], [--no-todos]  # Generate TODO: messages in generated code.
                           # Default: true
  Creates a new Rails scaffold with the given NAME, by default hosted by GitHub and published on RubyGems.
Here is the help message for creating Jekyll plugin gems using nugem:
$ nugem help jekyll
  [--block=BLOCK]                    # Specifies the name of a Jekyll block tag.
  [--blockn=BLOCKN]                  # Specifies the name of a Jekyll no-arg block tag.
  [--filter=FILTER]                  # Specifies the name of a Jekyll/Liquid filter module.
  [--generator=GENERATOR]            # Specifies a Jekyll generator.
  [--hooks=HOOKS]                    # Specifies Jekyll hooks.
  [--tag=TAG]                        # Specifies the name of a Jekyll tag.
  [--tagn=TAGN]                      # Specifies the name of a Jekyll no-arg tag.
  [--test-framework=TEST_FRAMEWORK]  # Use rspec or minitest for the test framework (default is rspec).
                                     # Default: rspec
                                     # Possible values: minitest, rspec
  [--executable], [--no-executable]  # Include an executable for the gem.
  [--host=HOST]                      # Repository host.
                                     # Default: github
                                     # Possible values: bitbucket, github
  [--private], [--no-private]        # Publish the gem on a private repository.
  [--quiet], [--no-quiet]  # Suppress detailed messages.
                           # Default: true
  [--todos], [--no-todos]  # Generate TODO: messages in generated code.
                           # Default: true
  Creates a new Jekyll plugin scaffold with the given NAME, by default hosted by GitHub and published on RubyGems.
Generated Jekyll Plugin Code
The generated code that I added to nugem was adapted from
github.com/.
That project also has additional Jekyll plugin code examples,
some of which are shown below.
Output
Jekyll plugins are easier to write when using a template,
and they are easier to manage when distributed as Ruby gems.
Nugem does a good job of creating working scaffolds of Jekyll plugins,
customized for your needs.
Following is a quick tour through the generated files that make up your new gem. Each type of Jekyll plugin will have a few different files; those will be described under the sections for each type of plugin, below.
.bundle/config-
Configures
bundlerto look for Ruby development executables in thebinstubdirectory. README.md-
This markdown file includes a badge that automatically displays the most recently published version of the gem.
The version will be shown as question marks on GitHub until you publish the first version of your gem on
RubyGems.org. Standard installation instructions are provided, and a placeholder is provided for you to write a description of the Jekyll tag plugin. .git/- This is the local copy of your newly created Git repository, and by default, the generated version is automatically committed.
.gitignore-
This is set up for Jekyll gem development.
Do not delete the
.jekyll-cache/entry, or you will introduce a huge security risk. .rspec- Configures the
rspectest facility. .rubocop.yml- Configures the Rubocop Ruby linter.
.vscode/- Defines standard debug launch configurations, suggested VSCode extensions, extension settings, and code snippets for developing Jekyll gems.
CHANGELOG.md- You should update this file each time you release a new version of the gem.
Gemfile- This is a standard setup for developing Jekyll gems; do not define runtime dependencies in this file.
your_gem_name.gemspec- Define runtime dependencies in this file. Also update the description of your new gem here. Pay close attention to the contents of this file; it defines your gem.
LICENCE.txt-
Standard MIT license terms.
If you want to use another license, modify this file,
and update the
spec.licenseentry in.gemspecfile to match. Rakefile- Standard setup for Ruby gem development, you probably do not need to modify this file.
bin/-
This directory contain useful scripts for Jekyll gem development:
attach,console,rake, andsetup. Take a look at them. demo/-
This directory contains a small but complete Jekyll website,
set up to exercise your Jekyll plugin.
See
demo/README.mdfor more information. lib/-
Contains the logic for your Jekyll plugin:
lib/your_gem_name.rb– entry point, set up torequireall the other Ruby source files in thelib/directory. You probably do not need to modify it.your_gem_name/version.rb– update the version number in this file each time you publish a new release.-
your_plugin_name.rb– the logic for your Jekyll tag, block, filter, generator, or hook goes in this file. It is well commented.-
nugemcan create Jekyll plugins that define more than one tag, and/or block tag, and/or filter, and/or generator, and/or hooks. A Ruby source file will be created for each. -
For Jekyll tags and block tags, the contents subclass the appropriate class from the
jekyll_plugin_supportgem.
-
spec/-
This directory contains a scaffold for
rspectests for your Jekyll gem and includes some test fixtures. Jekyll filters are easy to test because they are just Ruby module methods. Setting up tests for other types of Jekyll plugins is a black art, however, because almost nothing is documented. Tags, block tags, generators and hooks can be extremely difficult to test due to the difficulty of setting up fixtures. Thedemo/is provided, so you can debug your Jekyll plugins in situ.
Jekyll Filter Plugins
Filters are the easiest type of Jekyll plugin to write.
All that is required is a module with methods in it,
and to register the module with Liquid::Template.register_filter.
All the methods in the module become filters.
No subclassing is required.
Filters should not accept page parameters because Jekyll will recursively re-evaluate all the properties of the page,
and blow up when recursing through excerpt.
This means the following syntax should not be used:
{{ page | my_filter }}
The workaround is to write a Jekyll inline tag instead.
Example Jekyll Filter
The following code includes a method called my_filter_template.
That method becomes a filter when wrapped as shown:
require 'jekyll_plugin_logger'

# @author Copyright 2020 {https://www.mslinn.com Michael Slinn}
# Template for Jekyll filters.
module JekyllFilterTemplate
  class << self
    attr_accessor :logger
  end
  self.logger = PluginMetaLogger.instance.new_logger(self, PluginMetaLogger.instance.config)

  # This Jekyll filter returns the URL to search Google for the contents of the input string.
  # @param input_string [String].
  # @return [String] empty string if input_string has no contents except whitespace.
  # @example Use.
  #   {{ 'joy' | my_filter_template }} => <a href='https://www.google.com/search?q=joy' target='_blank' rel='nofollow'>joy</a>
  def my_filter_template(input_string)
    # @context[Liquid::Context] is available here to look up variables defined in front matter, templates, page, etc.

    JekyllFilterTemplate.logger.debug do
      'Defined filters are: ' + self.class # rubocop:disable Style/StringConcatenation
                                    .class_variable_get('@@global_strainer')
                                    .filter_methods.instance_variable_get('@hash')
                                    .map { |k, _v| k }
                                    .sort
    end

    input_string.strip!
    JekyllFilterTemplate.logger.debug "input_string=#{input_string}"
    if input_string.empty?
      ''
    else
      "<a href='https://www.google.com/search?q=#{input_string}' target='_blank' rel='nofollow'>#{input_string}</a>"
    end
  end

  PluginMetaLogger.instance.logger.info { "Loaded JekyllFilterTemplate v#{JekyllPluginTemplateVersion::VERSION} plugin." }
end

Liquid::Template.register_filter(JekyllFilterTemplate)
Input / Output Filter Transformation
Given this markup in an HTML file:
Search for {{ "joy" | my_filter_template }}
This is what is rendered to the web page after being passed through the above filter:
Search for joy
Forwarding Singleton Methods to Instance Methods
If you want to define a method that can be called as a Jekyll filter and be used by other plugins as well, then you should read this section.
Singleton methods cannot be used as Liquid filters.
When you use a
module_function statement,
module functions can be invoked from other modules;
you are actually converting those instance methods into singleton methods.
If you mention a filter method in a module_function
statement, an insidious bug will be introduced into your plugin, which can be difficult to understand at first.
Adding a module_function statement into a module that defines Jekyll filters does the following:
- The filters are never called
- The unfiltered value is returned
- No warnings or errors are issued.
Method forwarding is a way to wrap a singleton method within an instance method.
The following example of method forwarding was taken from my
jekyll_draft plugin.
The Jekyll::Draft::draft? singleton method is invoked from
the Liquid filter method Jekyll::DraftFilter::is_draft.
module Jekyll
  module Draft
    # Define this method outside of the filter module so they can be invoked externally
    def draft?(doc)
      # blah blah
    end
    module_function :draft?
  end

  module DraftFilter
    def is_draft(doc)
      Draft::draft?(doc) # method forwarding
    end

    Liquid::Template.register_filter(DraftFilter)
  end
end
Jekyll Tag Plugins
Jekyll tag plugins are easier to write when using a template,
and they are easier to manage when distributed as Ruby gems.
Nugem does a good job of creating a working scaffold of Jekyll tags, customized for your needs.
Following is a demonstration of how to use nugem
to create a new Jekyll plugin that defines one Jekyll tag.
The gem that contains the tag will be called jekyll_highlight_tag,
and the Jekyll tag will be called highlight.
This plugin would be better implemented as a filter.
$ nugem jekyll jekyll_highlight_tag --tag highlight
Please list the names of the options for the highlight Jekyll/Liquid tag:  text fg_color bg_color
What is the type of text? (tab autocompletes) [boolean, string, numeric] (string)
What is the type of fg_color? (tab autocompletes) [boolean, string, numeric] (string)
What is the type of bg_color? (tab autocompletes) [boolean, string, numeric] (string)
Initialized empty Git repository in /mnt/c/work/ruby/nugem/generated/jekyll_highlight_tag/.git/
Do you want to create a repository on GitHub named jekyll_highlight_tag? (y/N)  y
Enumerating objects: 66, done.
Counting objects: 100% (66/66), done.
Delta compression using up to 12 threads
Compressing objects: 100% (57/57), done.
Writing objects: 100% (66/66), 461.38 KiB | 445.00 KiB/s, done.
Total 66 (delta 0), reused 0 (delta 0), pack-reused 0
To github.com:mslinn/jekyll_highlight_tag.git
  * [new branch]      master -> master
branch 'master' set up to track 'origin/master'.
Lets see what was written to the generated/ directory.
The following shows only the first 2 levels of directories, without files.
$ tree -adL 2 generated/
generated/
  └── jekyll_highlight_tag
      ├── .bundle
      ├── .git
      ├── .vscode
      ├── bin
      ├── demo
      ├── lib
      ├── spec
      └── test

9 directories
The above shows that the new Jekyll plugin, ready to be made into a gem,
is stored in generated/jekyll_highlight_tag.
A public Git repository was created on GitHub,
and the contents of the directory were committed.
I use the generated/ directory as a scratch area for experimentation.
Before we go any further, you might want to move the generated/jekyll_highlight_tag directory
somewhere permanent.
I moved it to the directory pointed to by $work,
and made that directory current.
$ mv generated/jekyll_highlight_tag $work/

$ cd $work/jekyll_highlight_tag
Regular readers of this blog will know that I use environment variables to point to directories;
this allows me to address the contents of $work on every machine, even though the environment variable
might point to /mnt/f/work on one machine, and /data/work on another.
Next, I launched the project using Visual Studio Code:
$ code .
Jekyll Block Tag Plugins
Jekyll block tag plugins are just like tag plugins, plus they also have a content body.
The following is a demonstration of how to use nugem
to create a new Jekyll plugin that defines one Jekyll block tag.
The gem that contains the tag will be called jekyll_highlight_block,
and the Jekyll tag will be called highlight2.
This plugin would be better implemented as a filter.
$ nugem jekyll jekyll_highlight_block --block highlight2
Please list the names of the options for the highlight2 Jekyll/Liquid tag:  color bg_color
What is the type of fg_color? (tab autocompletes) [boolean, string, numeric] (string)
What is the type of bg_color? (tab autocompletes) [boolean, string, numeric] (string)
Initialized empty Git repository in /mnt/c/work/ruby/nugem/generated/jekyll_highlight_tag/.git/
Do you want to create a repository on GitHub named jekyll_highlight_block? (y/N)  y
Enumerating objects: 66, done.
Counting objects: 100% (66/66), done.
Delta compression using up to 12 threads
Compressing objects: 100% (57/57), done.
Writing objects: 100% (66/66), 461.38 KiB | 445.00 KiB/s, done.
Total 66 (delta 0), reused 0 (delta 0), pack-reused 0
To github.com:mslinn/jekyll_highlight_block.git
  * [new branch]      master -> master
branch 'master' set up to track 'origin/master'.
The structure of the generated code for Jekyll block tags is identical to that of regular Jekyll tags.
The new Jekyll plugin, ready to be made into a gem,
is stored in generated/jekyll_highlight_block.
A public Git repository was created on GitHub,
and the contents of the directory were committed.
As with the preceding tag plugin, you might want to move the generated/jekyll_highlight_block directory
somewhere permanent.
I moved it to the directory pointed to by $work,
and made that directory current.
$ mv generated/jekyll_highlight_block $work/

$ cd $work/jekyll_highlight_block
Next, I launched the project using Visual Studio Code:
$ code .
Usage
Given this markup in an HTML file:
{ % highlight2 %}
Hello, world!
{ % endhighlight2 %}
The generated HTML from the block tag looks like this:
<span style='color: black; background: yellow; padding: 2px;'>Hello, world!</span>
Here is another example:
{% highlight2 fg_color="yellow" bg_color="green" %}
Hello, world!
{% endhighlight2 %}
The generated HTML from the block tag is as follows:
<span style='color: yellow; background: green; padding: 2px;'>Hello, world!</span>
Jekyll Hook Plugins
Modifying Pages Across the Entire Jekyll Site
You can modify the generated HTML for the entire Jekyll website. This is easy to do.
The very last hook that gets called before writing posts to disk is :post_render.
We can modify the output property of the document at the
:documents :post_render hook to make edits to rendered web pages in collections,
regardless of whether they were originally written in Markdown or HTML:
module JekyllPluginHookExamples
  Jekyll::Hooks.register(:documents, :post_render) do |doc|
    doc.output.gsub!('Jekyll', 'Awesome')
  end
end
To also modify web pages that are not in a collection (for example, /index.html),
add the following into the above module JekyllPluginHooks:
Jekyll::Hooks.register(:pages, :post_render) do |page|
  page.output.gsub!('Jekyll', 'Awesome')
end
Notice that both of the hook invocations have duplicate code.
If we want all web pages to be modified, we can rewrite the above and extract the common code to a new method called modify_output:
module JekyllPluginHookExamples
  def modify_output
    Proc.new do |webpage|
      webpage.output.gsub!('Jekyll', 'Awesome')
    end
  end

  module_function :modify_output

  Jekyll::Hooks.register(:documents, :post_render, &modify_output)
  Jekyll::Hooks.register(:pages, :post_render, &modify_output)
end
The demo/index.html web page now looks like the following:
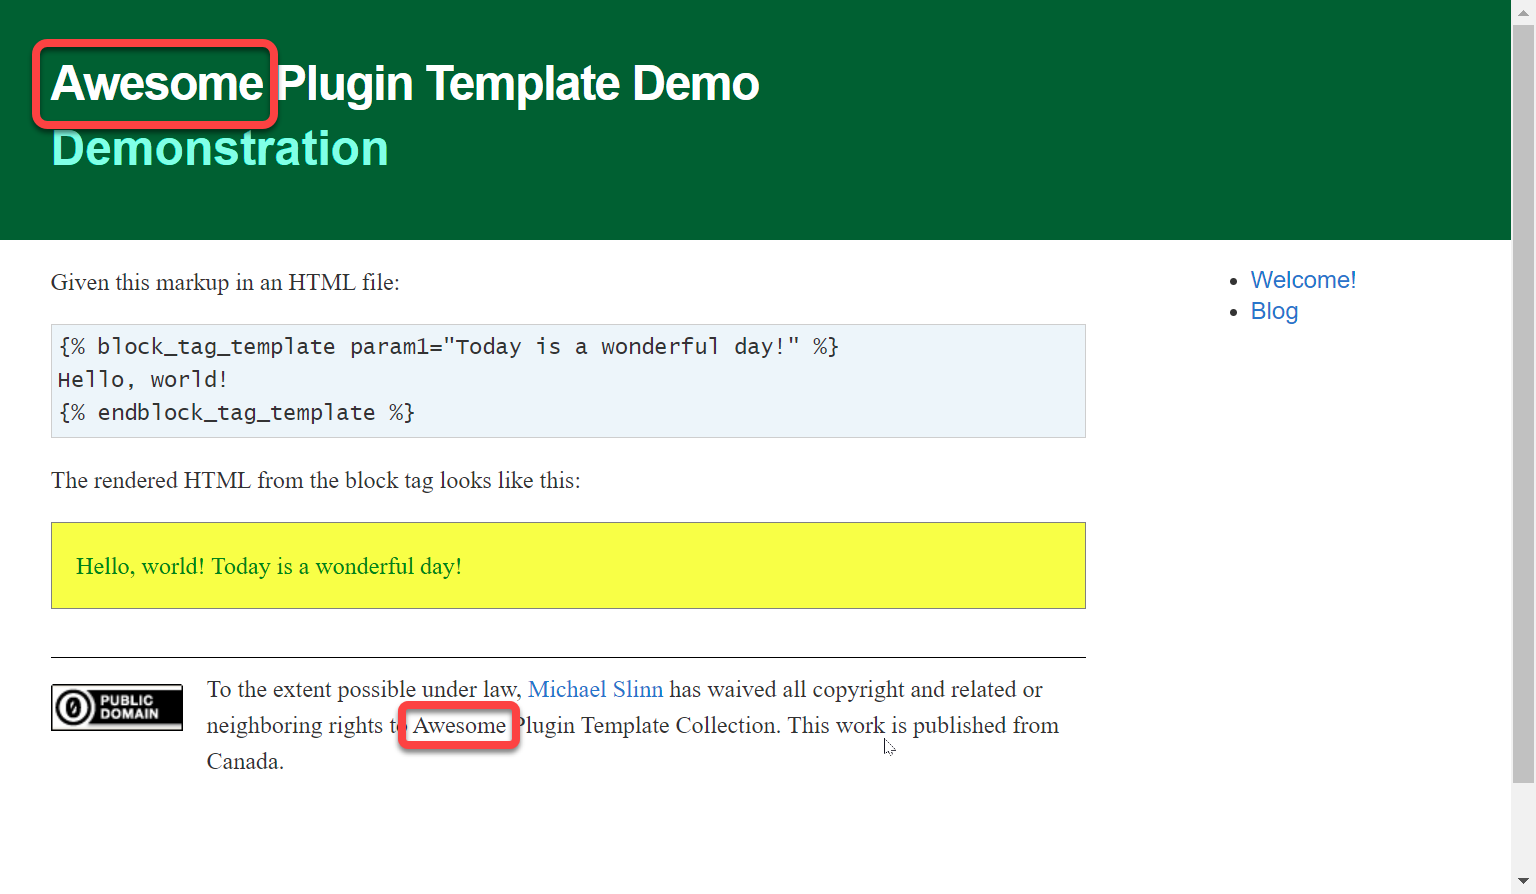
If you want to translate web pages into other languages or dialects, for example,
Pig Latin or
Pirate Talk, or even
spelling and grammar autocorrection,
just rewrite modify_output to suit.
Talk Like a Pirate Translator
I could not help myself, and wrote a quick Pirate Talk translator for Jekyll sites. This is an example of a Jekyll hook plugin.
require "active_support"
require "active_support/inflector"
require "nokogiri"
require "talk_like_a_pirate"

def pirate_translator
  proc do |webpage|
    html = Nokogiri.HTML(webpage.output)
    html.css("p").each do |node|
      node.content = TalkLikeAPirate.translate(node.content)
    end
    webpage.output = html
  end
end

module_function :pirate_translator

Jekyll::Hooks.register(:documents, :post_render, &pirate_translator)
Jekyll::Hooks.register(:pages, :post_render, &pirate_translator)
Here is the output of one of the demo web pages:
<h2>Don't Worry, Be Happy</h2>
<p>
If you do not worry, someone else will.
That is their problem.
Enjoy life, it comes at you fast.
</p>
<p class="copyright" id="copyright" xmlns:dct="http://purl.org/dc/terms/" xmlns:vcard="http://www.w3.org/2001/vcard-rdf/3.0#">
T' tha extent possible under law, Michael Slinn has waived all copyright n' related or neighborin' rights t'
Jekyll Plugin Template Collection.
This duty is published from Great North.
</p>
<p class="copyright" id="copyright" xmlns:dct="http://purl.org/dc/terms/" xmlns:vcard="http://www.w3.org/2001/vcard-rdf/3.0#">
<a rel="license" style="float: left; margin-right: 1em; padding-top: 9px; padding-bottom: 2em;"
href="http://creativecommons.org/publicdomain/zero/1.0/">
<img src="http://i.creativecommons.org/p/zero/1.0/88x31.png" style="border-style: none;" alt="CC0" />
</a>
To the extent possible under law,
<a rel="dct:publisher"
href="https://www.mslinn.com/blog/2022/03/28/jekyll-plugin-template-collection.html">
<span property="dct:title">Michael Slinn</span></a>
has waived all copyright and related or neighboring rights to
<span property="dct:title">Jekyll Plugin Template Collection</span>.
This work is published from <span property="vcard:Country" datatype="dct:ISO3166" content="CA"
about="https://www.mslinn.com/blog/2022/03/28/jekyll-plugin-template-collection.html"> Canada</span>.
Notice that the copyright has had all the inner HTML removed by my simple translator. With more work (and more code), some of the inner HTML could be retained.
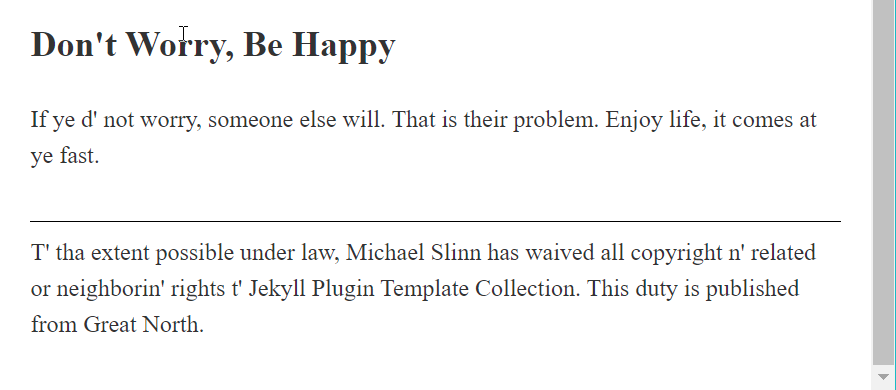
<h2>Don't Worry, Be Happy</h2>
<p>
If ye d' not worry, someone else will.
That is their problem.
Enjoy life, it comes at ye fast.
</p>
<p class="copyright" id="copyright" xmlns:dct="http://purl.org/dc/terms/" xmlns:vcard="http://www.w3.org/2001/vcard-rdf/3.0#">
T' tha extent possible under law, Michael Slinn has waived all copyright n' related or neighborin' rights t'
Jekyll Plugin Template Collection.
This duty is published from Great North.
</p>
The translated HTML renders in a web browser like this:
Selecting Pages to Translate
The above pirate_translator plugin modifies every page on the website.
If you want to only translate certain pages, you could take advantage of the fact that page data,
including front matter variables,
is available to all the hooks for :documents, :pages, and :posts.
Let's modify the hook, so it checks for the existence of a front matter variable called pirate_talk.
If present, and it has a value that is not false,
that page will be translated into Pirate Talk; otherwise, it will not be modified.
Here is the modified version:
def pirate_translator
  proc do |webpage|
    return unless webpage.data['pirate_talk']

    html = Nokogiri.HTML(webpage.output)
    html.css("p").each do |node|
      node.content = TalkLikeAPirate.translate(node.content)
    end
    webpage.output = html
  end
end
demo/_posts/2022/2022-01-01-test.html looks like this:
---
categories: [Jekyll, Ruby]
description: Test post.
date: 2022-03-28
last_modified_at: 2022-04-01
layout: default
title: Test Post
pirate_talk: true
---
<h2>Don't Worry, Be Happy</h2>
<p>
  If you do not worry, someone else will.
  That is their problem.
  Enjoy life, it comes at you fast.
</p>
Jekyll Generator Plugins
Generators are only invoked once during the website build process, when all the pages have been scanned and the site structure is available for processing. It is common for generators to include code that loops through various collections of pages.
Functionally, a Jekyll generator is the same as a :site :pre_render hook.
The choice of whether to write a generator class, which subclasses Jekyll::Generator,
or writing a :site :pre_render hook is arbitrary.
Flip a coin to decide.
Generators can create files containing web pages in any directory, and they can modify front matter and content of existing files. Generators usually log information to the console whenever a problem occurs, or progress needs to be shown. Here is the official documentation:
A generator is a subclass of
Jekyll::Generator that defines a generate method,
which receives an instance of Jekyll::Site.
The return value of generate is ignored.
Generators run after Jekyll has made an inventory of the existing content and before the site is generated. Pages with front matter are stored as instances of
Jekyll::Page
and are available via site.pages.
Static files become instances of
Jekyll::StaticFile
and are available via site.static_files.
See the Variables documentation page and Jekyll::Site for details.
# Inspired by the badly broken example on https://jekyllrb.com/docs/plugins/generators/, and completely redone so it works.
module CategoryIndexGenerator
  # Creates an index page for each catagory, plus a main index, all within a directory called _site/categories.
  class CategoryGenerator < Jekyll::Generator
    safe true

    # Only generates content in development mode
    # rubocop:disable Style/StringConcatenation, Metrics/AbcSize
    def generate(site)
      # This plugin is disabled unless _config.yml contains an entry for category_generator_enable and the value is not false
      return if site.config['category_generator_enable']

      return if site.config['env']['JEKYLL_ENV'] == 'production'

      index = Jekyll::PageWithoutAFile.new(site, site.source, 'categories', 'index.html')
      index.data['layout'] = 'default'
      index.data['title'] = 'Post Categories'
      index.content = '<p>'

      site.categories.each do |category, posts|
        new_page = Jekyll::PageWithoutAFile.new(site, site.source, 'categories', "#{category}.html")
        new_page.data['layout'] = 'default'
        new_page.data['title'] = "Category #{category} Posts"
        new_page.content = '<p>' + posts.map do |post|
          "<a href='#{post.url}'>#{post.data['title']}</a><br>"
        end.join("\n") + "</p>\n"
        site.pages << new_page
        index.content += "<a href='#{category}.html'>#{category}</a><br>\n"
      end
      index.content += '</p>'
      site.pages << index
    end
    # rubocop:enable Style/StringConcatenation, Metrics/AbcSize
  end

  PluginMetaLogger.instance.logger.info { "Loaded CategoryGenerator v#{JekyllPluginTemplateVersion::VERSION} plugin." }
end


