Published 2020-03-01.
Last modified 2024-11-05.
Time to read: 4 minutes.
av_studio collection.
I have written eighteen articles about Pro Tools. They are somewhat ordered, but largely are meant to be read in any order.
- Pro Tools Overview
- Pro Tools Installation and Preferences
- HUI & MCU
- Pro Tools Keyboards and Hot Keys
- Avid Control, EuControl and EuCon
- Pro Tools Modes and States
- Pro Tools Sessions
- Pro Tools Beats, Bars and Click Tracks
- Pro Tools Operations
- Pro Tools Workspaces and Catalogs
- Pro Tools Sessions
- Pro Tools Editing
- Pro Tools Effects
- Pro Tools Automation
- Pro Tools MIDI
- Pro Tools GrooveCell & Xpand!2
- EZdrummer 3 & Pro Tools
- Pro Tools Issues
General Principles
- Before making a recording, unplug all inputs that are not in use
- Never delete anything; copy and modify the copy instead
Copying an Insert
To copy an insert from one track to another:
- Both tracks must have the same number of channels (mono / stereo)
- Both tracks must be of the same type (instrument, audio, etc.)
- CTRL-drag copies an insert from one track to another; several seconds may elapse before the change becomes visible.
Memory Window
CTRL-numeric pad 5 toggles the visibility of the Memory window, where markers can be viewed and managed to a certain extent.
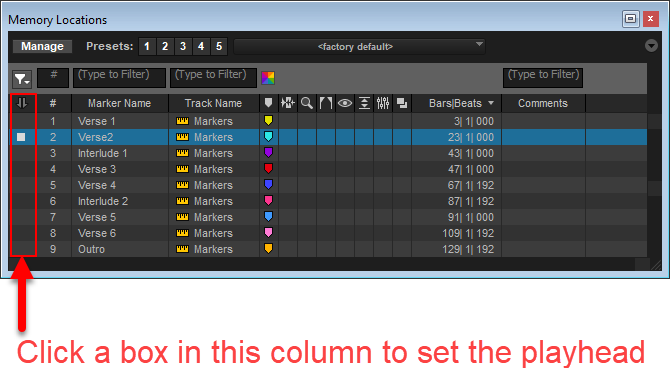
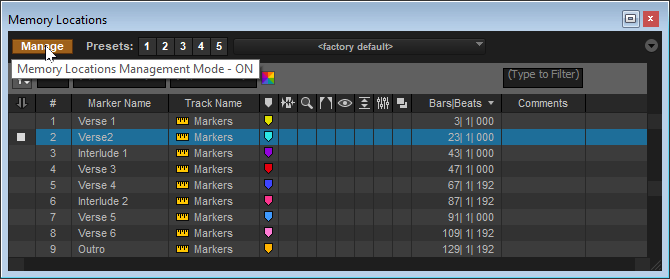
Enable management mode by clicking on the Manage button.
Several markers can be selected when management mode is enabled.
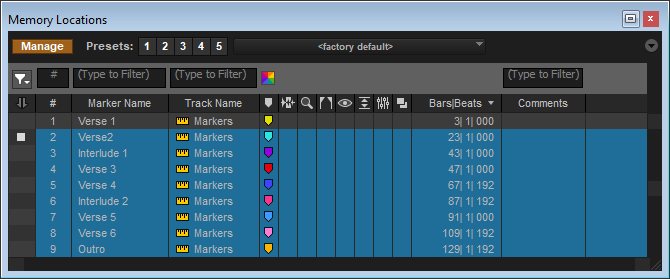
Right-click to delete the selected markers.
Moving Multiple Markers
Imagine you have a song that contains multiple clips on several tracks, with associated markers. If you want to make room for an extra bar or two in the middle of the song, you should move the markers and the clips to the right. It is easy to move clips; simply select them and drag right as desired. Unfortunately, multiple markers cannot be moved along with their tracks, nor can they be dragged; multiple markers must be cut and pasted into their new position.
- Position the playhead at the first marker to move. The easiest way to do this is to simply click on the first marker to move in the edit window. The main counter always shows the playhead position.
- Compute the desired value of the desired playhead location for the first marker. As an example, the original value (in bars|beats) might be 24|00|00, and the main counter should show this value now. if you want to move the selected markers two bars later, the desired value of the first marker will be 26|00|00. Write down this value – we will need it in step 5.
- Shift-click on the last marker to move in the edit window.
- Cut the markers and place them on the clipboard with CTRL-X.
- Notice that the playhead is still at the location you set in step 2. Continuing the example, type the new value (26|00|00) into the main counter and press Enter.
- You should see a small vertical white line blinking in the marker area, at the playhead position. This indicates to you that the marker track is still selected. If you do not see the blinking white vertical line, the next step will fail.
- Paste the markers from the clipboard with CTRL-C; the first one will be positioned at the current playhead position (26|00|00), and the others will be similarly offset.
Cut Selection From All Tracks
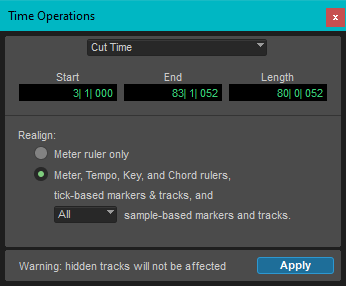
This procedure cuts the selected region from all visible tracks.
- Select a region in one or more tracks.
- Use menu Event / Time Operations / Cut Time....
-
The default settings in the dialog box will do the job.
Export Audio
- Highlight a track that spans the entire timeline
-
File / Bounce Mix (CTRL-ALT-B)

-
Before saving, Choose the directory (
E:\music\renders) and press the Use current folder button.

- Save
Export Stems
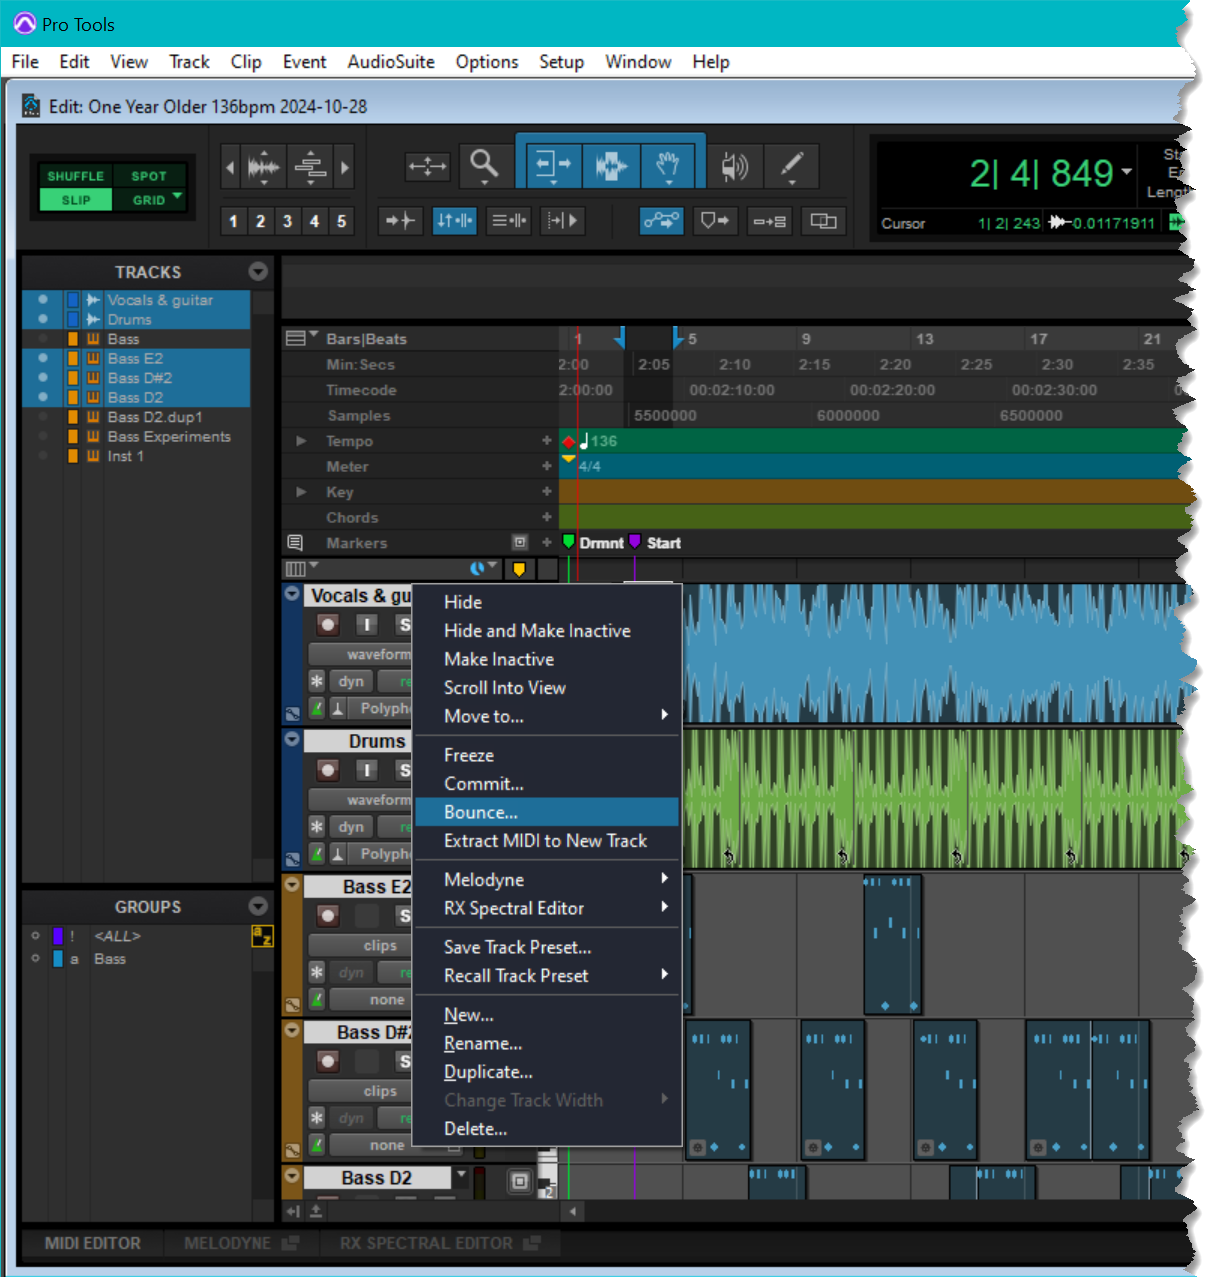
For processed stems, select all the tracks that should be output as stems, then right-click one one of their names and select Bounce. A file will be created for each selected track. Stereo tracks will have a separate file for the left and right channels.
For example, after I CTRL-clicked on the highlighted tracks in the following image to select them, I selected Bounce as shown in the open dialog.
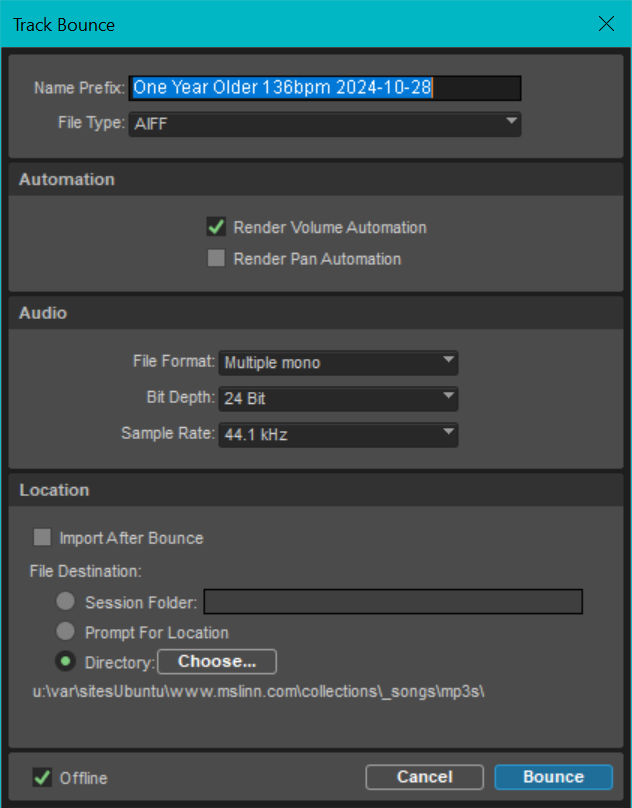
In the ensuing dialog box I chose to format the stems as 24-bit mono AIFF files at 44.1 kHz. Always leave Offline enabled, or the export will take a long time.
The following stem files were generated:
One Year Older 136bpm 2024-10-28_Bass D#2.aif
One Year Older 136bpm 2024-10-28_Bass D2.aif
One Year Older 136bpm 2024-10-28_Bass E2.aif
One Year Older 136bpm 2024-10-28_Drums.aif
One Year Older 136bpm 2024-10-28_Vocals & guitar.L.aif
One Year Older 136bpm 2024-10-28_Vocals & guitar.R.aif
Deleting References to Missing Audio Clips
Unlike many other programs, Pro Tools does not listen to file system changes. This means that if audio clips are deleted by using File Manager, Pro Tools will not realize that the files which used to contain the deleted clips no longer exist, and a warning message will be shown the next time the session is opened.
References to missing files must be removed in order to prevent the error message from being displayed every time Pro Tools starts.
- Reveal the Clips window by using the Window / Clip List menu.
- Missing files are shown italicized and light grey; click on all of them so they are selected.
- Right-click on one of the missing clips and select Clear....
- Save the session under a new name, but in the same directory, then reload the renamed session to ensure all is well. Because you saved the session under a new name, if you accidently deleted the wrong clip, you will notice the problem when reloading, and will be able to easily revert to the previous version.
Related topic: workspace browsers.
I have written eighteen articles about Pro Tools. They are somewhat ordered, but largely are meant to be read in any order.
- Pro Tools Overview
- Pro Tools Installation and Preferences
- HUI & MCU
- Pro Tools Keyboards and Hot Keys
- Avid Control, EuControl and EuCon
- Pro Tools Modes and States
- Pro Tools Sessions
- Pro Tools Beats, Bars and Click Tracks
- Pro Tools Operations
- Pro Tools Workspaces and Catalogs
- Pro Tools Sessions
- Pro Tools Editing
- Pro Tools Effects
- Pro Tools Automation
- Pro Tools MIDI
- Pro Tools GrooveCell & Xpand!2
- EZdrummer 3 & Pro Tools
- Pro Tools Issues


