Published 2024-06-12.
Last modified 2024-09-11.
Time to read: 8 minutes.
posts collection, categorized under Ableton, Clonezilla, Ubuntu, VirtualBox.
Mini-Series
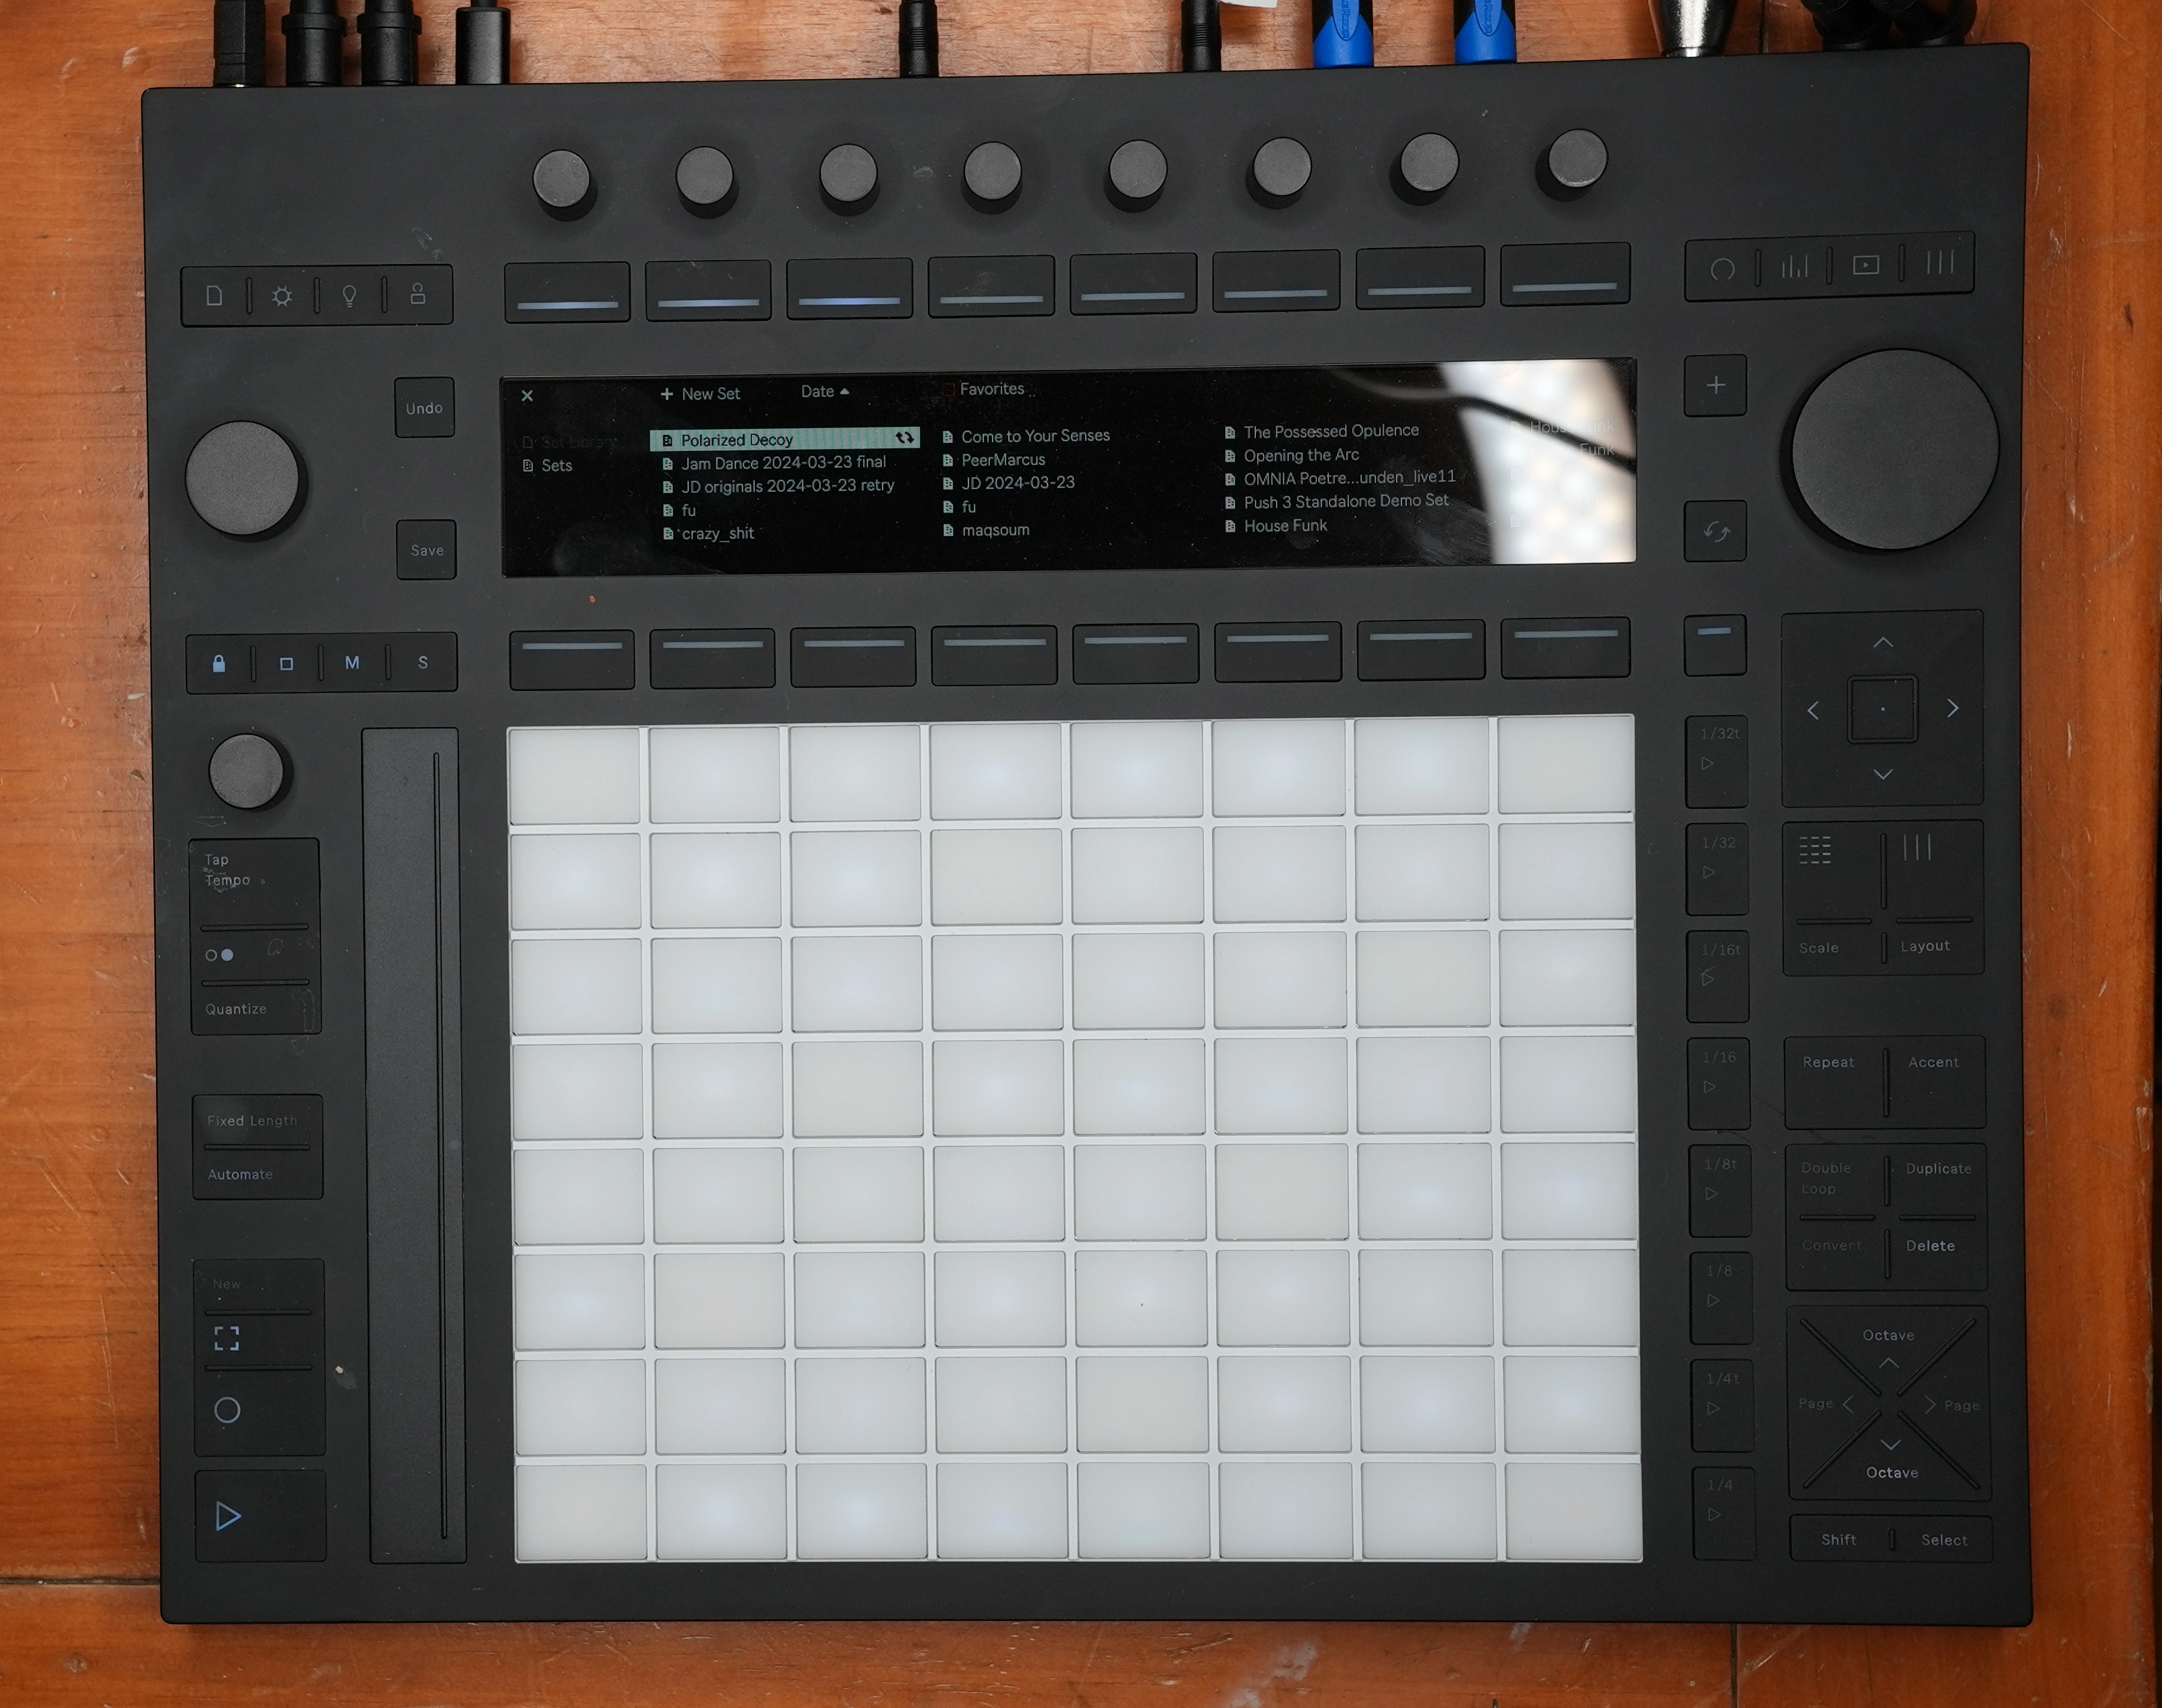
This article can be read standalone; however, is part of a mini-series that discusses how to increase the storage capacity and performance of the Ableton Push 3 Standalone (P3S). If you own a P3S, or are thinking of purchasing one, you might want to first read my review.
The articles in this mini-series are:
Although other OSes are mentioned, this article focuses on using Clonezilla to clone drives used by Linux systems.
Nomenclature
An original is the drive that needs to be cloned, and a clone is a drive containing an identical copy of the original drive’s contents.

A snapshot is a read-only copy of an entire file system and all the files contained in the file system. The contents of each snapshot reflect the state of the file system at the time the snapshot was created. It is easy to navigate through each snapshot as if it were still active. The directories, folders and files will appear as they were at the time that the snapshot was created.
By default, Linux systems are not configured to use snapshots; for example,
Ableton Push 3 Standalone devices do not use snapshots.
It is not difficult to set up snapshots using
LVM;
perhaps I will write an article about how to do that one day.
About Clonezilla
Clonezilla can clone just about any type of Linux hard drive.
Many file systems are supported:
ext2,ext3,ext4,reiserfs,reiser4,xfs,jfs,btrfs,f2fsandnilfs2of GNU/LinuxFAT12,FAT16,FAT32,exFATandNTFSof MS WindowsHFS+andAPFSof macOSUFSof FreeBSD, NetBSD, and OpenBSD- Minix
VMFS3andVMFS5of VMWare ESX
Therefore, you can clone GNU/Linux, Microsoft Windows, Intel-based macOS, FreeBSD, NetBSD, OpenBSD, Minix,
VMWare ESXi and Chrome OS/Chromium OS, no matter if it's 32-bit (x86) or 64-bit (x86-64) OS.
For these file systems, only used blocks in partitions are saved and restored by
Partclone.
For unsupported file systems, sector-to-sector copy is done by dd in Clonezilla.
Clonezilla works with MBR- and GPT-formatted hard drives. However, I am only going to discuss GPT-formatted drives. There is no point in discussing obsolete technology unless a legal firm is paying me for my time.
GPT Drives
The GUID Partition Table (GPT) is a standard for the layout of the partition tables on a physical hard disk. It forms a part of the Unified Extensible Firmware Interface (UEFI) standard, which Microsoft calls EFI. GPT allows for a maximum disk and partition size of 9.4 ZB (a zetabyte is a billion terabytes).
The bootloader for GPT drives is stored in the EFI system partition,
formatted as FAT16 or FAT32,
and resides at the beginning of the disk — Partition 1 in the following diagram.

As illustrated by the above diagram, drives contain a primary partition table, at least one partition, and a backup partition table. You could think of the two partition tables as bookends and the partitions as books between them, with the introductory book (the partition dedicated to containing the bootloader) in first place.

Clonezilla Overview
Clonezilla can clone entire drives, including the two GPT partition tables that bookend all the partitions in between, or it can just clone specific partitions.
The Clonezilla procedure is the same, no matter what size file system you start with. The process after using Clonezilla changes, depending on the scenario. To summarize:
- Once Clonezilla finishes cloning a drive, all the partitions in the clone are identical to the partitions in the original drive; any extra storage capacity is not used.
- If the cloned drive is the same size as the original, you are done.
-
As I discuss in Supersizing a Partition and Its File System, tiny Linux file systems (those with 1K blocks) should be recreated larger, not enlarged, and the same is true for normal-sized file systems that are being migrated to much larger partitions. Normally, only one of the partitions on a drive should be enlarged, so this article makes that assumption.

To recreate a file system in a partition:- The file system in the partition being enlarged should be deleted.
- The partition should be enlarged.
- A new file system should be created in the enlarged partition. The creation process heavily optimizes the file system for the partition it is placed in.
- The files from the partition on the original drive should be copied to the new file system on the cloned drive.
Usage
The Clonezilla installation process depends on how you want to use it. I describe the installation processes separately for each scenario discussed in this article.
I would like to encourage you to get in the habit of running Clonezilla in a VirtualBox virtual machine, as I did when I wrote this article. Unless you want to clone the system drive in the machine that you prefer to run VirtualBox on, this is generally your best option for running Clonezilla.
You have many other options as well.
You can run Clonezilla from a normal Ubuntu system if you just want to clone a
drive that is not mounted
or if your file system supports snapshots.
To clone a system disk that does not support snapshots,
the drives on the disk will first have to be attached to the OS as a /dev device
but not mounted,
then the virtualized system should be booted, or an ISO system image on a CD / DVD / SSD should be booted.
Once Ubuntu is running, Clonezilla can be run as a console text program in a terminal window.
I was unable to use Clonezilla from WSL because I did not know how to map USB drives to the WSL VM so Clonezilla could work its magic. Maybe one day I will fight through the issues involved, but there is no reason for me to work that hard for no benefit.
Cloning an Unmounted Drive
Installation
If you want to clone unmounted drives, install Clonezilla on an Ubuntu system like this:
$ sudo apt install clonezilla
Once installed, read the clonezilla help message:
$ sudo clonezilla -h
/usr/sbin/clonezilla: -h: invalid option
Usage:
Run clonezilla:
/usr/sbin/clonezilla [OPTION]
  -l, --language INDEX Set the language to be shown by index number:
        [0|en_US.UTF-8]: English,
        [2|zh_TW.UTF-8]: Traditional Chinese (UTF-8, Unicode) - Taiwan
        [a|ask]: Prompt to ask the language index
  This option is for backward compatibility. It's recommended to use
  locales to assign that.
  -d0, --dialog         Use dialog
  -d1, --Xdialog        Use Xdialog
  -d2, --whiptail       Use whiptail
  -d3, --gdialog        Use gdialog
  -d4, --kdialog        Use kdialog
  -k, --skip-ocs-prep-repo  Skip preparing the clonezilla image home
     directory (assume it's ready), this is specially for device
     <-> image clone.
  -p, --postaction [choose|poweroff|reboot|command|CMD]
    When save/restoration finishs, choose action in the client,
    poweroff, reboot (default), in command prompt or run CMD
  -s, --skip-lite-menu  Do not show live-server and lite-client in the dialog menu.
Ex. /usr/sbin/clonezilla -l en
Launch Clonezilla
Now launch clonezilla:
$ sudo clonezilla
If you are cloning an unmounted drive, you can skip the next section and continue to Running Clonezilla.
Cloning a System Drive
This section actually describes how to clone any Linux-compatible drive, not just system drives.
Generally speaking, a system cannot clone itself unless it has the ability to snapshot the drives that you want to back up. Without a snapshot, cloning a system drive requires Clonezilla to be booted, such that:
- The drive to be cloned is connected as a
/dev/Linux device - None of the file systems in any of the drive's partitions may be mounted
Installation in a VirtualBox VM
Clonezilla is available as a package that includes a minimal Linux operating system. After the dedicated Linux OS boots, it runs Clonezilla.
You can install Clonezilla on a CD, DVD, or SSD drive. It was more convenient for me to run Clonezilla in a VirtualBox virtual machine (VM) instead of running on bare metal using a CD or SSD drive.
I downloaded the
ISO image for standalone Clonezilla
for the amd64 architecture.
This will run on physical Windows desktops, Mac and Linux desktop computers that can boot from ISO images, CDs, DVDs and SSD drives.
It will also run on a virtual 64-bit x86 computer.
Then I started VirtualBox as described in my VirtualBox Setup article and created a new virtual machine using the Clonezilla ISO image.
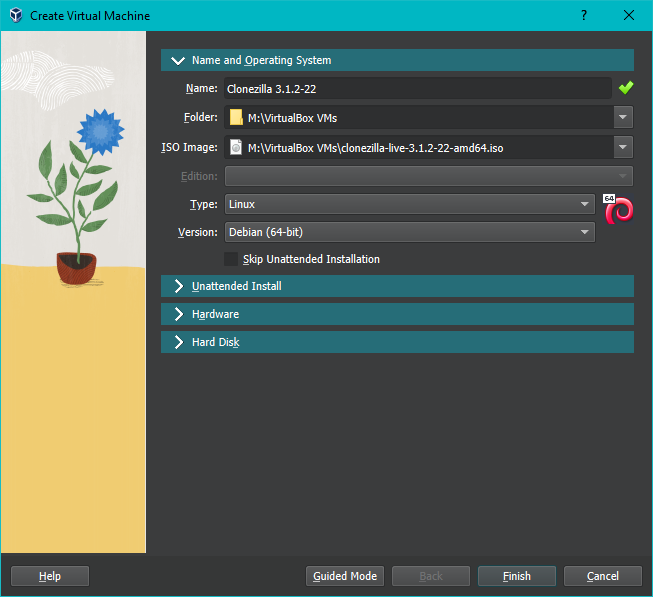
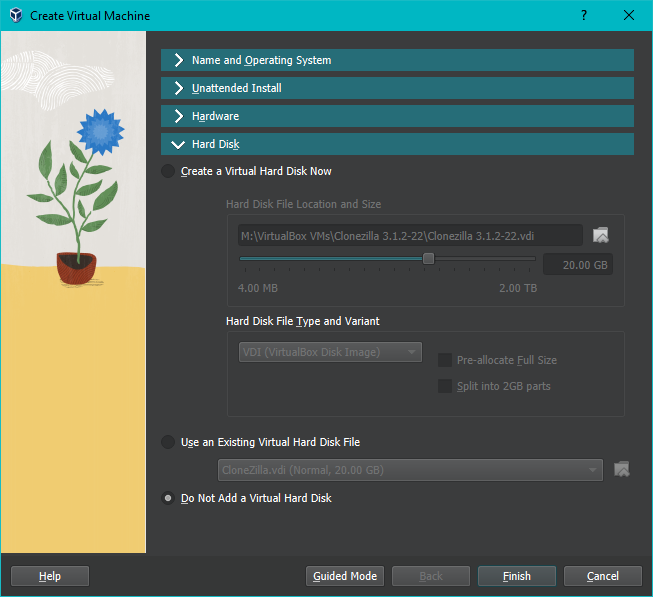
Notice that Clonezilla does not require a virtual hard drive; it strictly runs from the downloaded ISO image.
I launched the Clonezilla VM, and it instantly booted the Linux setup program.
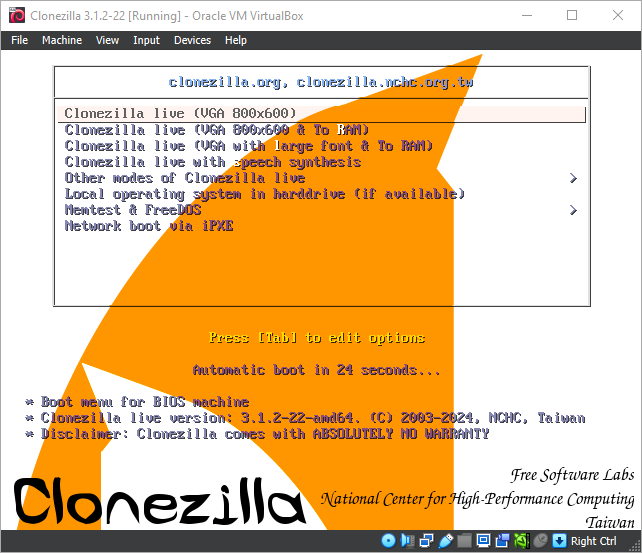
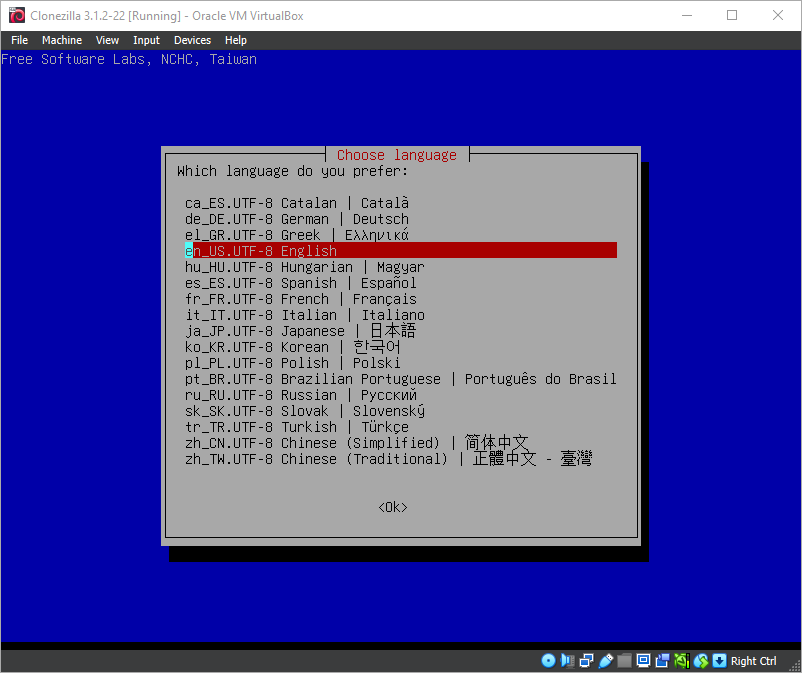
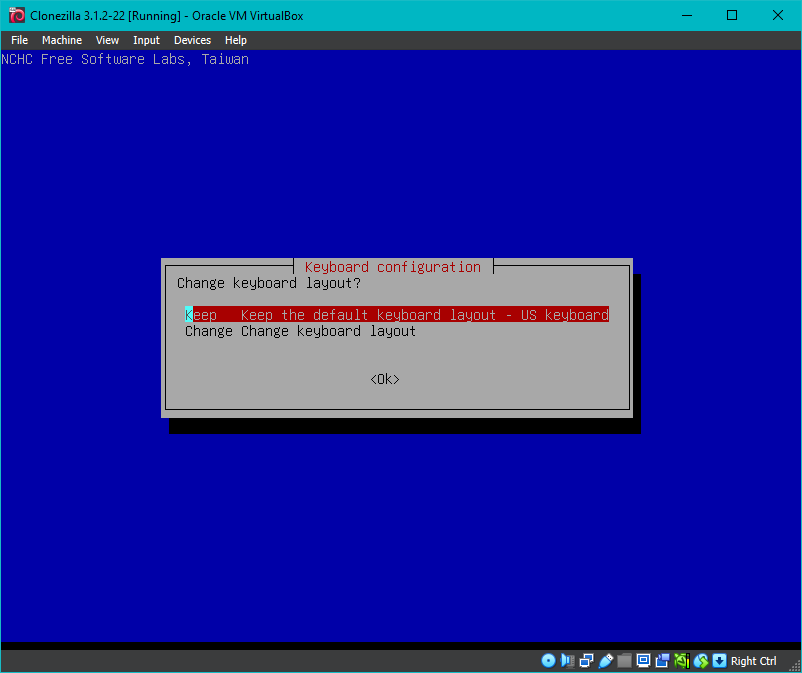
The Linux setup program asked me to select the keyboard layout I was using,
and I pressed Enter to accept the default en_US layout.
Yes, I am sure.
Once Linux is configured, it is time to run the Clonezilla program.
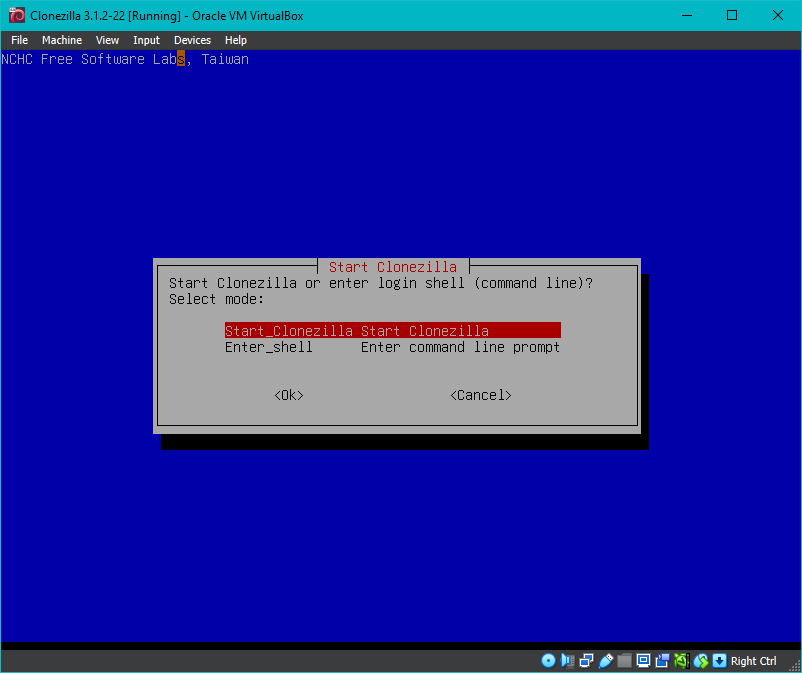
Running Clonezilla
Clonezilla uses different background colors when running from a command line, and when running from an ISO image. Otherwise, the program is exactly the same.
The next two screenshots show the difference between Clonezilla running from a command-line, and when running from an ISO image. Both of the screens accomplish the same thing: defining the mode of operation.
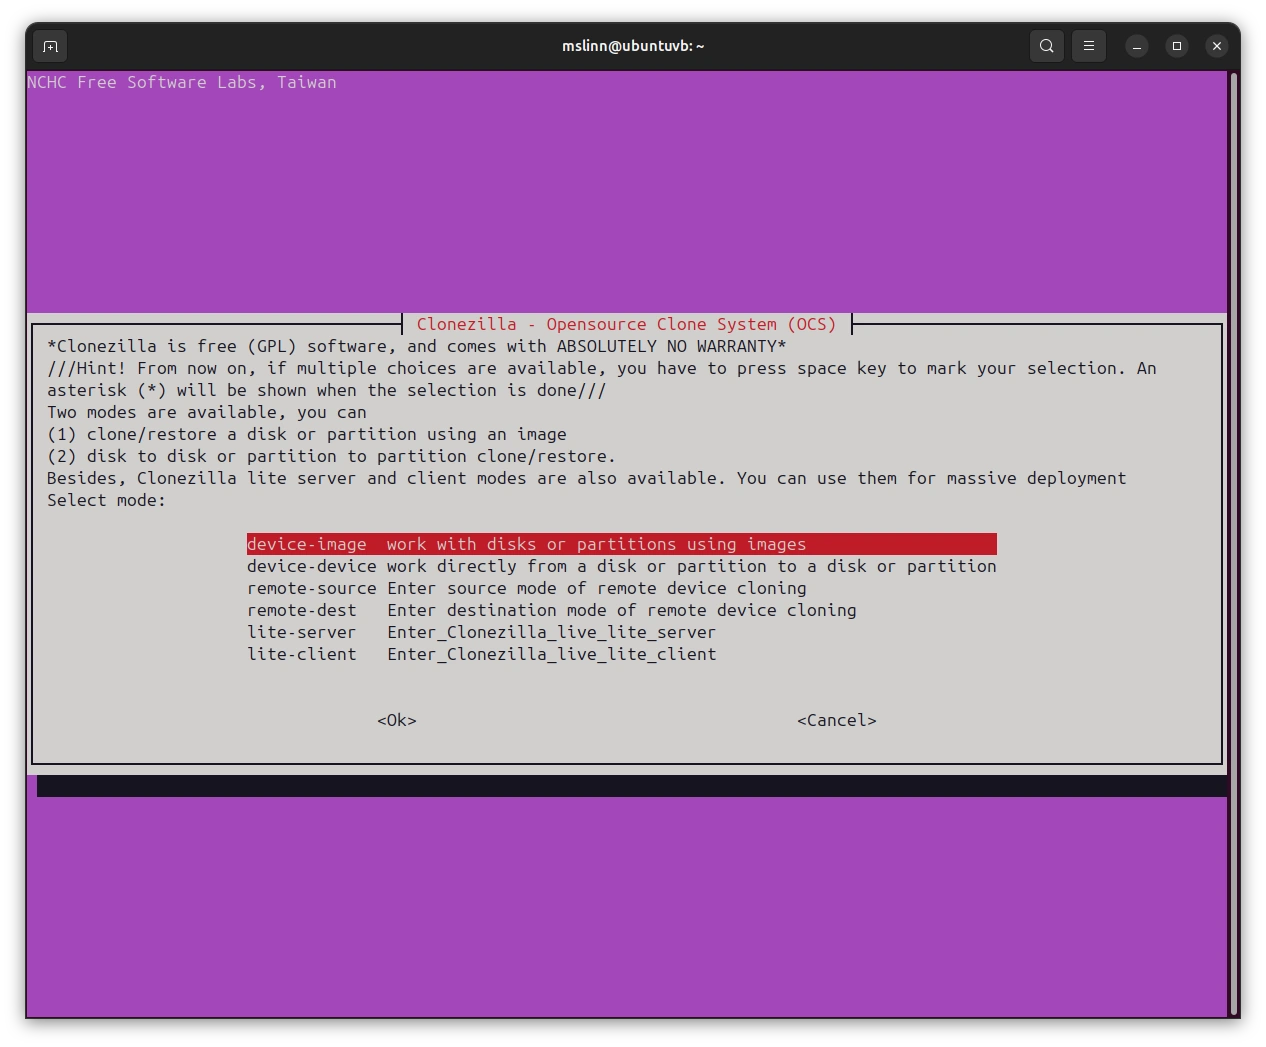

I wanted to copy from one physical disk to another,
so I selected the second choice, device-device, using the up- and down-arrow keys,
then pressing Enter.
In order for the VM to 'see' the NVMe drives, I right-clicked on the little rocket icon at the bottom of the VirtualBox window. This displayed all the USB devices attached to the Windows computer. I then enabled the two Sabrent [2001] USB devices, which made them exclusively available to the VM running Clonezilla.
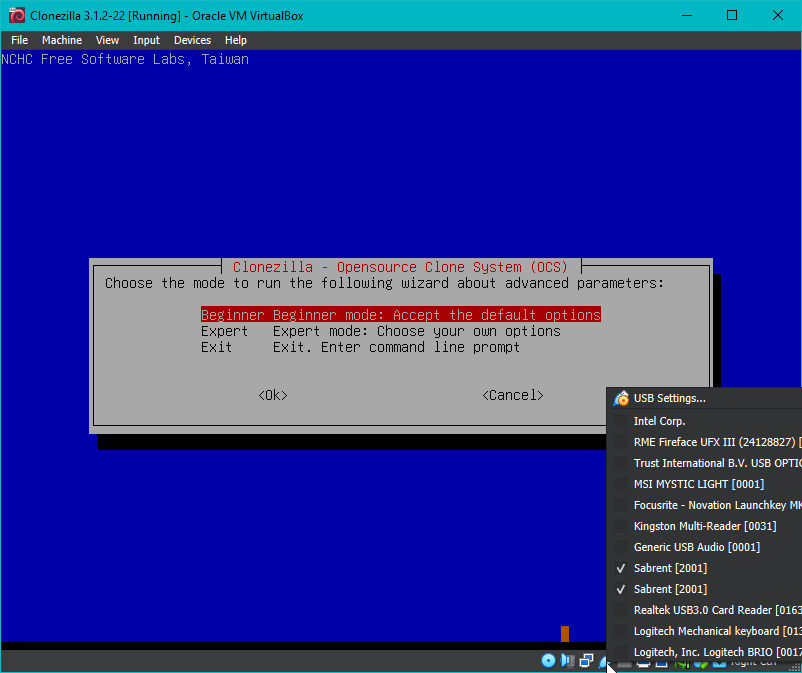
Now I selected disk_to_local_disk and pressed the Enter key.
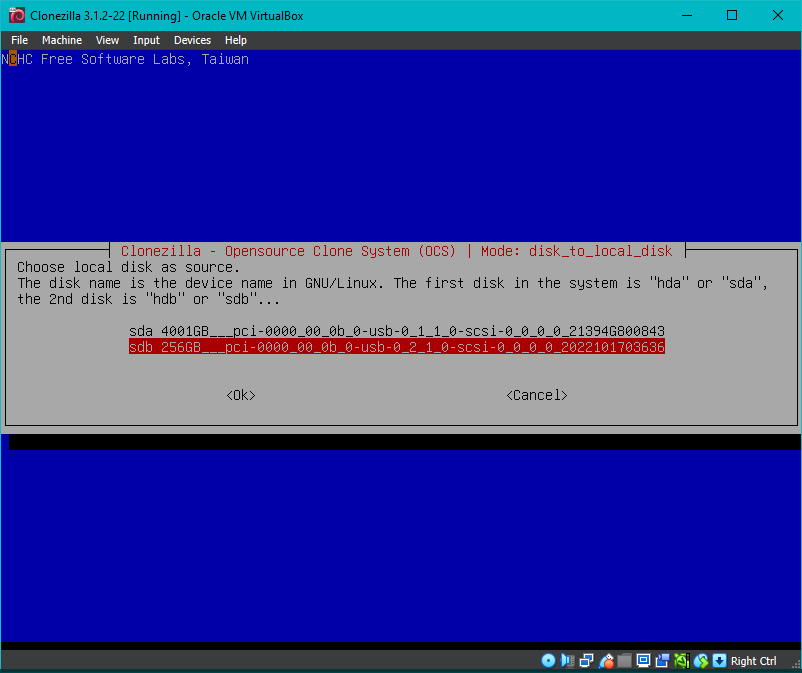
After several long minutes, I was presented with the two USB drives and was asked to select the source drive to clone, which was of course the 256 GB NVMe.
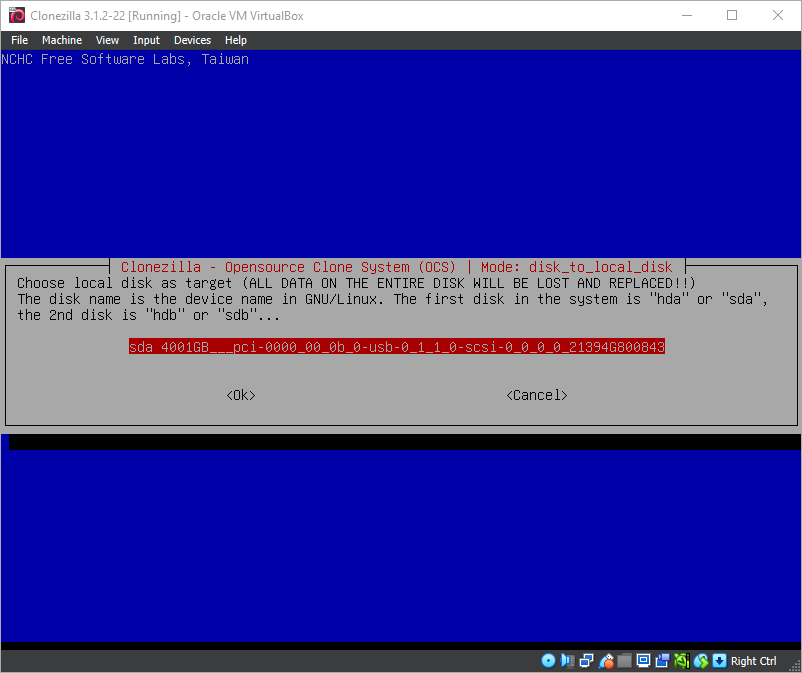
After pressing the Enter key, I had to wait a while once again while Clonezilla laboriously enumerated all available drives. Eventually, it displayed the 4 TB drive as the only possible candidate for the destination, which was correct. I pressed the Enter key once more.
Another long pause ensued, and then I was presented with this screen:
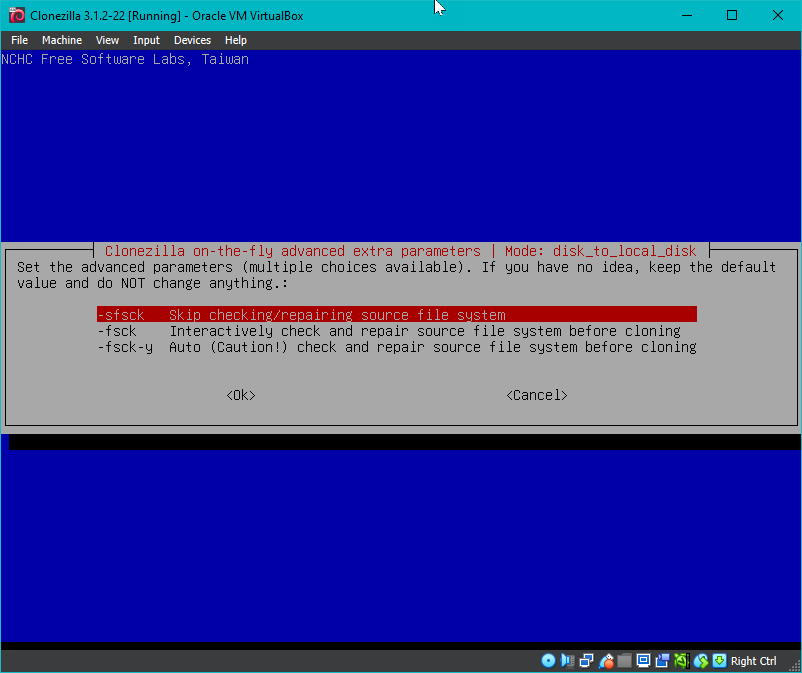
I pressed Enter and soon saw:
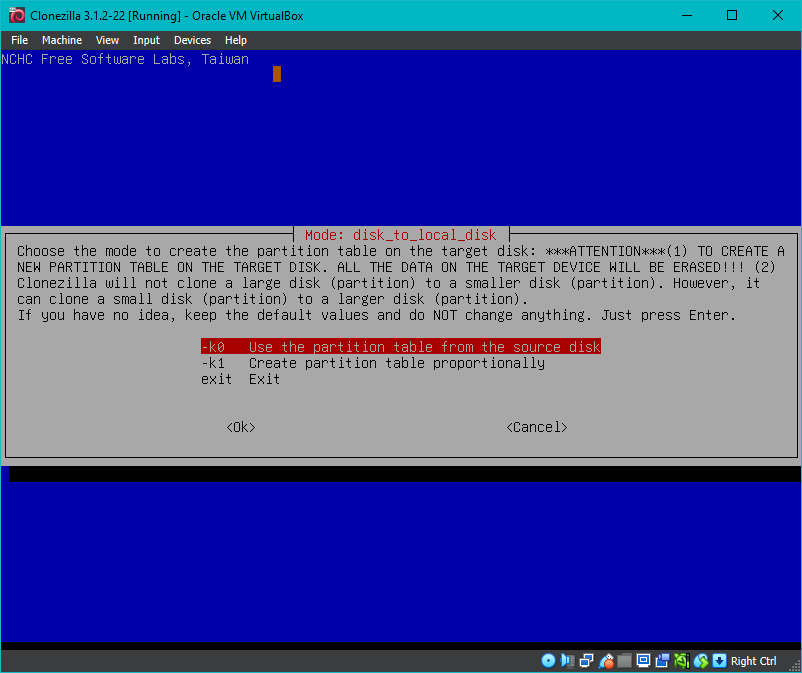
I just want to resize the data partition, so I selected the first option, -k0.
I will resize the partition later using gparted.
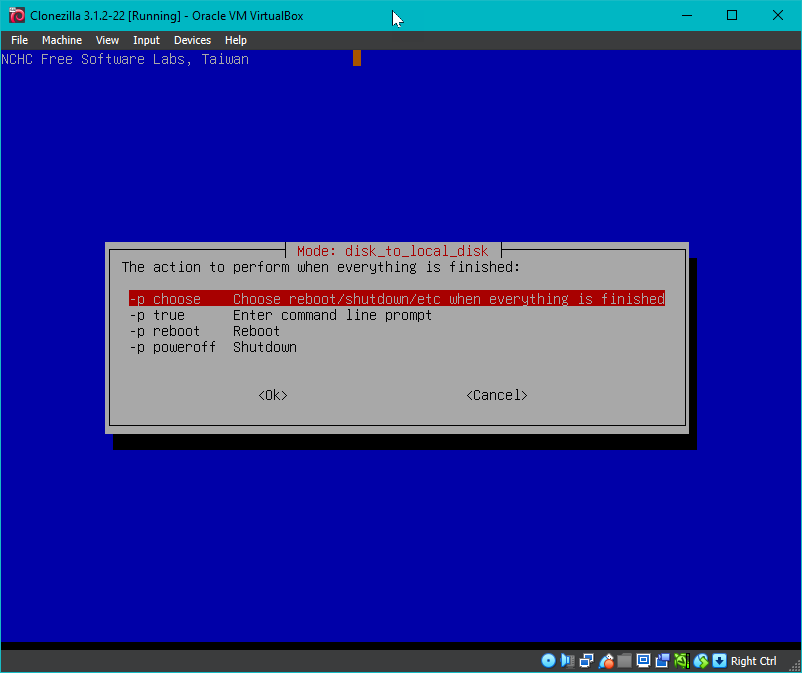
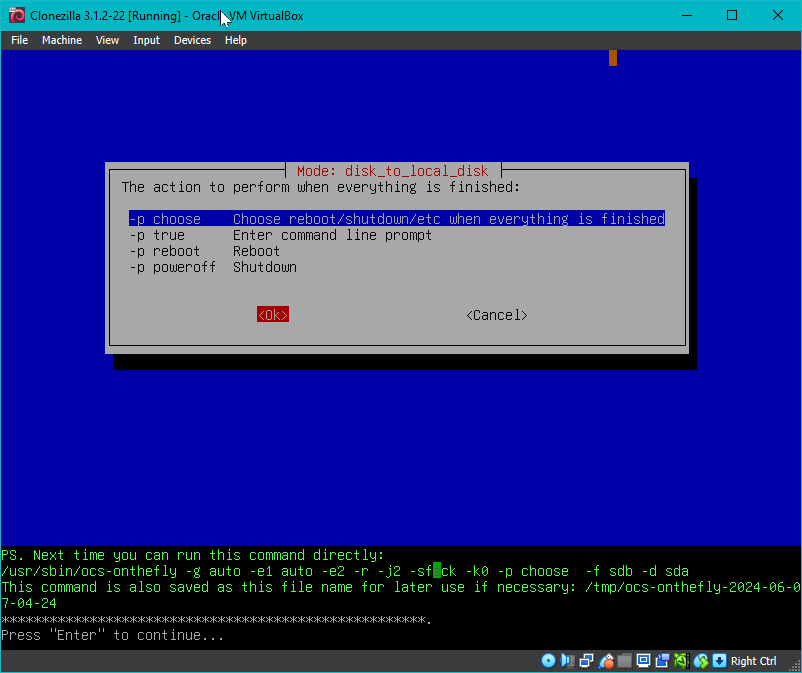
I will decide what to do later, so I picked the first option, -p choose.
A helpful hit was displayed in case I need to run this command again. The information was presented in green text over a black background at the bottom of the window.
The small blue LEDs on both Sabrent enclosures flashed for several minutes.
Finally, I was asked twice if I wanted the contents of sda (the new 4 TB drive) to be overwritten.
Yes!

/dev/sda3 had a file with errors.
I will run fsck on it shortly.
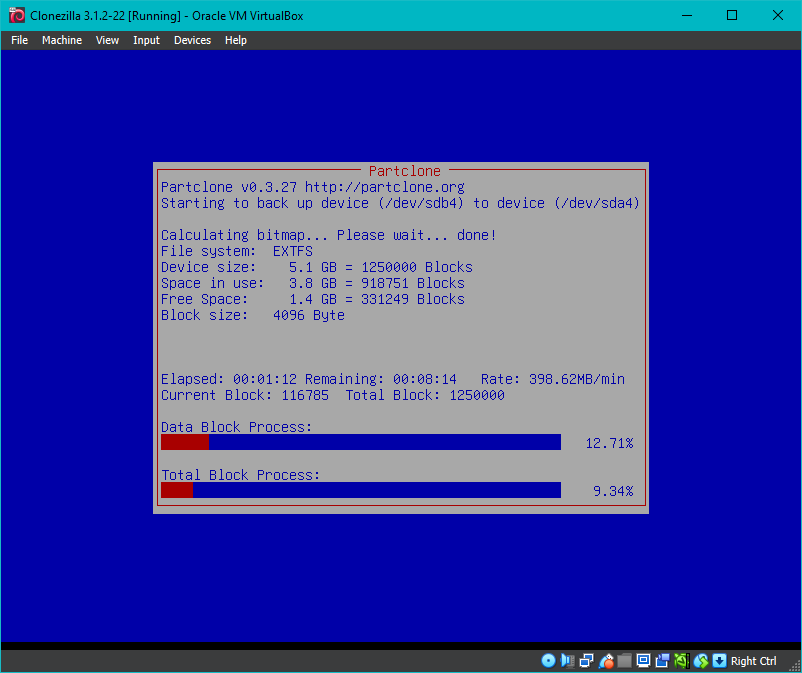
I left Clonezilla running overnight. When I awoke, it had completed:
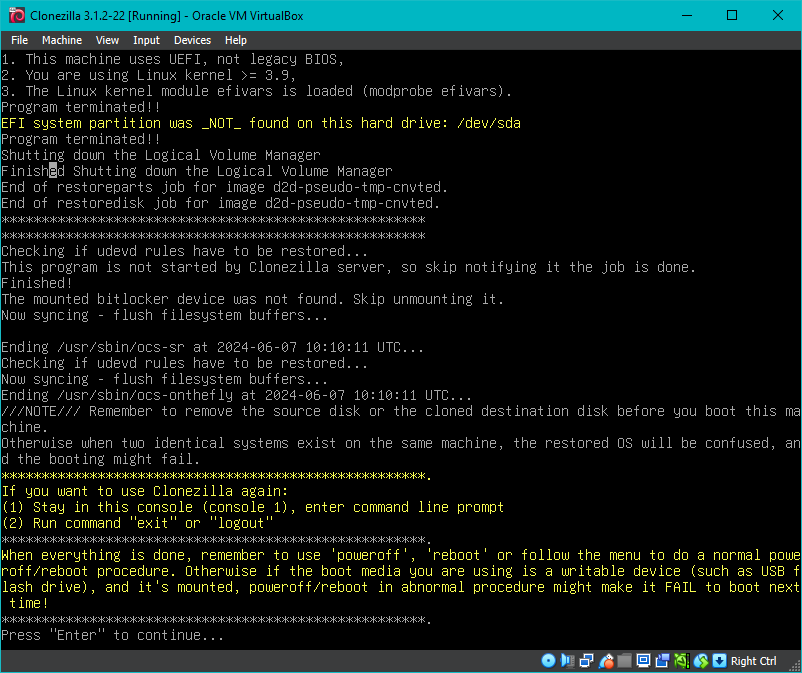
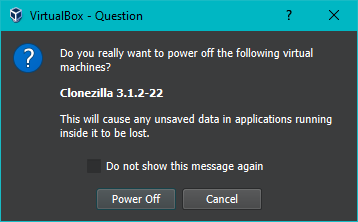
I turned off the Clonezilla VM.
It is possible to run Clonezilla without a GUI.
Here is a sample command line, which clones /dev/sdd to /dev/sdc:
Next time you can run this command directly:
/usr/sbin/ocs-onthefly -g auto -e1 auto -e2 -r -j2 -fsck-y -k0 -p choose -f sdd -d sdc
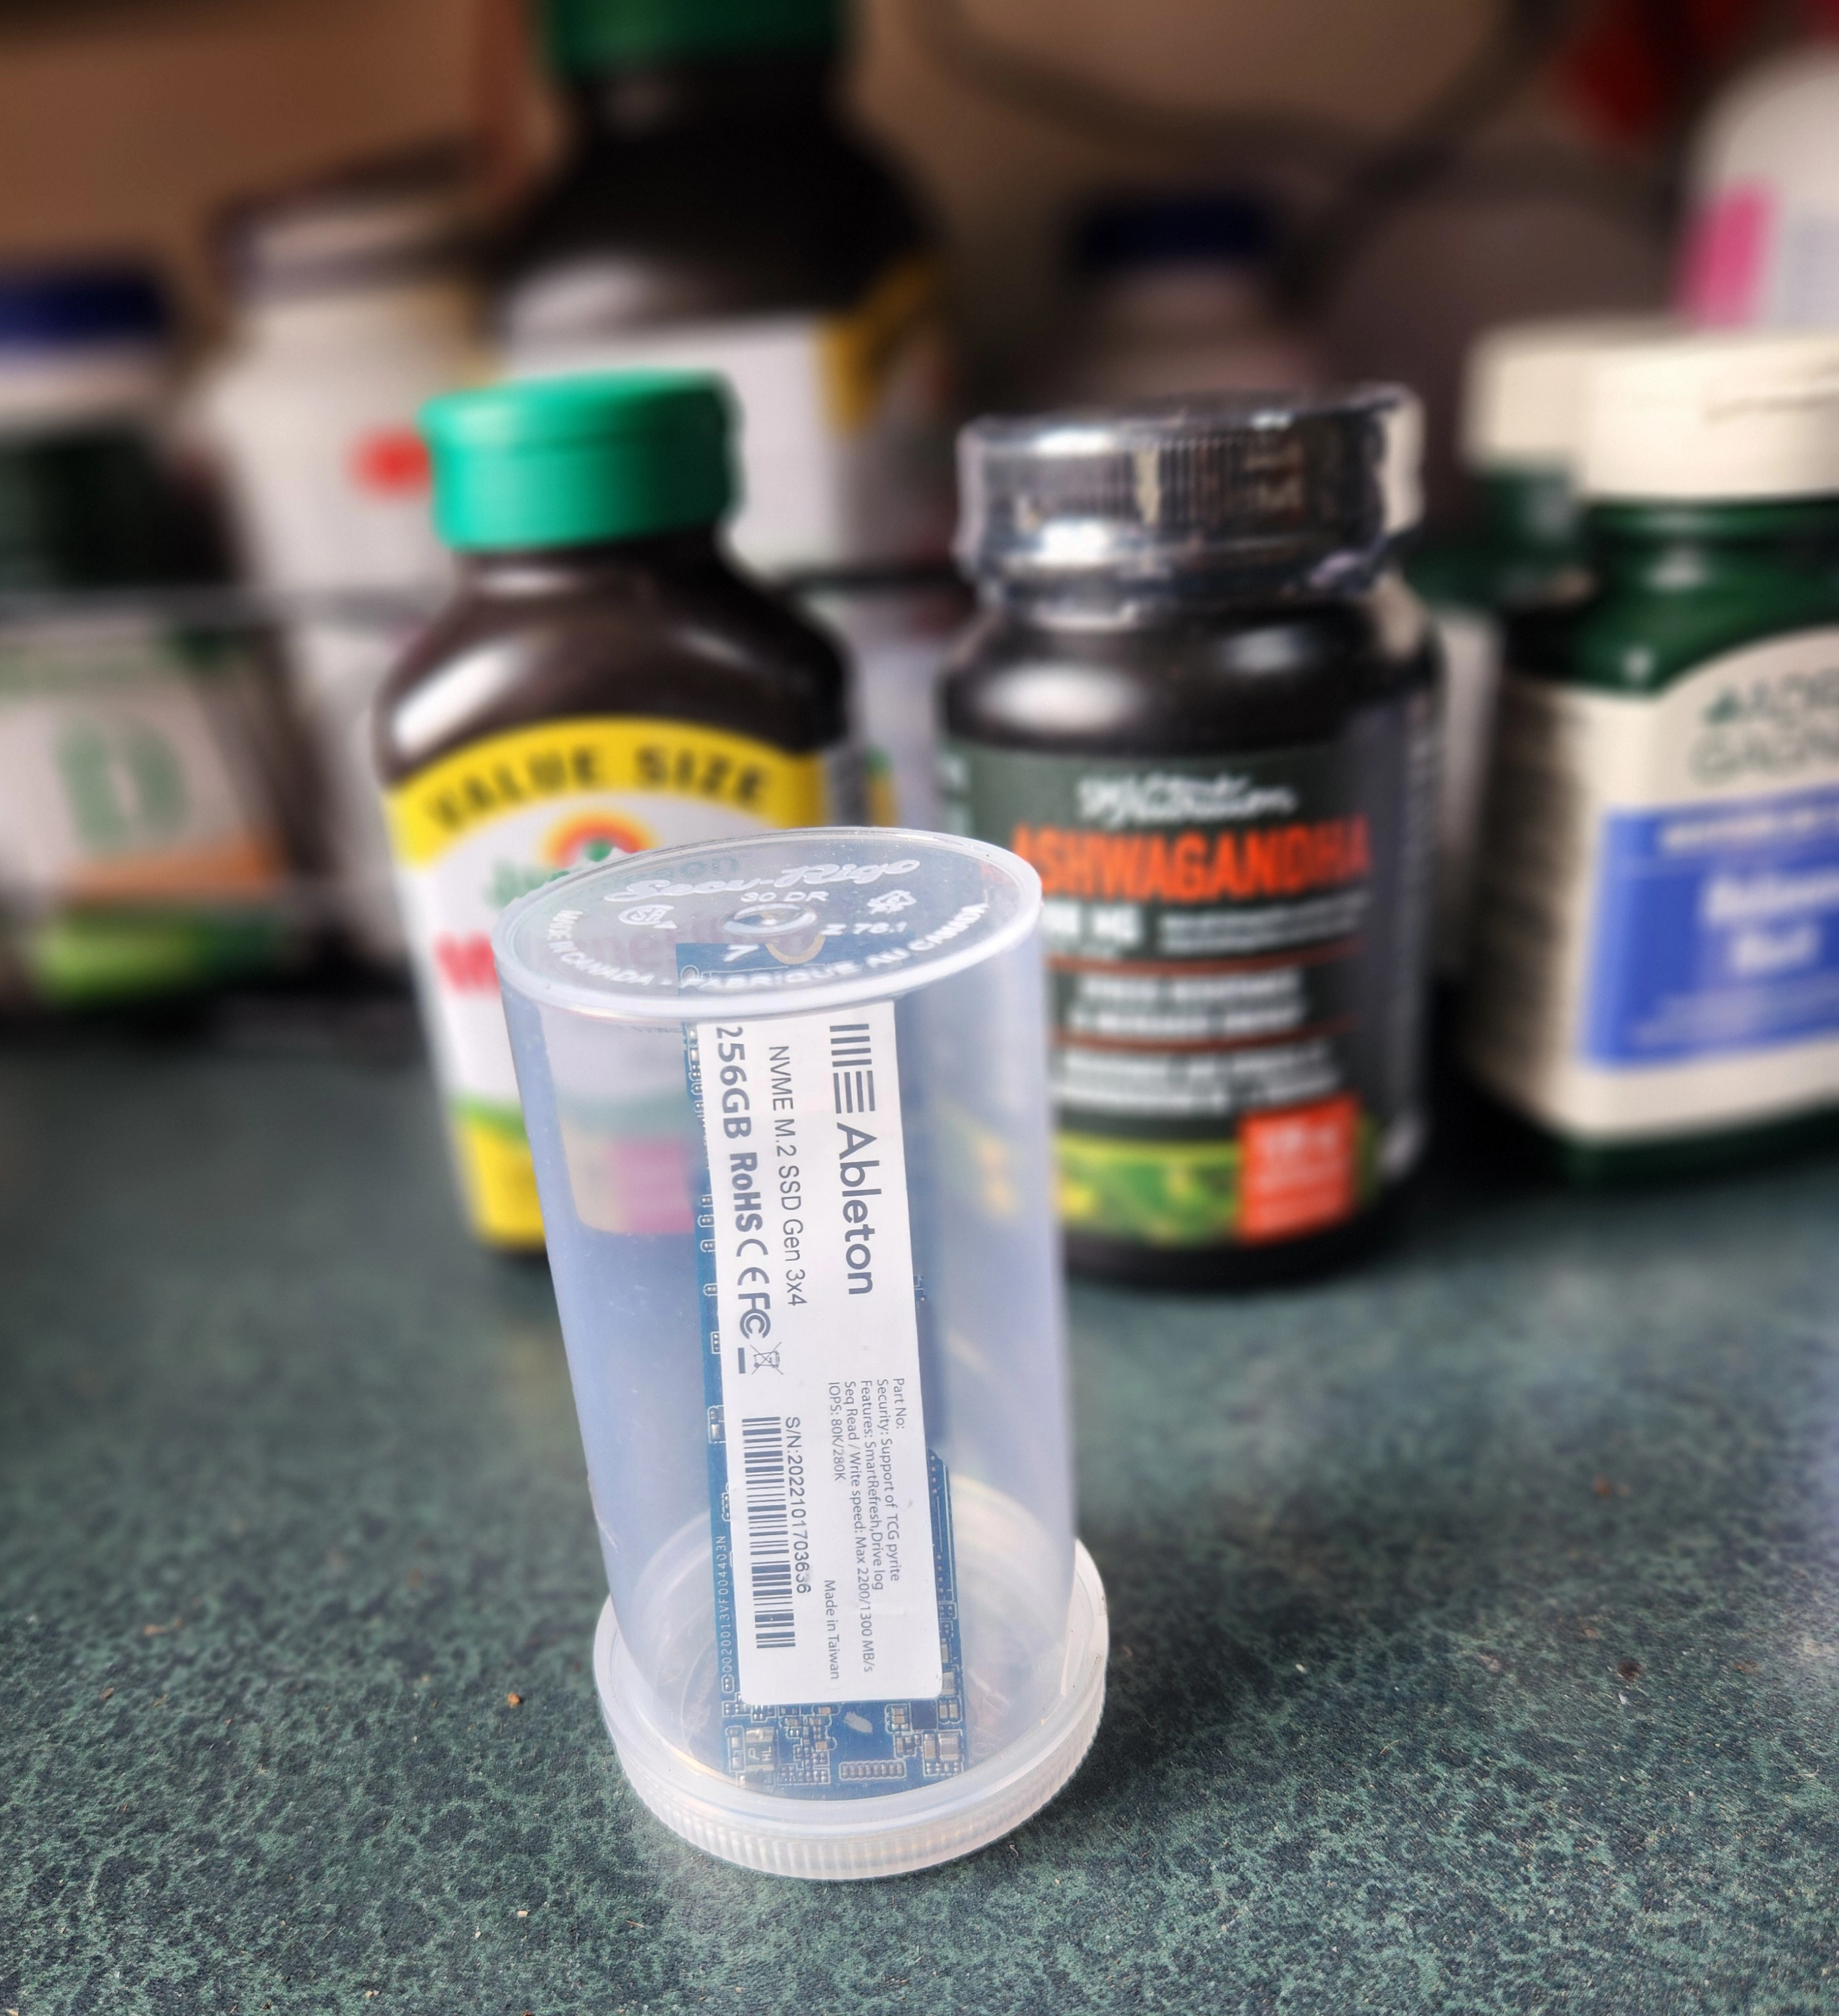
Store the Original NVMe
I unplugged the original 256 GB NVMe drive and placed it into an empty prescription bottle, then stored the bottle with my extra drives. Small spice bottles also work well for storing NVMe drives.
Clone Verification
Now we can verify that the cloned drive works by putting it into the system that the original drive came from and verifying that the system still works.
😁If the drive containing the clone has the same storage capacity as the original drive, you are done.
Next: Resizing
If the drive containing the clone is larger or smaller than the original drive, at least one of the partitions on the clone will need to be resized. Remove the cloned drive from the system, place it back into the Sabrent NVMe / USB enclosure, and reattach the enclosure to the computer for further work. Please continue on to read Supersizing a Partition and Its File System for more information.
Mini-Series
This article can be read standalone; however, is part of a mini-series that discusses how to increase the storage capacity and performance of the Ableton Push 3 Standalone (P3S). If you own a P3S, or are thinking of purchasing one, you might want to first read my review.
The articles in this mini-series are:


