Published 2022-04-19.
Last modified 2025-07-17.
Time to read: 15 minutes.
av_studio collection.
These are my notes on using Blackmagic Design’s DaVinci Resolve, a non-linear video editor (NLE).
DaVinci Resolve offers an impressive free edition.
This article discusses video codecs, which are explained in So Many Video Codecs, So Much Confusion.
Limitations
The free version of Davinci Resolve has more limitations that the paid version, which is called Davinci Resolve Studio.
The free version of Davinci Resolve does not support:
- H.264 videos using the 10-bit 4:2:2 color space. 10-bit video provides better color grading and color correction capabilities than 8-bit video. 4:2:2 chroma subsampling uses half the horizontal resolution of the luma (brightness) information, while 4:2:0 samples chroma at half the horizontal and vertical resolution. 4:2:2 provides more flexibility for colour grading, and gives better results for green screen footage. If you convert video encoded with 4:2:2 to 4:2:0, some color information will be lost.
The paid (Studio) version and the free version have the following limitations:
- Davinci Resolve 19 Supported Formats and codecs (Blackmagicdesign, August 2024).
- The Windows AAC encoder in Resolve has bugs and limitations. The issue is reportedly related to the fact that Resolve utilizes the Windows built-in AAC encoder. This encoder has limitations, including a maximum bitrate of 192kbps and potential quality issues. Rendered AAC audio may sound compressed and lack detail, sometimes resembling a low-bitrate MP3. Some users have experienced noticeable artifacts, particularly in white noise or when encoding simple waveforms. The encoder may not allow for higher bitrates, even if set to a higher value in Resolve's settings. The AAC improvements in Windows 11 have resolved some of the issues.
Hanging When Loading Projects
DaVinci Resolve would get stuck when loading projects. I uninstalled the DaVinci Resolve Control Panels app and the problem went away.
Linux Support
Davinci Resolve is one of the few Windows and MacOS programs that is also supported on Linux. However, DaVinci Resolve's free Linux version has serious limitations:
-
Does not support H.264/H.265 video codes, so
MP4,MOV,MKVfiles are1 not supported. -
Because of licensing restrictions, the
AACaudio codec is not supported on Linux. Some MP4 files use AAC for encoding their audio streams. However, the MainConcept Codec Plugin for DaVinci Resolve Studio ($99 USD) can enable AAC rendering and other codecs, such as HEVC/H.265. - Only NVIDIA graphics cards are supported, and the CUDA and OpenCL libraries are required.
- Apple ProRes codes support is limited on Linux. The Studio (paid) version requires an hardware dongle for full support.
- AV1 video codec is not supported (yet.)

Weaning Off Premiere Pro
I have made hundreds of instructional videos using Adobe Premiere Pro. It is a good program, but I strongly dislike two aspects of that program:
- Adobe radically changes the user interface and even entirely changes how important features work between releases. Only one version is provided, and subscribers cannot opt to stay on the current version. Instead, everyone is upgraded at once, like it or not. This means your workflow could be threatened without notice after each upgrade. The change that hurt me the most was the removal of the Title Menu and Title Templates in 2017, which were replaced with Legacy Titles.
- Very high cost, and no option to purchase outright. I am sure that was good for a short-term boost to the corporate bottom line, but I decided to abandon Adobe, along with many other customers.
Storage
DaVinci Resolve saves project files in a SQLite database;
on my Windows machine it is located at
%AppData%\
DaVinci Resolve Preferences
For Windows, preferences are stored in %AppData%\Blackmagic Design\DaVinci Resolve\Preferences.
The Preferences dialog can be displayed by using the menu items DaVinci Resolve / Preferences or by typing CTRL-,.
The dialog title changes according to the sub-option selected, which can be confusing because this means the dialog is not initially titled Preferences, as you might expect. Instead, the first time it opens, the Memory and GPU preferences are displayed, which means the dialog is also labeled Memory and GPU. If you select another set of options, for example, General, the title changes to General Preferences, and the sub-option is displayed the next time you open the dialog.
Backups
The timeline is automatically backed up every 10 minutes to
%HOMEDRIVE% by default.
It is a good idea to also enable project backups. Enable Preferences / User / Project Save and Load / Project backups.
Displaying Focus in Fusion
Enable Preferences / User / UI Settings / Show focus indicators in the User Interface to cause the panel with focus to be highlighted.
Audio Output
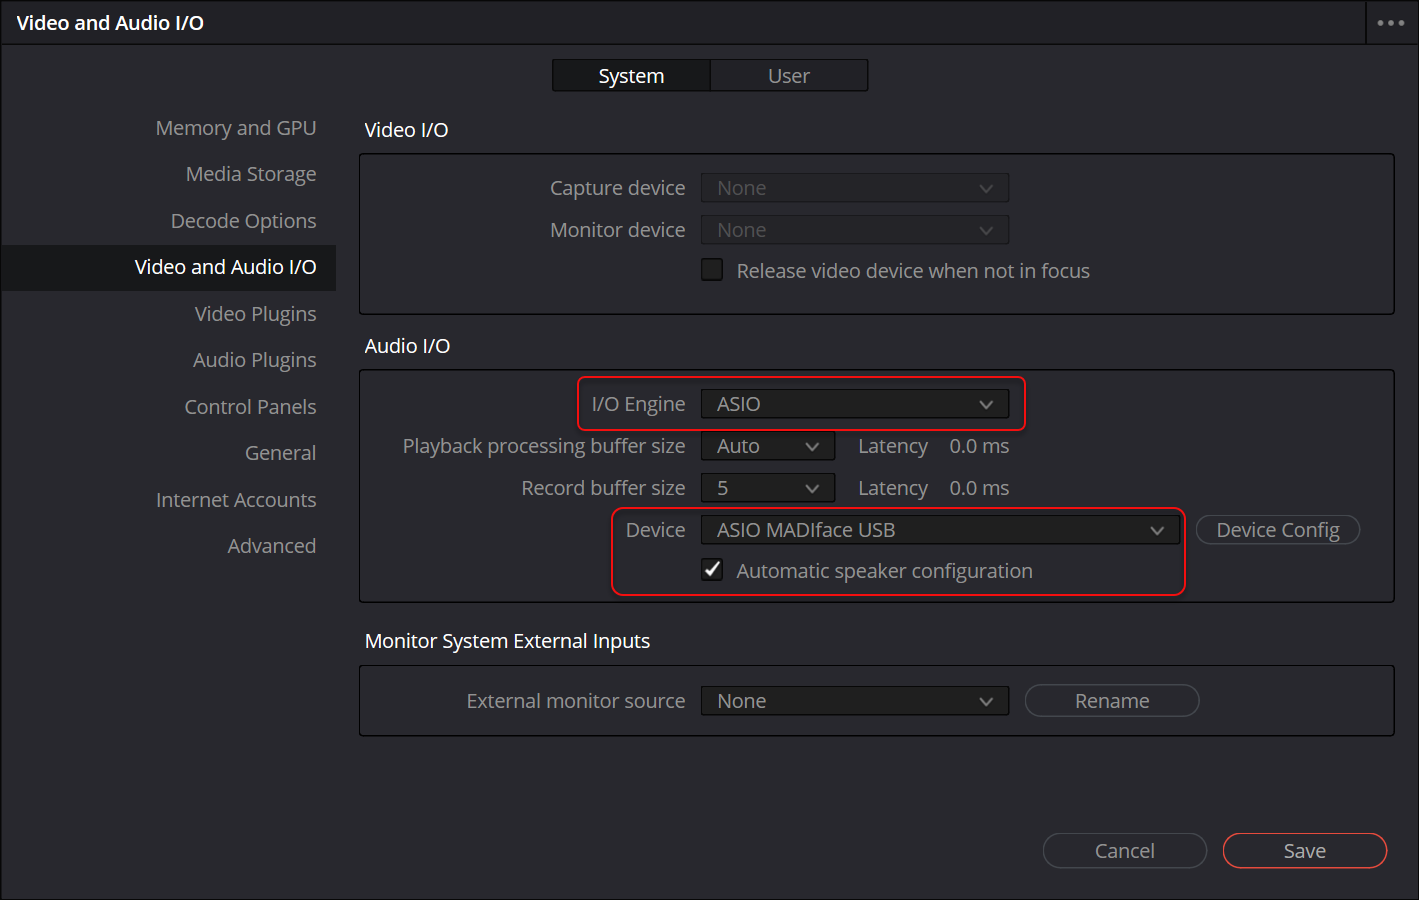
To send output to the speakers attached to my RME UFX III, I pressed CTRL-, then selected the Video and Audio I/O menu item. The following dialog was displayed, where I set I/O Engine to ASIO and Device to ASIO MADIface USB:
Camera Settings
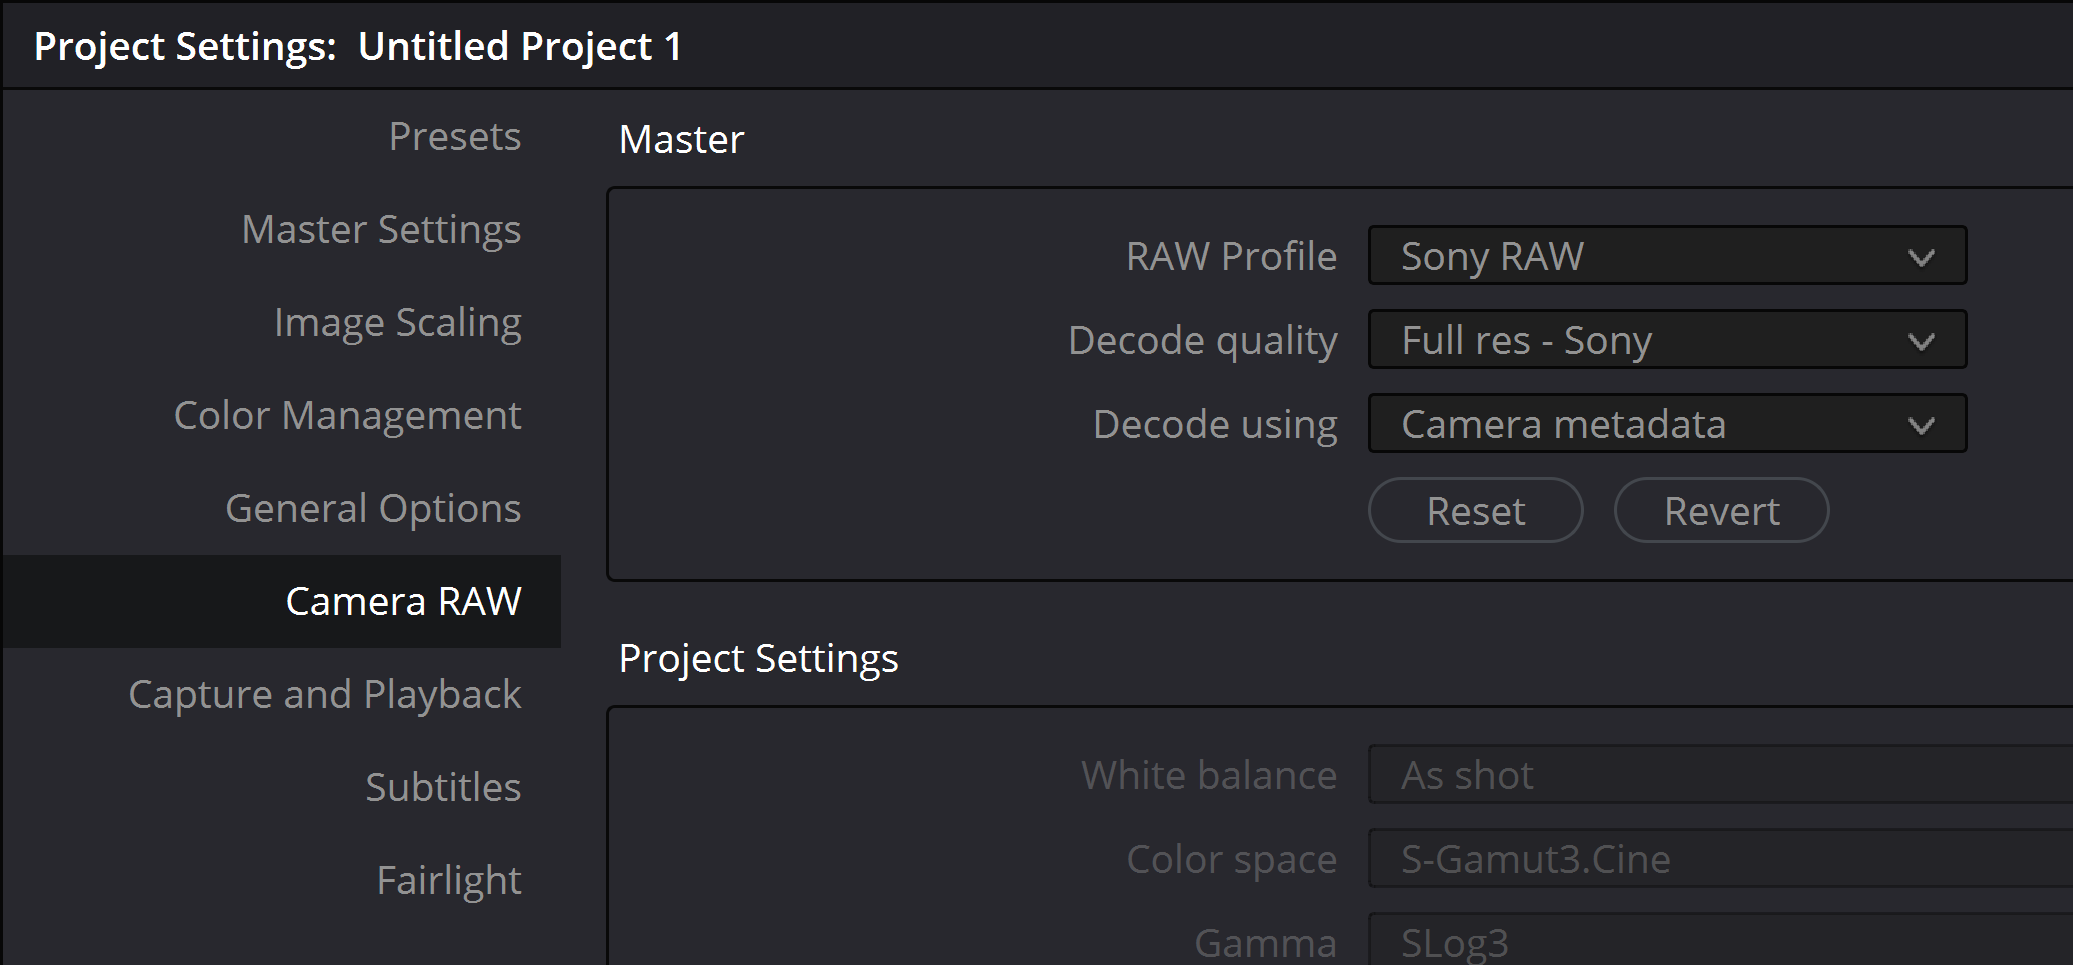
The other default preferences were fine for my purposes, but I changed the camera settings to suit my Sony A7 iii and Sony Alpha ZV-E1 cameras.
This can be set in Project Settings, accessible by SHIFT-9.
I also have Panasonic Lumix DC-S5* Cameras and Lenses.
It seems that only one type of RAW photographs can be used in a Davinci Resolve project.
Render Errors
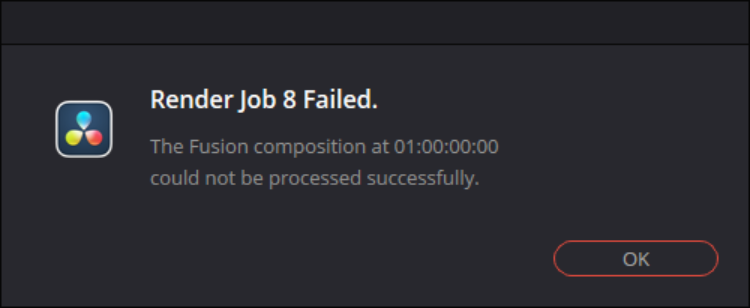
By default, any error aborts a render. While this might seem to be a good idea, Fusion pipelines can encounter unknown errors, which can be frustrating. Standalone Fusion has a console, which can display error messages, but Fusion running within DaVinci Resolve does not have a console.
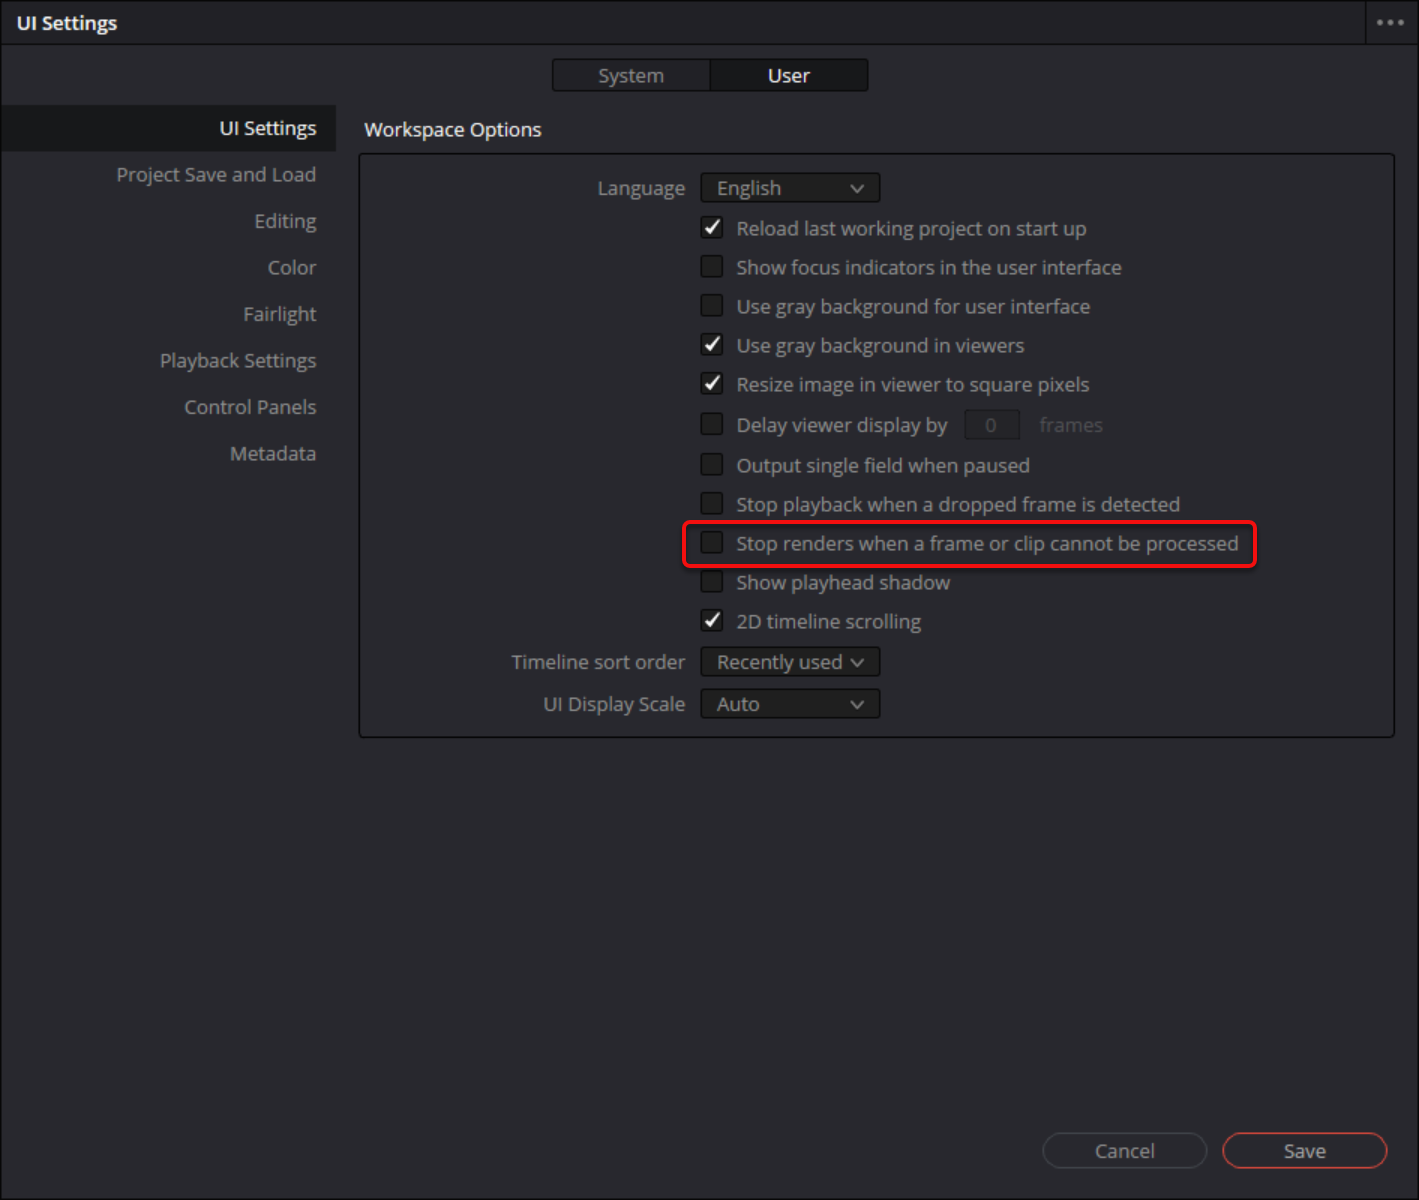
Disable Preferences / User / UI Settings / Stop renders when a frame or clip cannot be processed. Your rendered video might look just fine, or if not, viewing the resulting video will give you an idea what the problem might be.
Second Monitor
I wrote about how to use a tablet as a second monitor in Samsung Tablet As A Second Screen. Regardless of how your computer might come to have two or more monitors, here is a quick video that shows how to use it with Davinci Resolve:
Structuring A Project
There are two reasons for keeping all the files necessary for a DaVinci Resolve project within a small directory structure:
- Facilitates maintenance.
- Enables projects to be archived.
For music videos, and for many other types of projects, the source media is often scattered throughout the file system.
Archiving a Project
A DaVinci Resolve project has a .drp file type.
It is a compressed folder containing .xml files, and does not contain any media.
Projects are immutable; once created by export, they cannot be modified.
A DaVinci Resolve archive is a normal folder with a .dra file type.
It contains a file called project.drp and all referenced media in a subdirectory called MediaFiles.
Archives should not require relinking because they contain all the media, and it is referenced relative to the drp file.
Archives are useful for backups, transferring to another drive, sending online, etc.
If there is a lot of media in a project, creating an archive might be impractical.
For big projects, it is better to just export the project (drp filetype) and relink the media,
instead of exporting archives (dra filetype).
Structure your DaVinci Resolve projects such that all media resides in the same subdirectory tree, instead of pulling it in from arbitrary directories in any accessible file system. See the Problem section below for a description of the type of problem you are likely to encounter if you do not do this.
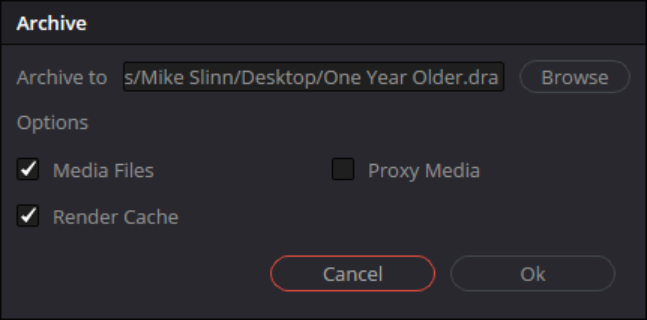
To create an archive from the DaVinci Resolve welcome screen, right-click on a project, then select Export Project Archive... and include your media via the options window.
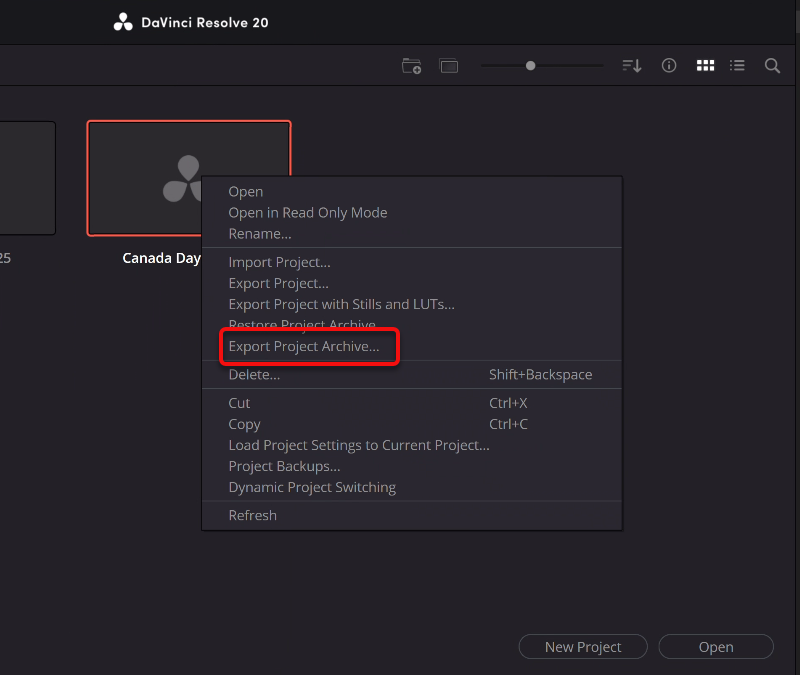
If a project is open, create an archive by using the DaVinci Resolve Project Manager. Press SHIFT-1, or use the File / Project Manager... menu item.
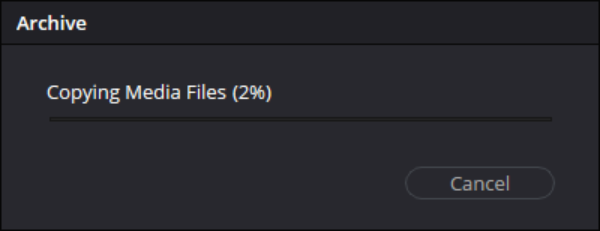
Regardless of how you began the export process, besure to include the media files. If exporting from a fast computer to a slow computer, include the render files and proxy media. Do not enable these options on a slow computer, or the export might take a long time.
Here is an abbreviated version of the complete DaVinci Resolve project archive:
$ cd /mnt/e/media/songs/one_year_older/dvrArchives/

$ tree 'One Year Older_2024-11-20.dra'
One Year Older_2024-11-20.dra
├── MediaFiles
│   ├── Edisk
│   │   └── media
│   │       └── songs
│   │           └── one_year_older
│   │               └── videos
│   │                   ├── birthday
│   │                   │   ├── 1908423-uhd_3840_2160_25fps.mp4
│   │                   │   ├── 1943485-uhd_3840_2160_25fps.mp4
│   │                   │   ├── 1943488-uhd_3840_2160_25fps.mp4
│   │                   │   ├── 4684234-uhd_2160_4096_25fps.mp4
│   │                   │   ├── 4823022-uhd_3840_2160_25fps.mp4
│   │                   │   ├── 4823219-uhd_3840_2160_25fps.mp4
│   │                   │   ├── birthday1.mp4
│   │                   │   ├── birthday1.png
│   │                   │   └── f690dd31-e430-5612-8bc1-9bba0daaac42.mp4
│   │                   └── mike_guitar
│   │                       ├── 20230608_170248.mp4
│   │                       ├── 20230622_164535.mp4
│   │                       ├── one_year_older_guitar_only_2023-07-08.mp4
│   │                       └── one_year_older_take3_2024-03-18.mp4
│   ├── Fdisk
│   │   └── davinci_cache
│   │       ├── Compound Clip 1 Render.mov
│   │       └── Compound Clip 1 Render.mov Render.mov
│   └── One Year Older 136 bpm 2024-11-05.mp3
└── project.drp

11 directories, 74 files
When you import the project, it will be named after the .drp file.
Unless you rename the .drp file, the project will be called project.
To keep things in order, you might want to first rename the .drp file to match the name of the enclosing directory.
Problem
I encountered a problem with two of the files:
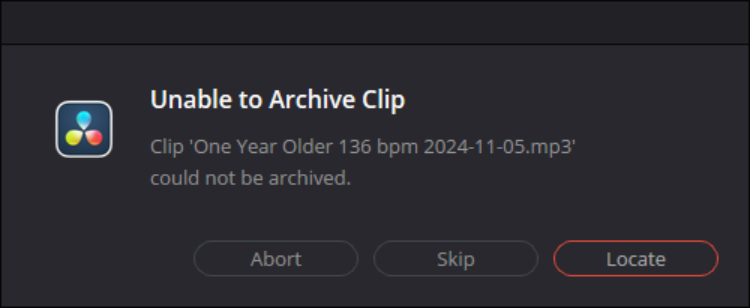
Using the Locate button did not help. This posting suggests that the path length might be too long.
To fix the problem, you could press Skip and manually copy the missing files into the archive directory. When restoring, the problem files would have to be relinked.
Solution #1
- Copy the problem file into a sibling directory of the other media files.
- Right-click on the problem file in the DaVinci Resolve media pool.
- Select the Replace selected clip... menu item.
- Navigate to the copy of the problem file.
Solution #2 (Preferred)
When setting up the DaVinci Resolve project, keep all files in their original directories, and create Windows symbolic links (symlinks) to them in the DaVinci Resolve project directory.
Recording Audio
- Select the Fairlight tab at the bottom of the screen.
-
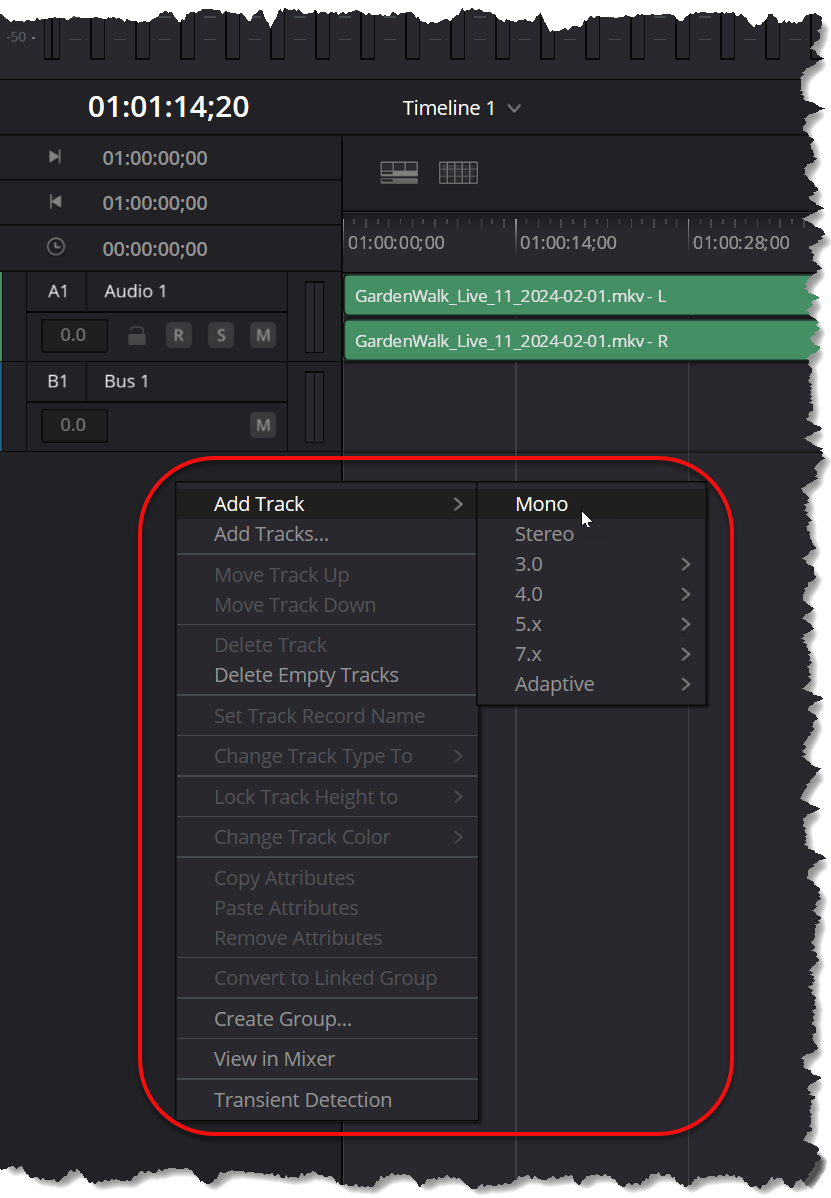
Create an Audio Track by right-clicking in an empty place in the track header area and select Add Track / Mono.
- Name the audio track by double-clicking on the automatically generated name and overtyping a new name. I called my new track voiceover.
-
Go to the channel strip for the new audio track in the mixer panel and click in the Input area, where it says No Input.

-
The Patch Input/Output panel will open.
TotalMix channels are mapped to DaVinci Resolve channels as: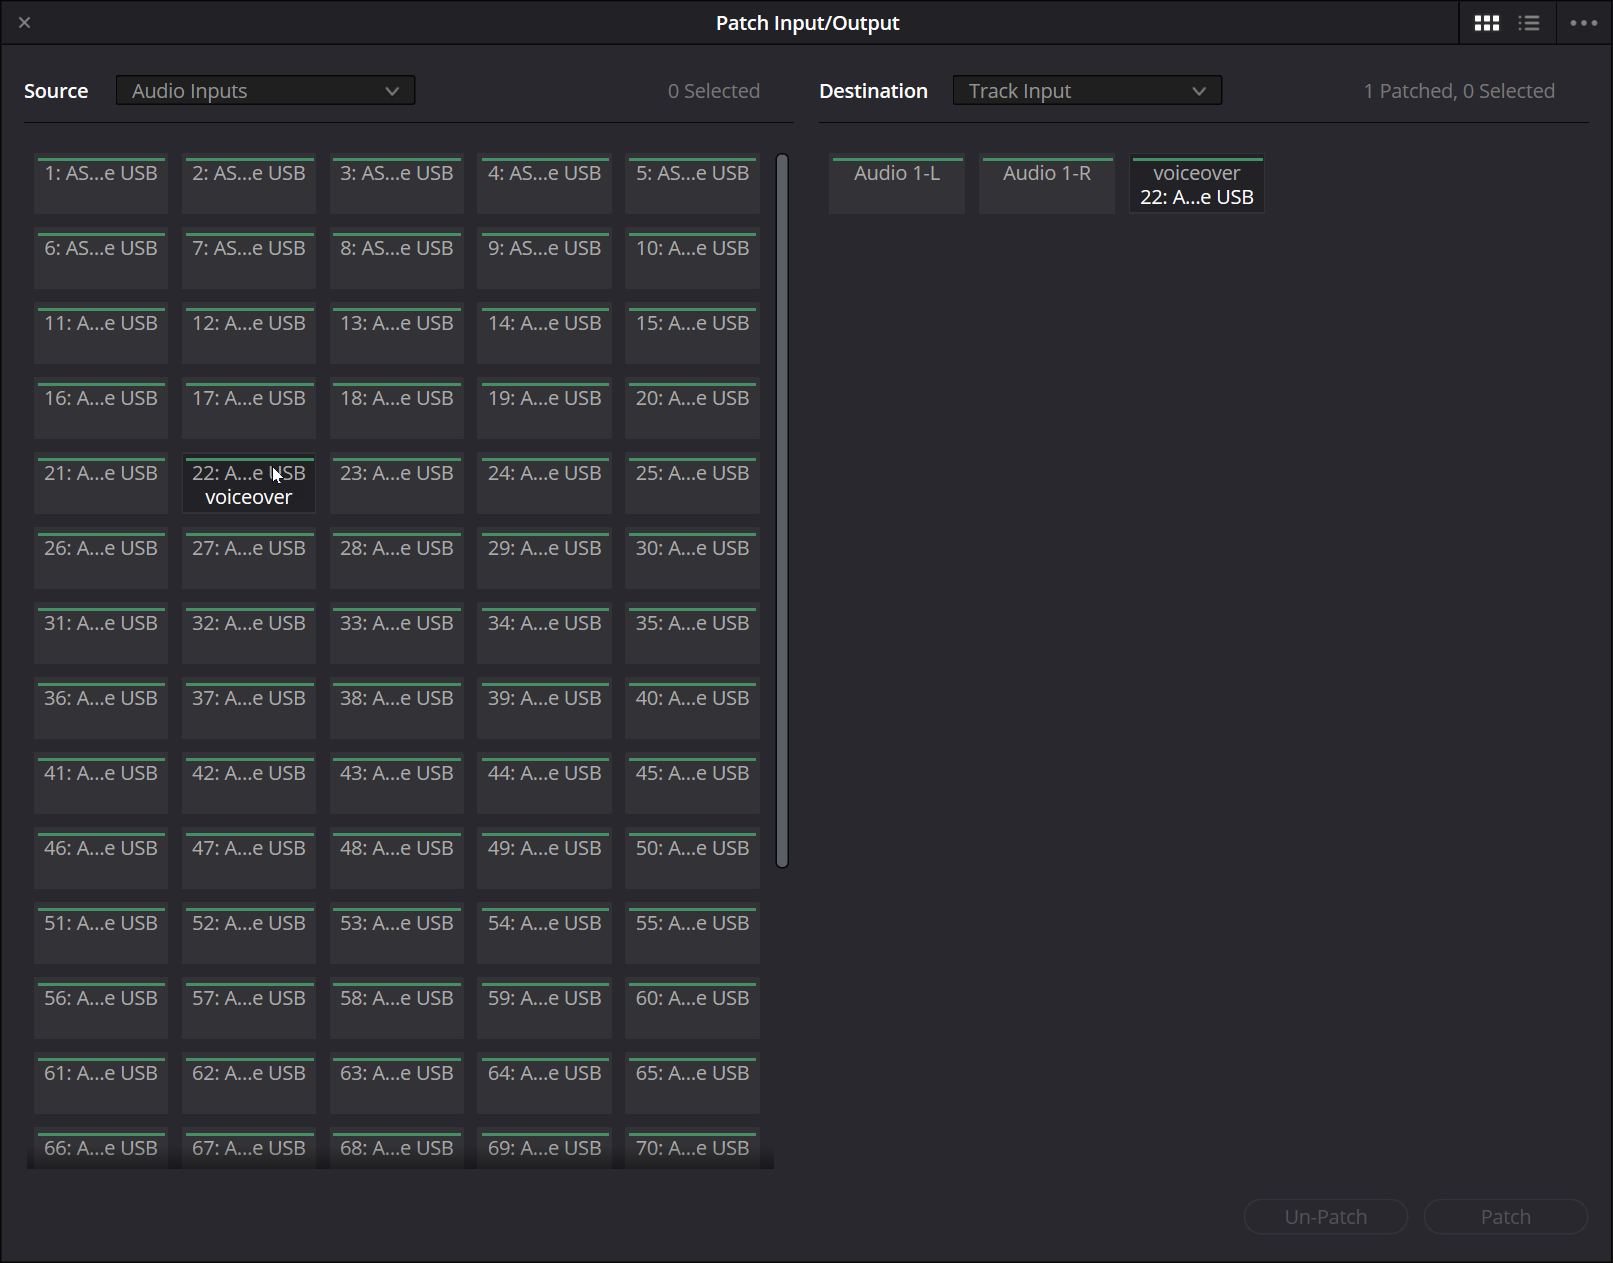
To map your new track, click on the new track button, then click on the source button, which for me was TotalMix channel ADAT 8, which appears to DaVinci Resolve as 22: MADIFace USB.TotalMix DaVinci Resolve AN 1..8 1..8: MADIFace USB Mic 9..12 9..12: MADIFace USB ADAT 1..16 15..31: MADIFace USB - Press the Patch button.
-
Test that you made the proper connection by pressing the R button in the DaVinci Resolve Mixer panel. When you speak into the microphone, you should see a signal appear in the meter.

Toggling Inspector Visibility
The default binding for the CTRL-9 shortcut can open the Inspector, but not toggle it. I prefer that the hotkey acts as a toggle.
Press CTRL-ALT-K to open the Keyboard Customization window.
Reveal the default binding for the CTRL-9 shortcut:
- Click on the Ctrl button on the left side of the image.
- Click on the 9 key in the image.
- Under Active Key, you will see the Application panel has an Inspector command. Click on Inspector; this will cause the assigned item in the menu tree to be displayed in the Commands section. By default, this is Commands: Application / Workspace; under Active Panel Selection, the Inspector Command has Keystroke Ctrl+9.
Delete the existing keybinding by clicking on the small x next to Ctrl+9.
Assign the Ctrl+9 shortcut to Show in Workspace, Inspector.
Click on Save and provide a unique name for the keyboard mapping preset.
Click on Close.
Rendering a Portion of a Timeline
Edit Render In Place
To speed up working with a complex project, an element in an Edit page can be rendered to a cache.
Right-click on the complex element that needs to be speeded up and select Render In Place....
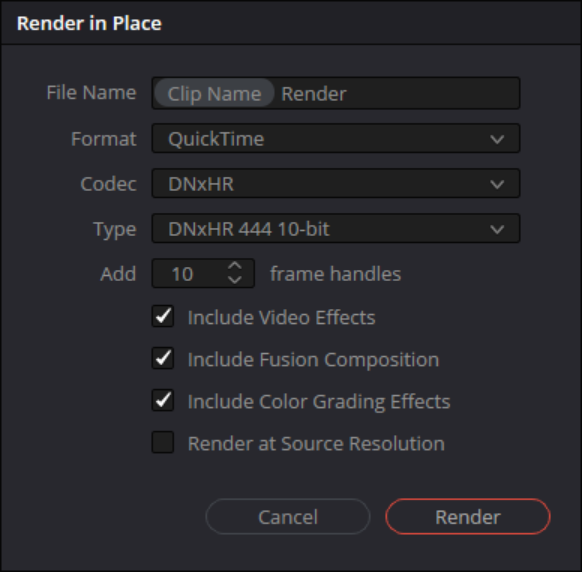
I could not find any documentation on Format, so I left it at the default value, QuickTime. The following pertains to the Codec and Type values:
On a Windows computer - DNxHQX 10-bit for Prosumer footage and DNxHR 444 12 bit for raw and graphics.
I specified that 10 frame handles should be created for the render, but I do not understand what this does. Maybe 0 is a better value for some reason, since that is the default value.
You will be prompted to specify the directory to hold the temporary renders.
I created a directory called F:\davinci_cache.
It took about 1:20 to render the first time, at an average speed of about 50 fps. The second time it took about 20 seconds, at an average speed of about 150 fps. Each time you render, you are prompted for the directory, which is annoying.
Restoring the Original Element
If you perform this operation on a compound clip with a custom Fusion page, then later you need to modify the Fusion page or the compound clip, right-click on the rendering, and select Decompose to Original. I had to select Decompose to Original twice, not sure why.
Uploading to YouTube
These instructions do not cause renders to be uploaded. Not sure why.
I am unclear why a Google account is required to upload a video from a local computer to YouTube, but that is how things are.
- CTRL-, opens the DaVinci Resolve preferences dialog.
- Choose the Internet Accounts menu category, then press the Sign In button for YouTube.
-
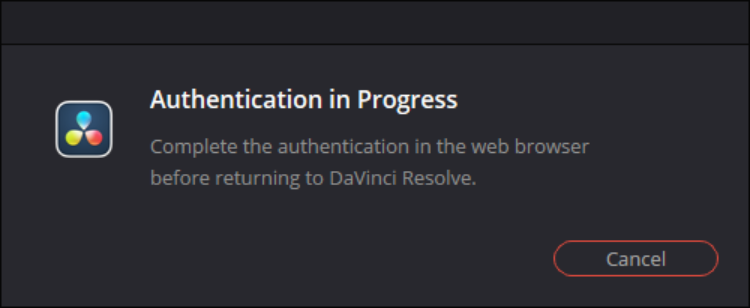
The following dialog should appear:
-
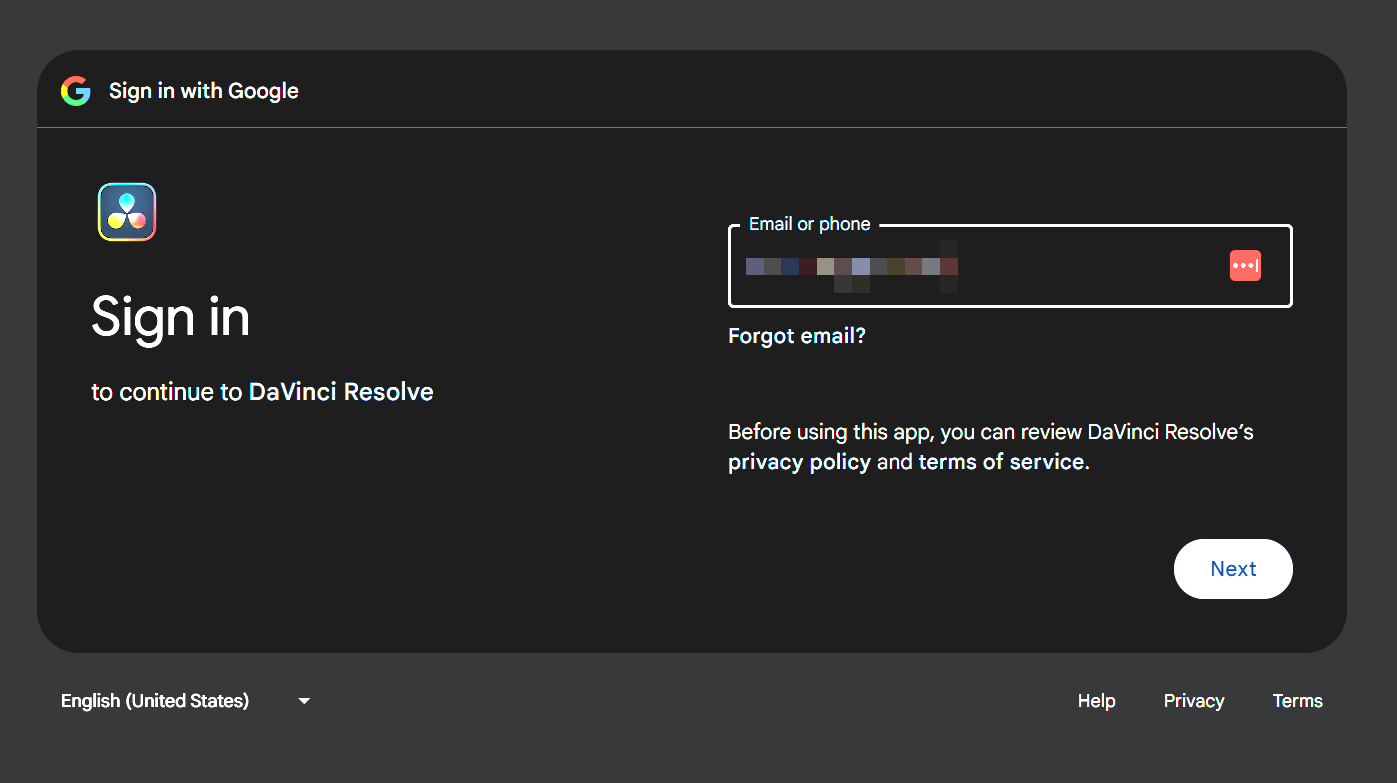
A new web page will open in the default web browser
(the focus of activity passes from DaVinci Resolve to whatever web browser is default on your system).
Sign in to Google by typing in a Gmail account address and password, then press the Next button.
-
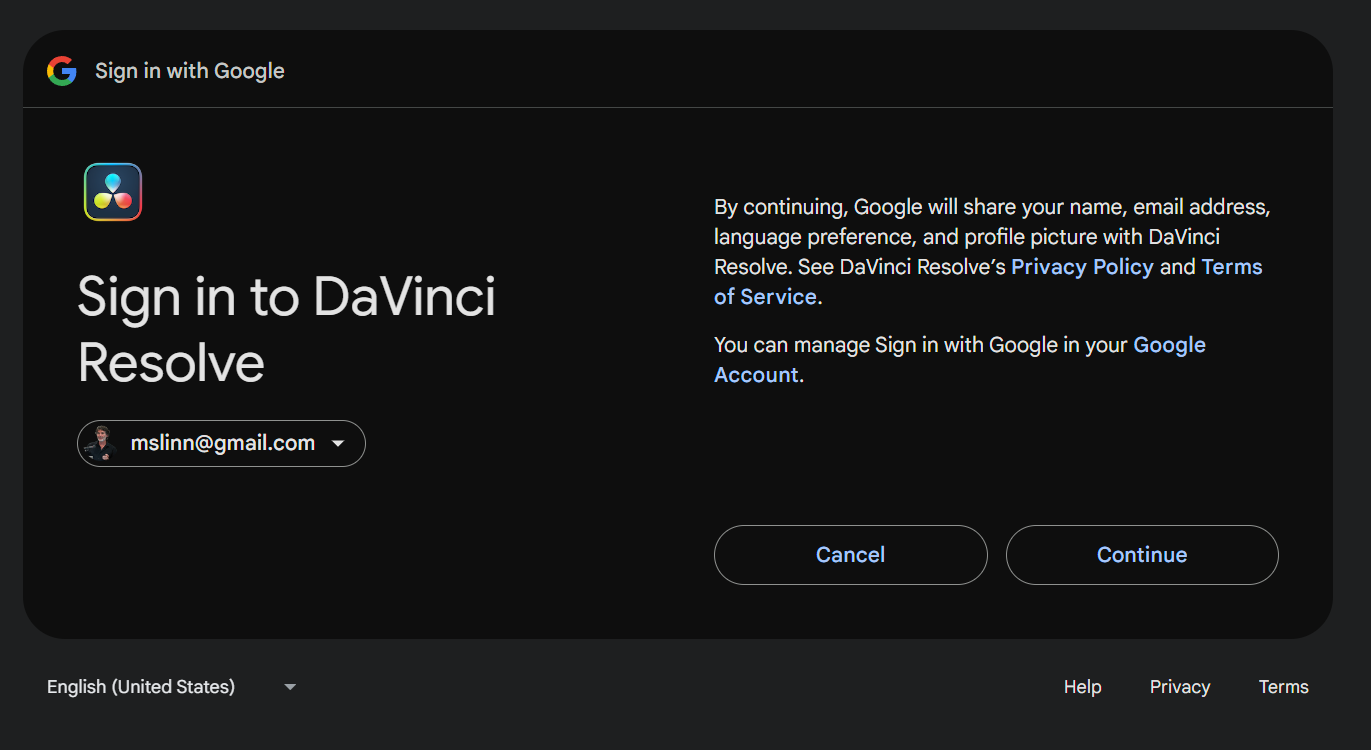
Press the Continue button to accept the terms and conditions.
-
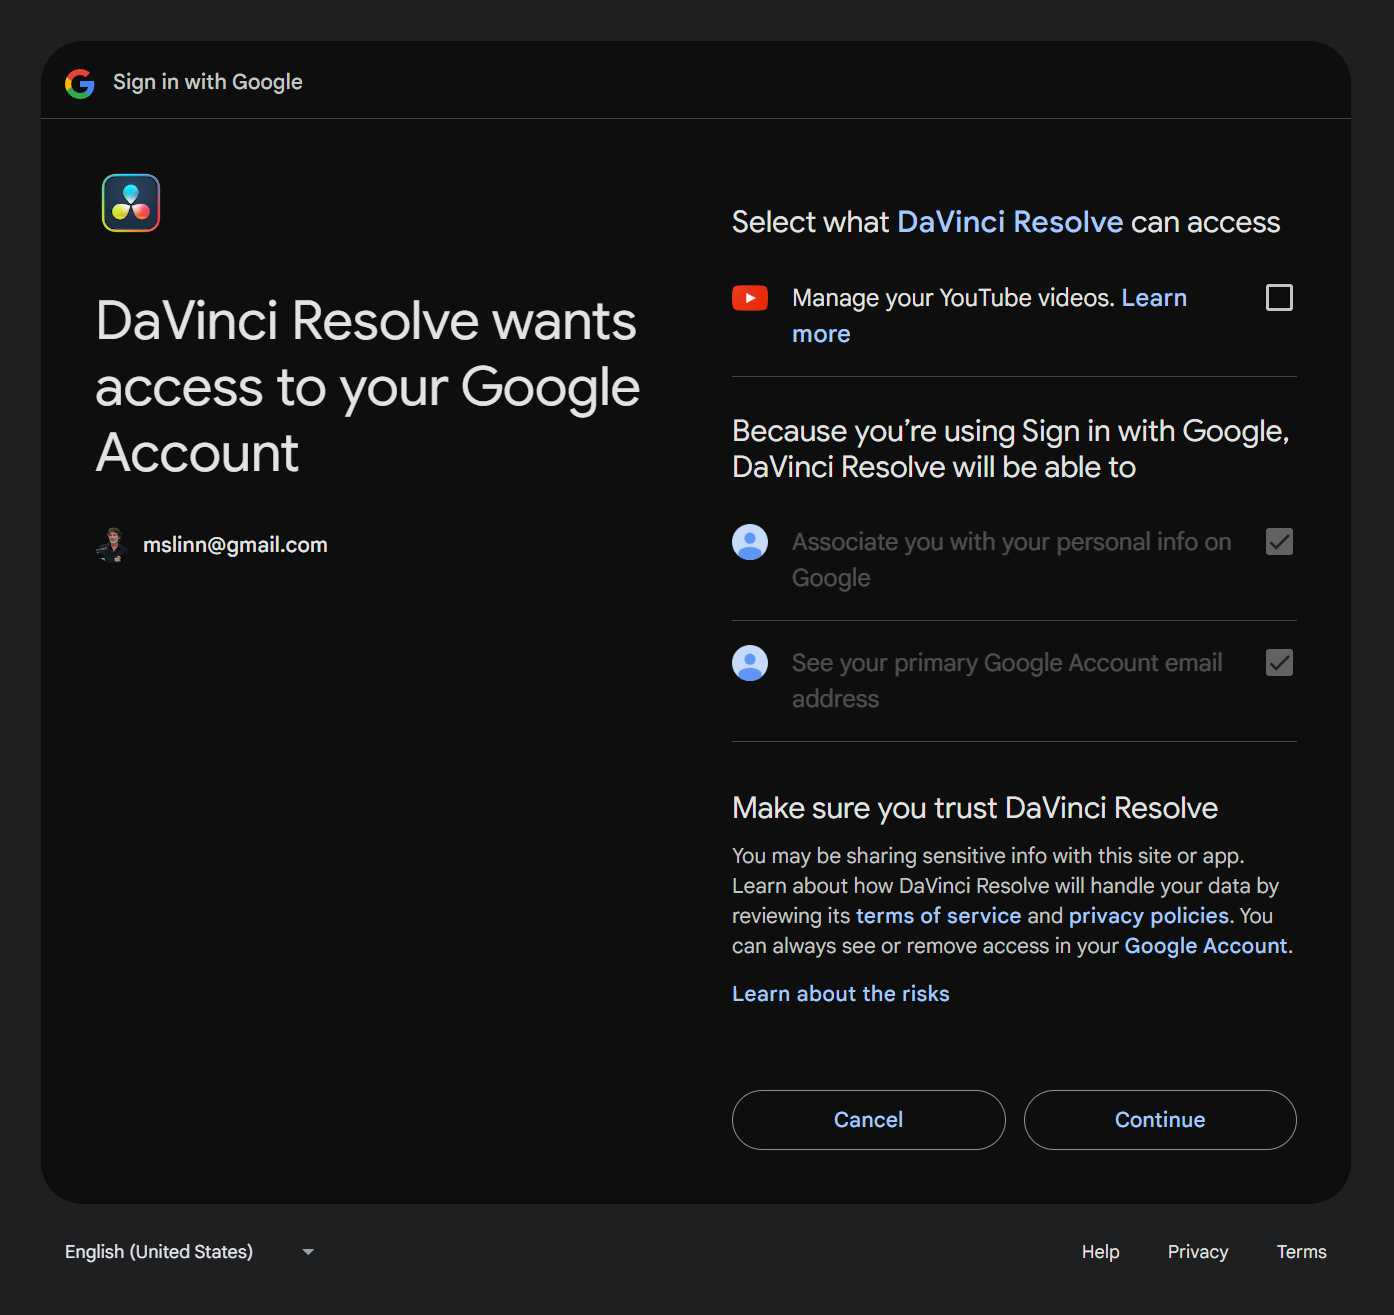
Press the Continue button to permit DaVinci Resolve,
running on the local computer, to perform management activities on YouTube.
-
A confirmation message should appear:
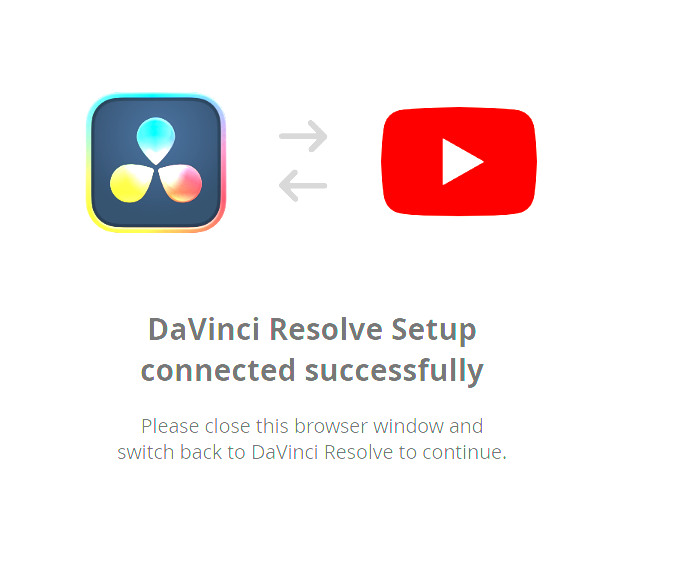
Now YouTube renders should automagically be uploaded after they are created.
Removing Unused Media from a Project
I have added suggestions to the following DaVinci Resolve quote.
You can have DaVinci Resolve automatically remove any unused media clips from the Media Pool in preparation for archiving or handing off a clean project to another workstation. This action loads all timelines, compound clips, and Fusion compositions, then analyzes them for media usage.
Any clips not found during this analysis are removed from the Media Pool. This option does not delete any clips from your disk; it only removes them from the Media Pool and the Project. This operation is undoable. Depending on the size of the Project, this operation can take several minutes.
To remove unused media from a Project:
-
Archive the project in case you encounter a problem.
I add a file suffix like
_before_pruning_2024-11-20. - Click on the Media Pool Option (3-dot) menu.
- Select Remove Unused Clips from the drop-down menu.
- Click on the Load All Timelines button to start the operation.
-
Archive the Project again so you can recover from this point easily.
I add a file suffix like
_pruned_2024-11-20.
Relinking media
To relink offline media in DaVinci Resolve:
- Right-click on an offline clip in the Media Pool and select Relink Selected Clips.
- Navigate to the new location of the media file and select it. If the directory was moved or renamed, you might need to use the Change Source Folder option to guide DaVinci Resolve to the new location
Hot Keys
Playback
; First frame
' Last frame
Space Play from cursor / stop
L Play from cursor
J Play backwards from cursor
Home Play from the beginning of the timeline
End Go to end of timeline
Edit
T trim
B Blade
CTRL-B Razor
View
CTRL-= Zoom in
CTRL-- Zoom out
SHIFT-Z Zoom to fit
ALT-mouse wheel Zoom in and out
Fusion
Numeric + / = Scale by 141%
Numeric - / - Scale by 70%
CTRL-F Scale to fit
F5 Nodes
F7 Keyframes
F9 Control view
F11 Modifier view
CTRL-Tab Next frame
CTRL-SHIFT-Tab Previous frame
[ / Left arrow / Media Previous Step back
] / Right arrow / Media Next Step forward
ALT-Right arrow / ALT-] Next key
ALT-Left arrow / ALT-[J] Previous key
SHIFT-0 Console
Space Play forward
ALT-Space Play reverse
Fusion
The playhead must be over the element on the timeline that contains a Fusion component before you can view or modify the Fusion component in Fusion mode.
The MediaIn node:
- Is usually the starting point for composites in the Fusion page. Additional nodes can be added between the "MediaIn" and "MediaOut" nodes to add effects.
- Contains the clip from the Edit or Cut page.
- Adds clips brought in from the Media Pool.
-
Image tab has controls for:
- Trimming
- Creating a freeze-frame
- Looping
- Reversing the clip
The MediaIn2 node represents the foreground material from a track.
Fusion Underlay Boxes
By default, the Fusion page for an element has very few nodes. Once you start adding nodes, however, their purpose may not be obvious. Underlay boxes are a way to group nodes together according to their purpose and to label them.
Underlay Boxes can be named to identify the purpose of that collection of nodes, and they can be colored to be distinct from other Underlay Boxes or to adhere to some sort of color code for your compositions.
To create an Underlay Box around specific nodes, select the nodes in the [Fusion] Node Editor that you want surrounded by an Underlay Box. Then, press SHIFT-Spacebar, type
under,
then press the Return key when the Underlay Box appears in the Select Tool window.
Alternatively, you can open the Effects Library, open the Tools / Node Editor category,
and click the Underlay Box node to have it added and sized to encompass all the selected nodes.
To rename an Underlay Box, ALT-click the Underlay Box to select just the box and not the contents, and then right-click it and choose Rename (or press F2). Type a new name into the Rename dialog and click OK or press Return.
You cannot move individual nodes within an underlay box, but you can readjust each side of the underlay box, and you can move the underlay box.
Make all nodes nice and neat by right-clicking on the Nodes background and selecting Line Up All Tools To Grid.
Make just the nodes within an underlay box nice and neat by right-clicking within the underlay box and selecting Line Up To Grid.
Keyframe Editor
For more information on the Keyframes Editor functions, see Chapter 71, “Animating in Fusion’s Keyframes Editor,” on pages 1393-1410 in the DaVinci Resolve Reference Manual or Chapter 9 (Animating in Fusion’s Keyframes Editor) in the Fusion Reference Manual.
Fusion Cache to Disk
Working with Fusion on a non-trivial page makes my powerful computer work really hard, and the video stutters badly while on the Fusion page. I did not find that the following improved my computer's responsiveness when the Fusion mode was active.
A Fusion node's output can be cached. Simply right-click on the node and select Cache to Disk....
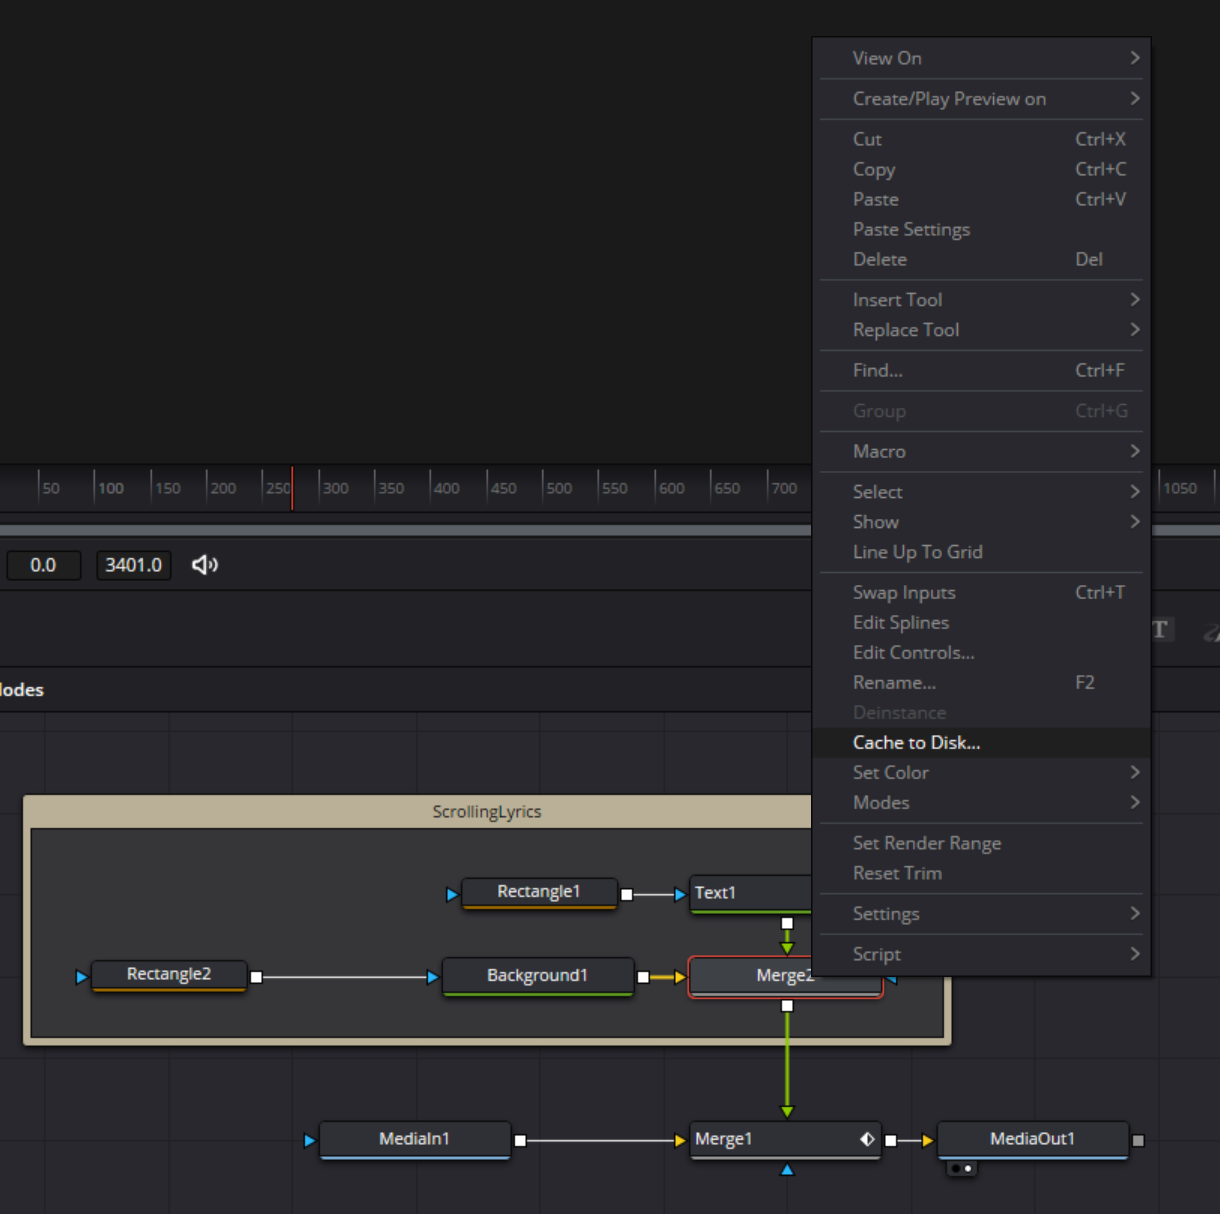
You will be prompted for the path; I suggest you accept the default value.
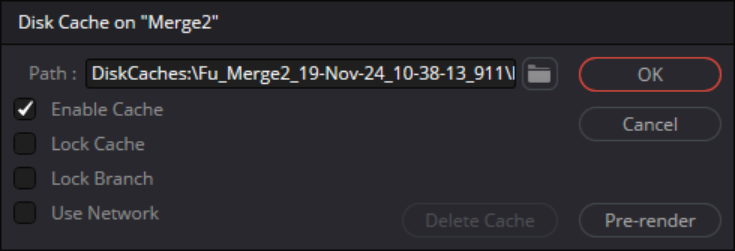
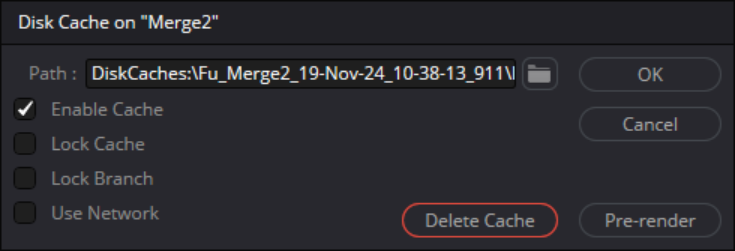
Clicking on the Pre‑render button causes the cache to be built immediately.
Compound and Fusion Clips
The compound clip feature in DaVinci Resolve is similar to nesting clips in Premiere Pro. In both programs, compound clips group multiple clips together. Compound clips can simplify complex edits, streamline the workflow, and make it easier to organize the timeline.
If a project has several references to a compound clip, then editing the compound clip will cause all the references to be modified.
Fusion clips are like compound clips, but they are optimized for working with Fusion. For example, a Fusion clip would allow the subclip timings to be staggered.
It is possible to copy all nodes from a compound clip on the system clipboard, then paste them into a fusion clip.
Compound Clips
Creating
To create a compound clip in DaVinci Resolve:
- Unlock all tracks that contain clips that you want to group together into a compound clip. Clips on locked tracks will not be added to the compound clip; if all the selected clips are on locked tracks, then the menu item described in step 3 will not appear.
- Select the clips you want to group; they could be any combination of audio, video, titles, etc.
- Right-click on any of the selected clips and choose the New Compound Clip... context menu item, or use the Clip / New Compound Clip... top menu item.
- Optionally name the compound clip or accept the autogenerated name.
- Click the Create button.
You can place the compound clip anywhere on your timeline. For example, if you need to place a sequence multiple times, you can make it a compound clip and keep it in your bin.
Editing
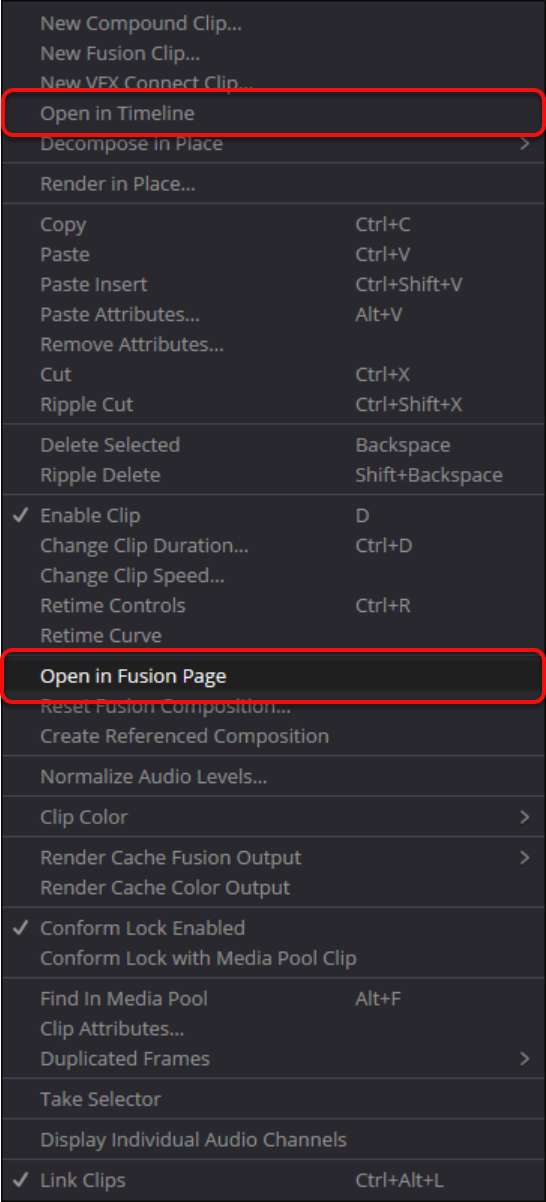
To change a compound clip, right-click on it and select the Open In Timeline menu item.
To change the Fusion nodes of a compound clip, right-click on it and select the Open in Fusion Page menu item.
If you are considering making a compound clip to develop a Fusion component, make a Fusion clip instead.
For More Information
See the Compound Clips section in the DaVinci Resolve User Manual, pages 857-860.
The following video has more detail on compound clips in DaVinci Resolve.
Fusion Clips
Learning Resources
The manufacturer is the logical place to start looking for training materials. Blackmagic Design offers several videos with accompanying projects and free downloadable books as PDFs. The online forum for Resolve is also free. Overall, I am impressed.
Documentation
- The Beginner’s Guide to DaVinci Resolve 18
- DaVinci Resolve 19 Reference Manual
- DaVinci Fusion 19 Reference Manual
- DaVinci Resolve 19 New Features Guide
- DaVinci Resolve 11 Menus and Keyboard Shortcuts
- DaVinci Resolve: All Keyboard Shortcuts
- DaVinci Resolve Micro Color Panel Quick Start Guide
- The Colorist Guide to DaVinci Resolve 18
- The Editors Guide to DaVinci Resolve 18
- The Fairlight Audio Guide to DaVinci Resolve 17


