Published 2023-12-03.
Last modified 2024-12-28.
Time to read: 41 minutes.
av_studio collection.
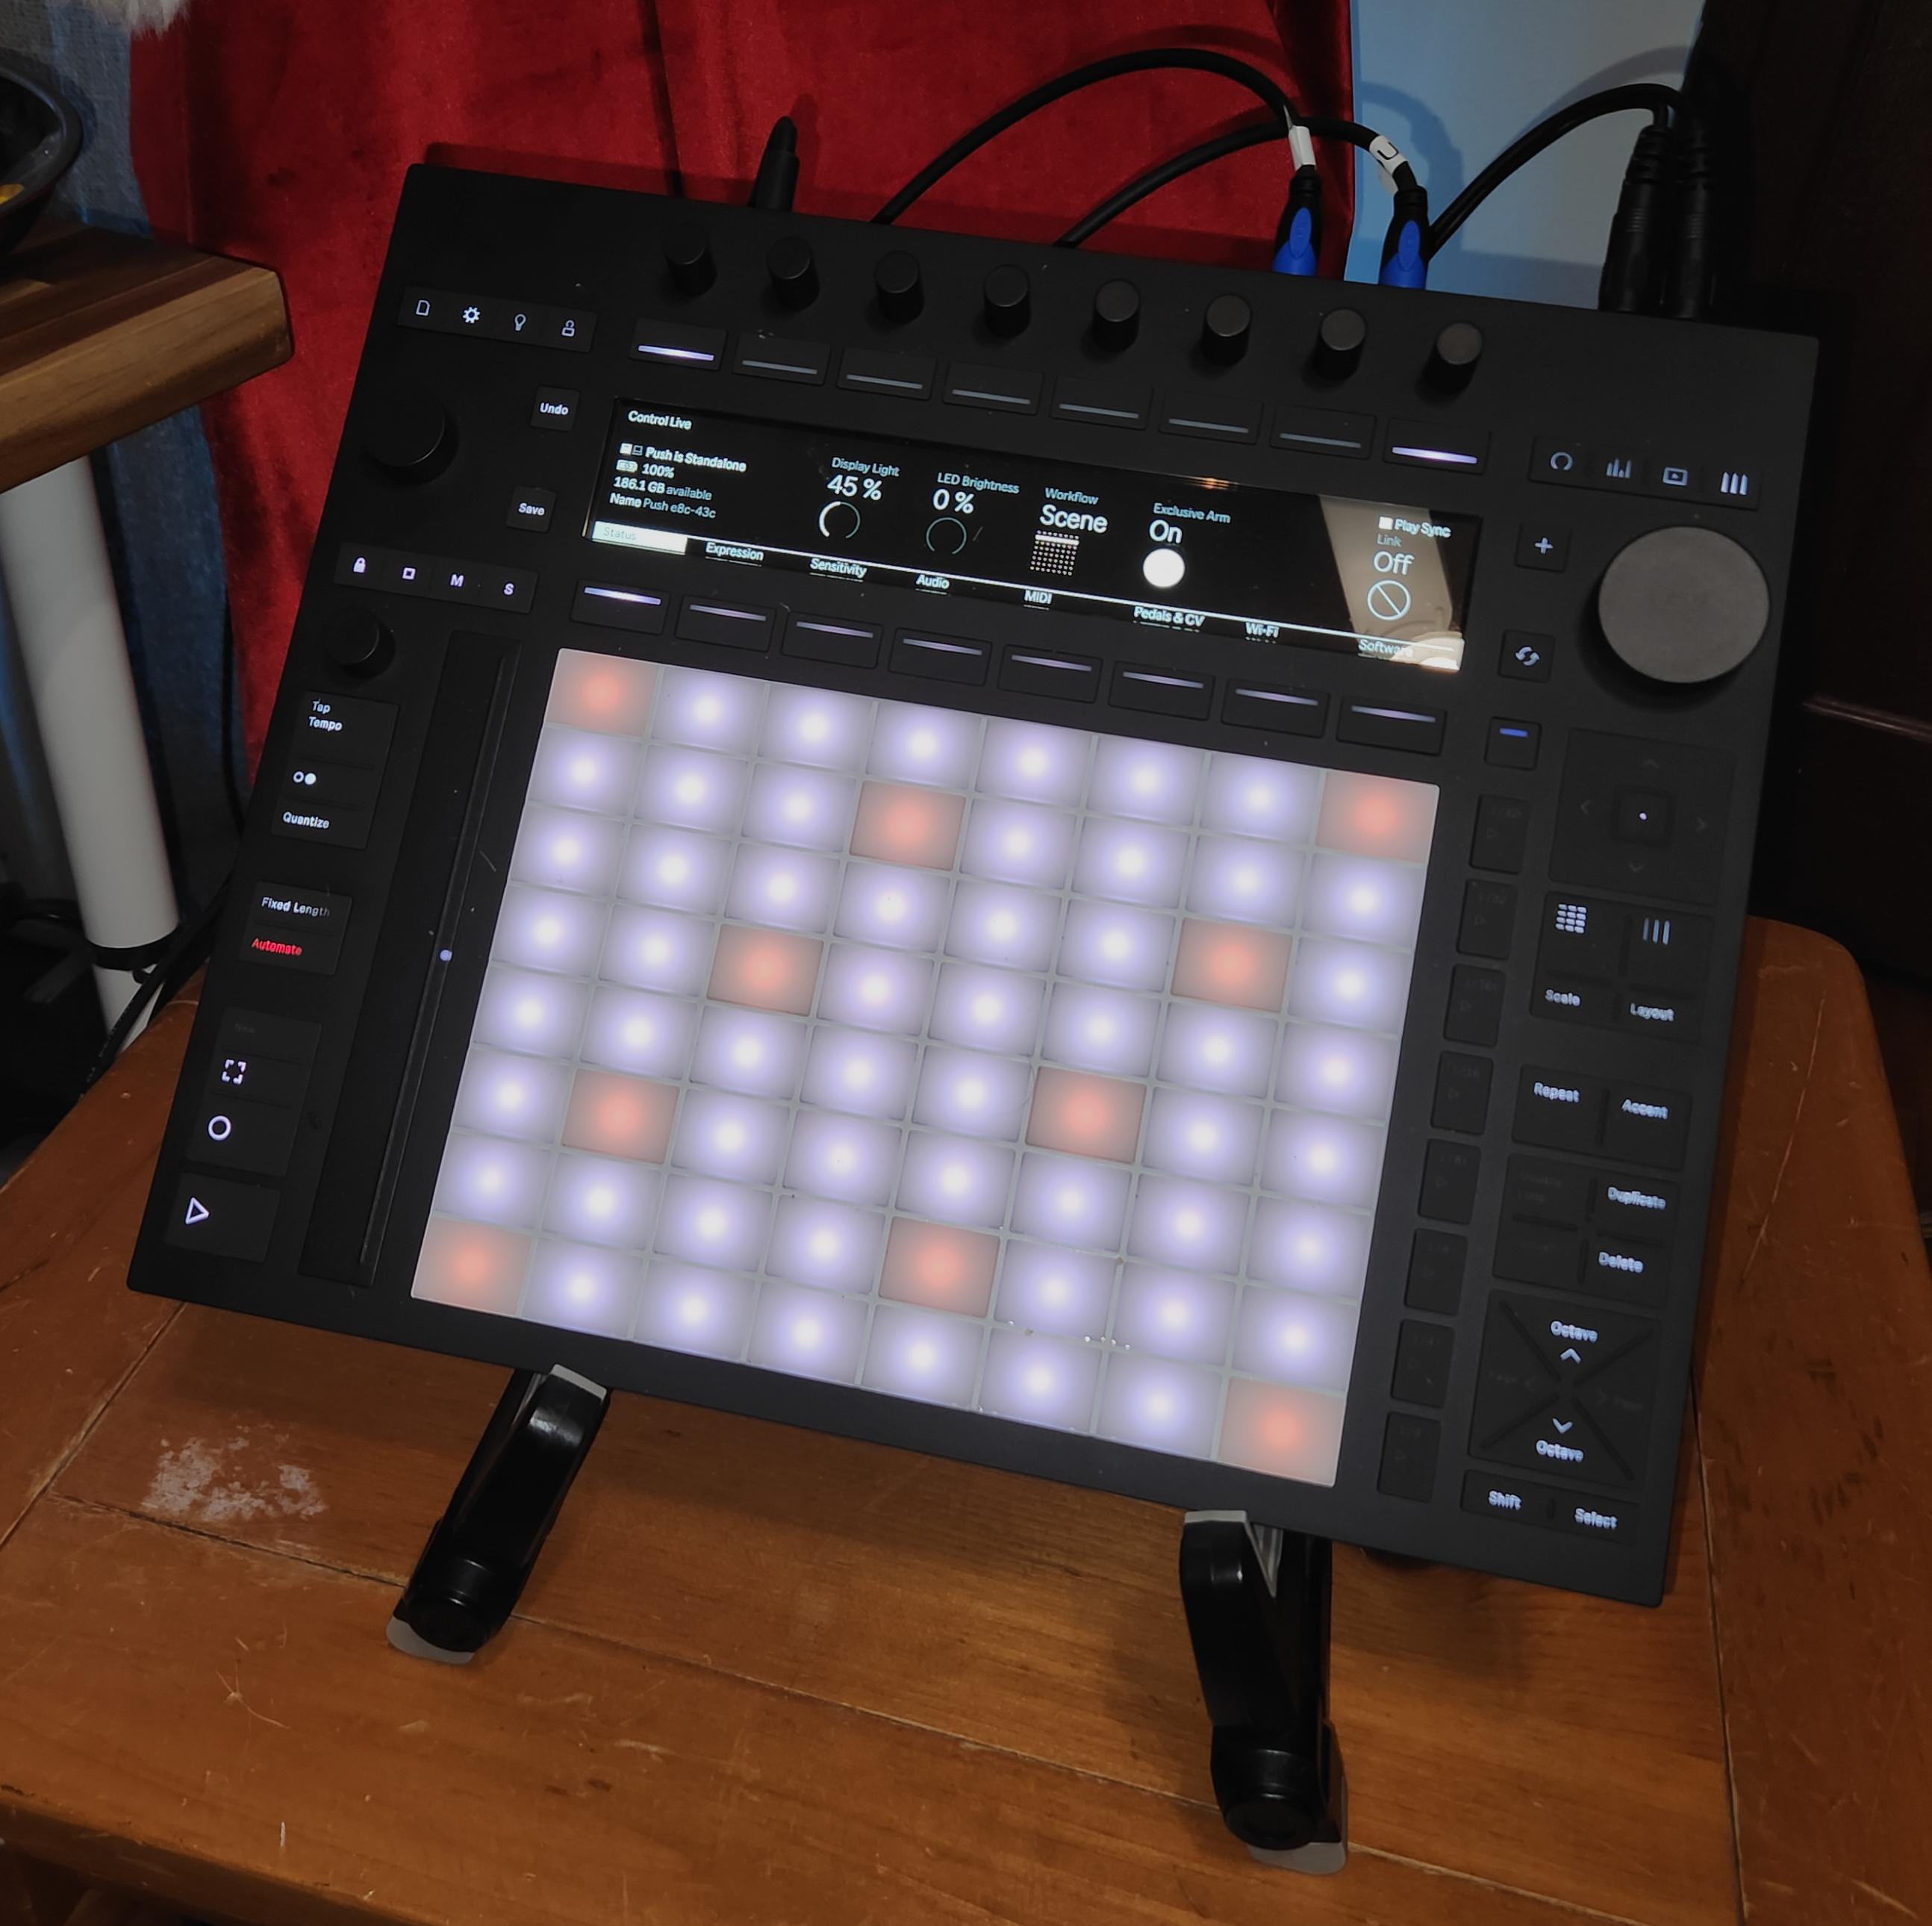
Yesterday, my new Ableton Push 3 Standalone was delivered.
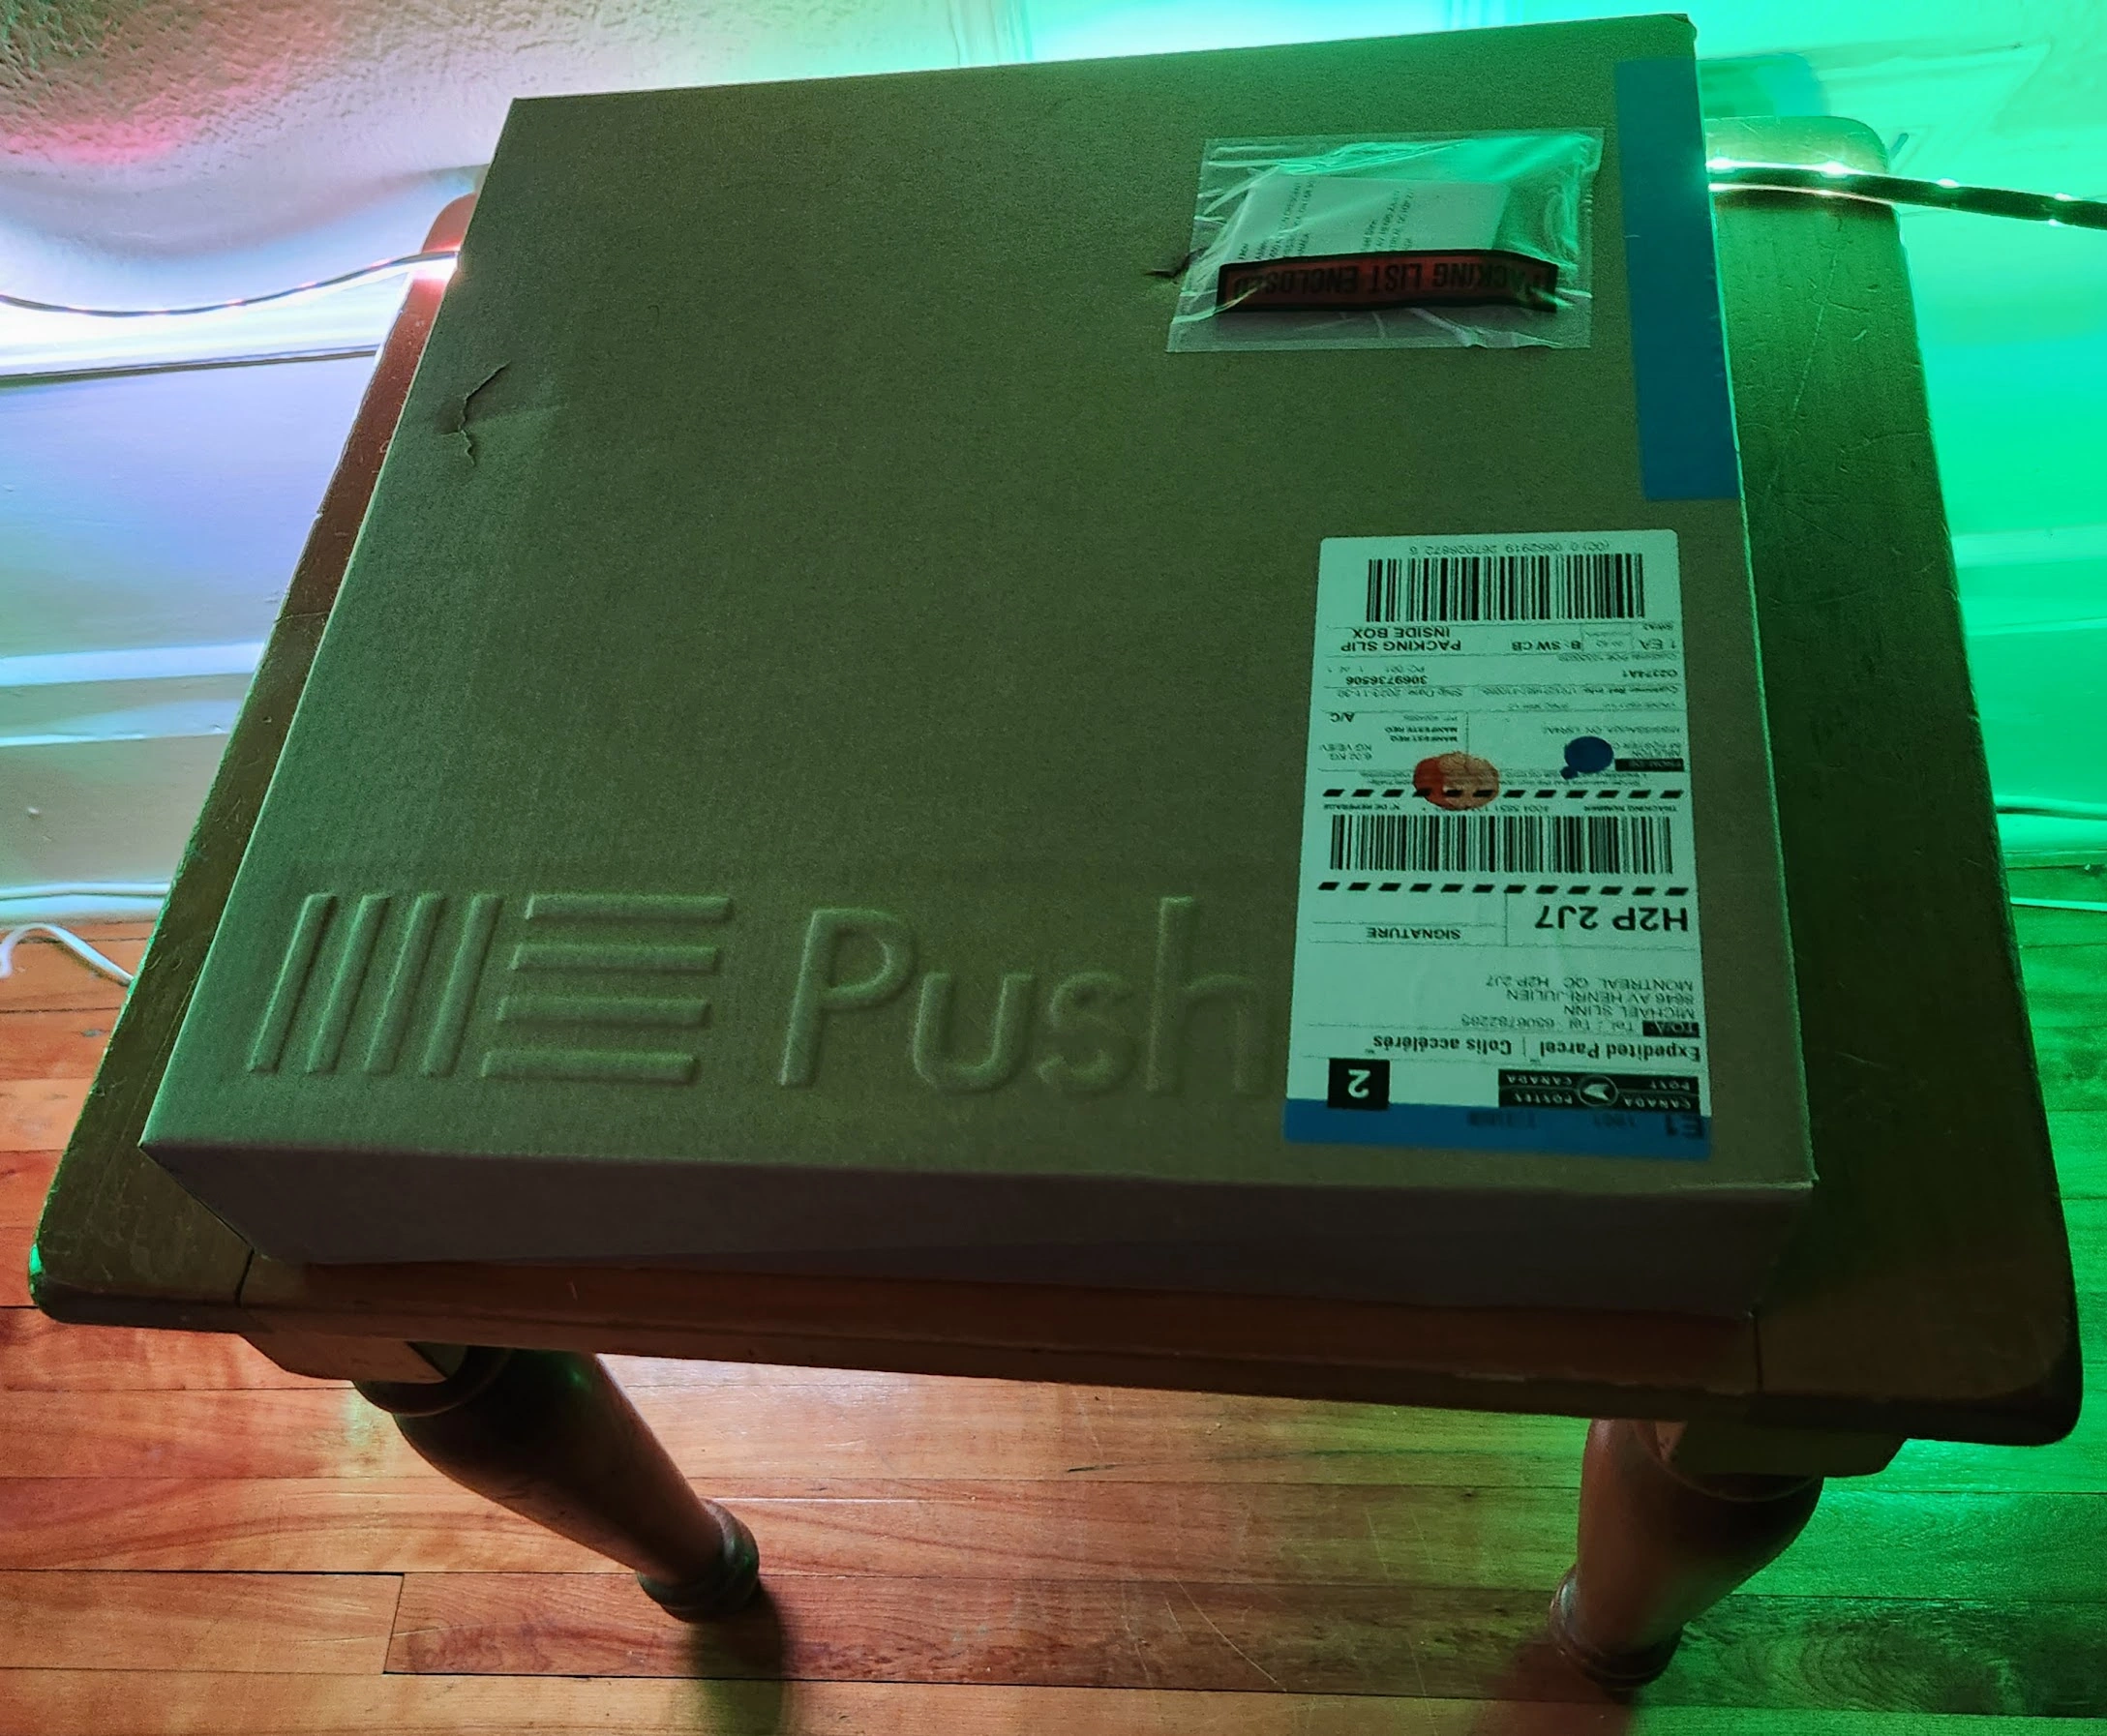
I purchased this device because it is the first of its kind: a standalone DAW realized in hardware. Just like the Arp 2600 I purchased in 1979, I think this device introduces a new form of musical expression.
I recommend that most people not purchase a P3S because Ableton does not provide proper support, and even a full year after release, the product is still missing basic functionality.
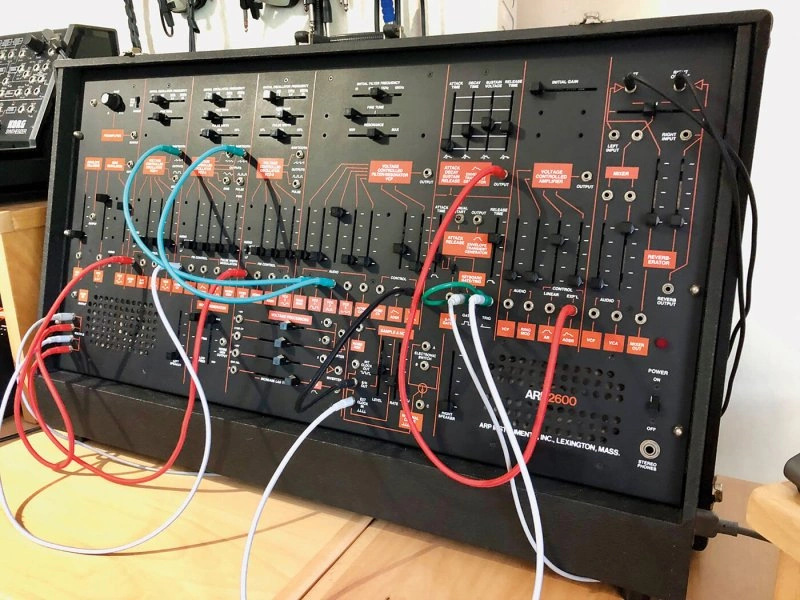
Like the early versions of the Arp 2600, the P3S is quite heavy (3.95 kg / 8.7 lbs) – although it is only about a quarter as heavy as the early Arp 2600s, which were 43 pounds / 19 kg. In fact, the P3S is heavier than most laptops, but they are not meant to be pounded upon during a performance.
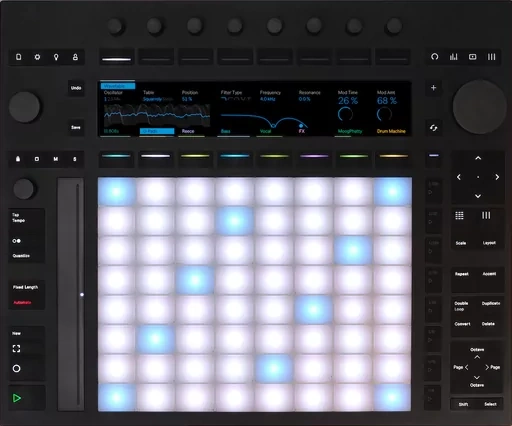
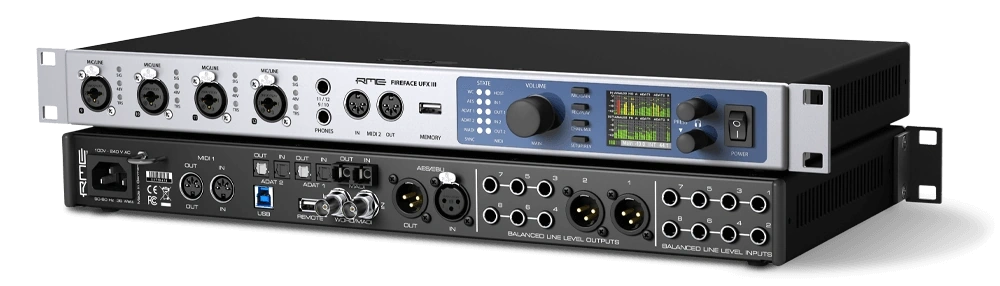
Ableton Push 3 Standalone supports ADAT I/O, which means it should plug right into my RME audio interfaces. It also has differential 1/4" audio TRS outputs.
P3 and P3S
People often use the nickname P3 to refer to the Ableton Push 3, but the nickname does not specify whether the reference is to a standalone device or a standard device, which requires a computer. In this article, I use ‘P3S’ to mean the standalone variant.
P3S Presents As an Ableton Live Subset
Since the P3S only presents a subset of the functionality of Ableton Live, packaged as a hardware product, it is essential to know how to use Ableton Live before attempting to learn how to use the P3S. One of the features of Ableton Live that P3S does not surface is arrangement view, so you just need to know how session view works to operate P3S.
A more complete explanation is that an actual copy of Ableton Live runs internally, but the graphical user interface (GUI) is not visible, and certain aspects of the GUI are mapped to the controls and the small LED display. Unmapped aspects of the GUI are unreachable, which can be frustrating to experienced Live users. I discuss this further throughout this article.
A good hands-on resource for self-study or teacher-led classrooms is First Steps with Ableton Live – A classroom project by Matt Ridgway. The free learning resources are here.
Push 2 Successor
Upon the first anniversary of the P3S release, there is still not much documentation available for the P3S. However, it is an evolution of the Ableton Push 2 (P2), so if you cannot find information about how to do something, look for Push 2 instructions and try to consider the physical differences if you can.
This can be awkward because, if you have never used a P2, learning about an older device that you do not have can be frustrating.
The attempt to find information might be fruitless because there are aspects of the P3S that have no analog in the P2 or P3.
The sorry state of P3S documentation is unacceptable.
Tough Love
As is often the case when I write about a product, I made many statements in this article that sound critical, but every product has room for improvement.
There are two types of products in this world:
- Products that people do not use
- Products that people complain about
This article has evolved as the product evolves, and as I learn more. Hopefully, new users who read this article will have an ever-smoother experience with the product. The design of this product is good, the materials are high quality, but the implementation is woefully incomplete. P3S is a promising product, but new users are likely to experience a needlessly frustrating and confusing experience, and some limitations force users to use a decidedly suboptimal workflow for common operations. Stated more directly: users cannot avoid wasting massive amounts of time.
One day, months or years from how, assuming that the product eventually evolves to the point that it provides value commensurate with its high cost, I will recommend it. Upon the first anniversary of release, and after talking extensively with Ableton, that day still seems far in the future. Ableton has not released a roadmap that indicates how and when the product’s fundamental deficiencies might be overcome.
Tiny Printed Manual
A printed manual, 4.5" x 6" in size, was provided. I cannot read it without a magnifying glass because it is set in 4-point type. The quarter placed on the manual helps show the scale. Only seven pages of the manual are printed in English. Not much of a manual.
When I purchased Ableton Live 8.14 in June 2010, it came with a 2"-thick printed manual. I had no problem reading it, and it was well written. Times have changed! Now we pay more, but get less.
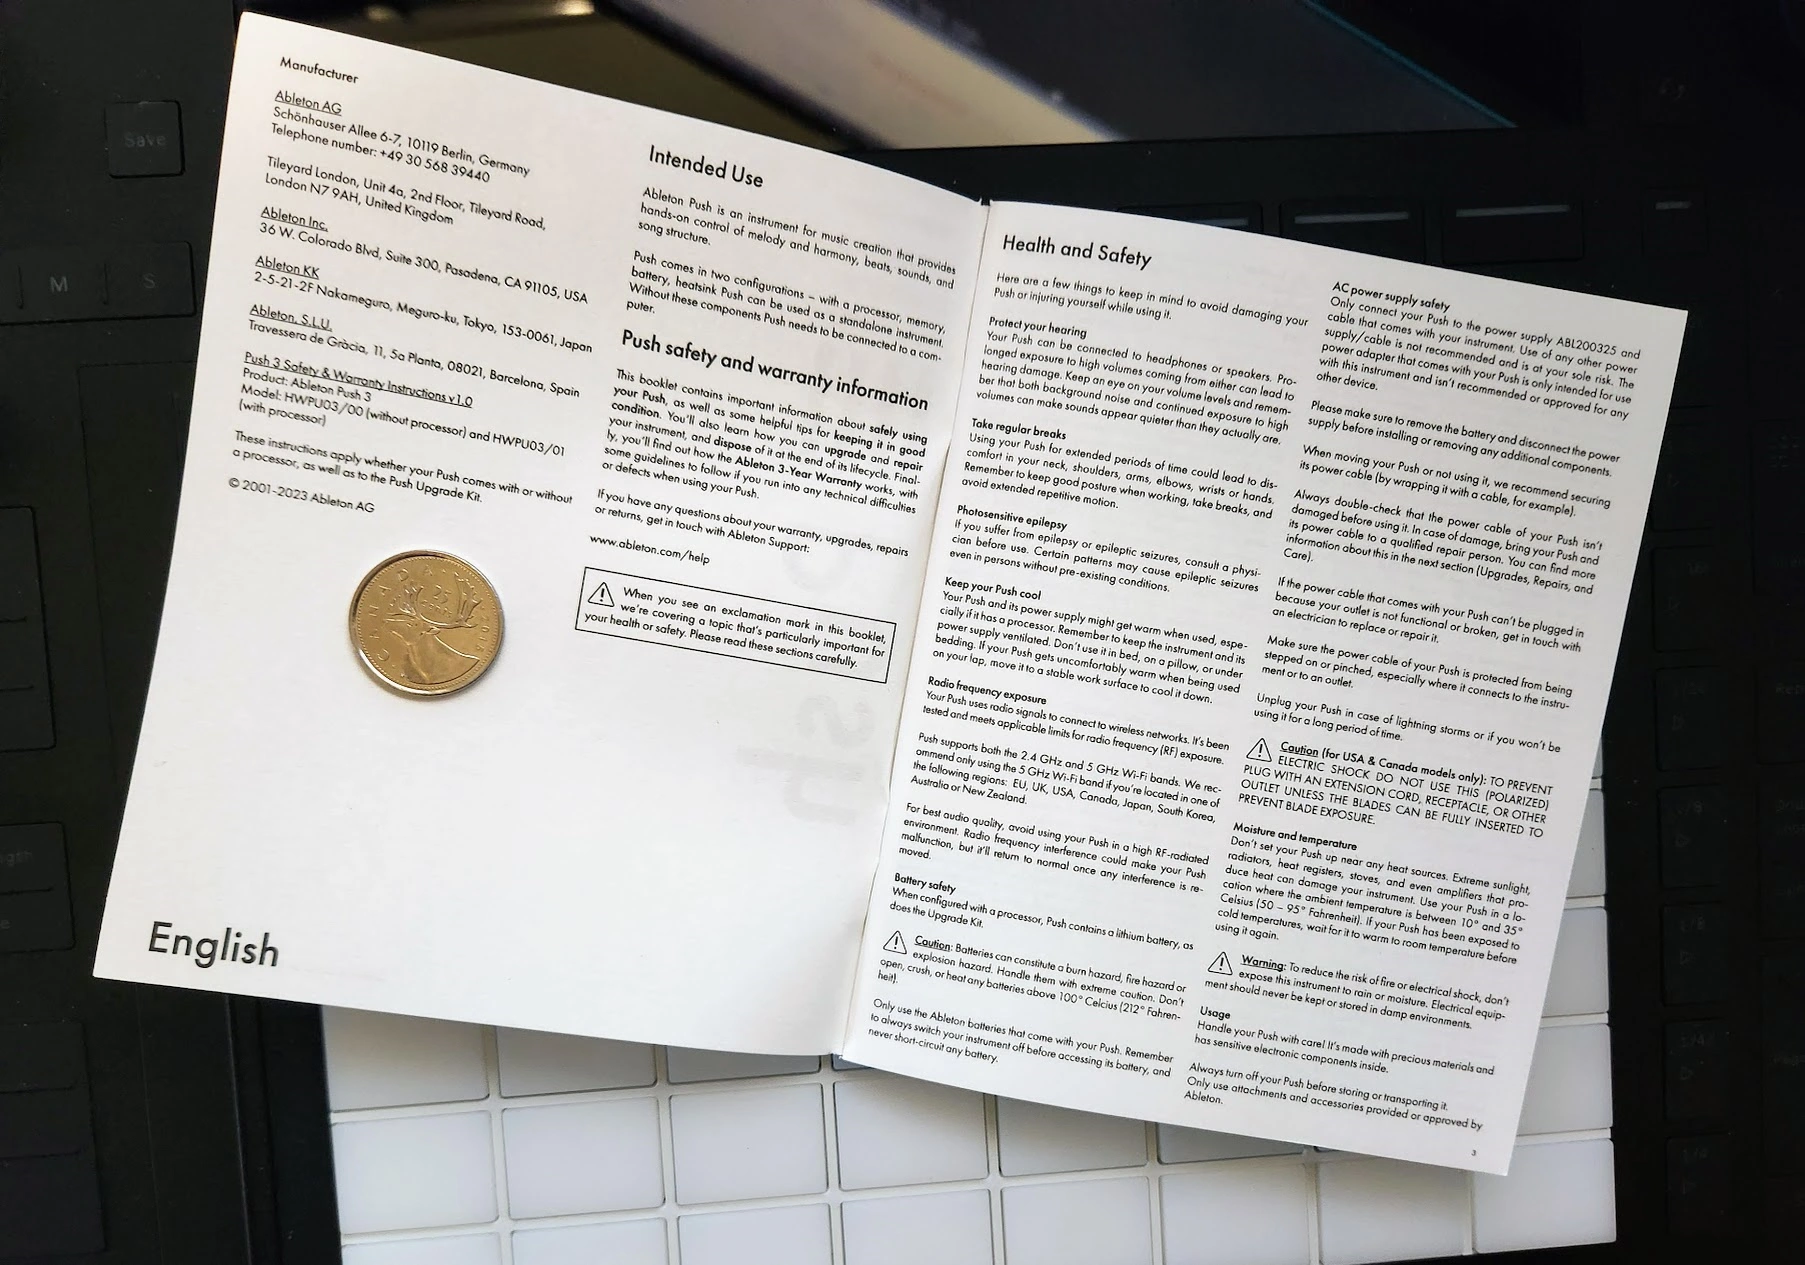
The manual can be viewed online here
(it redirects to www.ableton.com/
if your web browser's default language is English),
and can be downloaded in PDF format
here and
here.
Tiny, Artistic and Illegible Documentation
It would be easy to miss the other printed documentation in the box. This documentation is on the same color paper as the packing material.
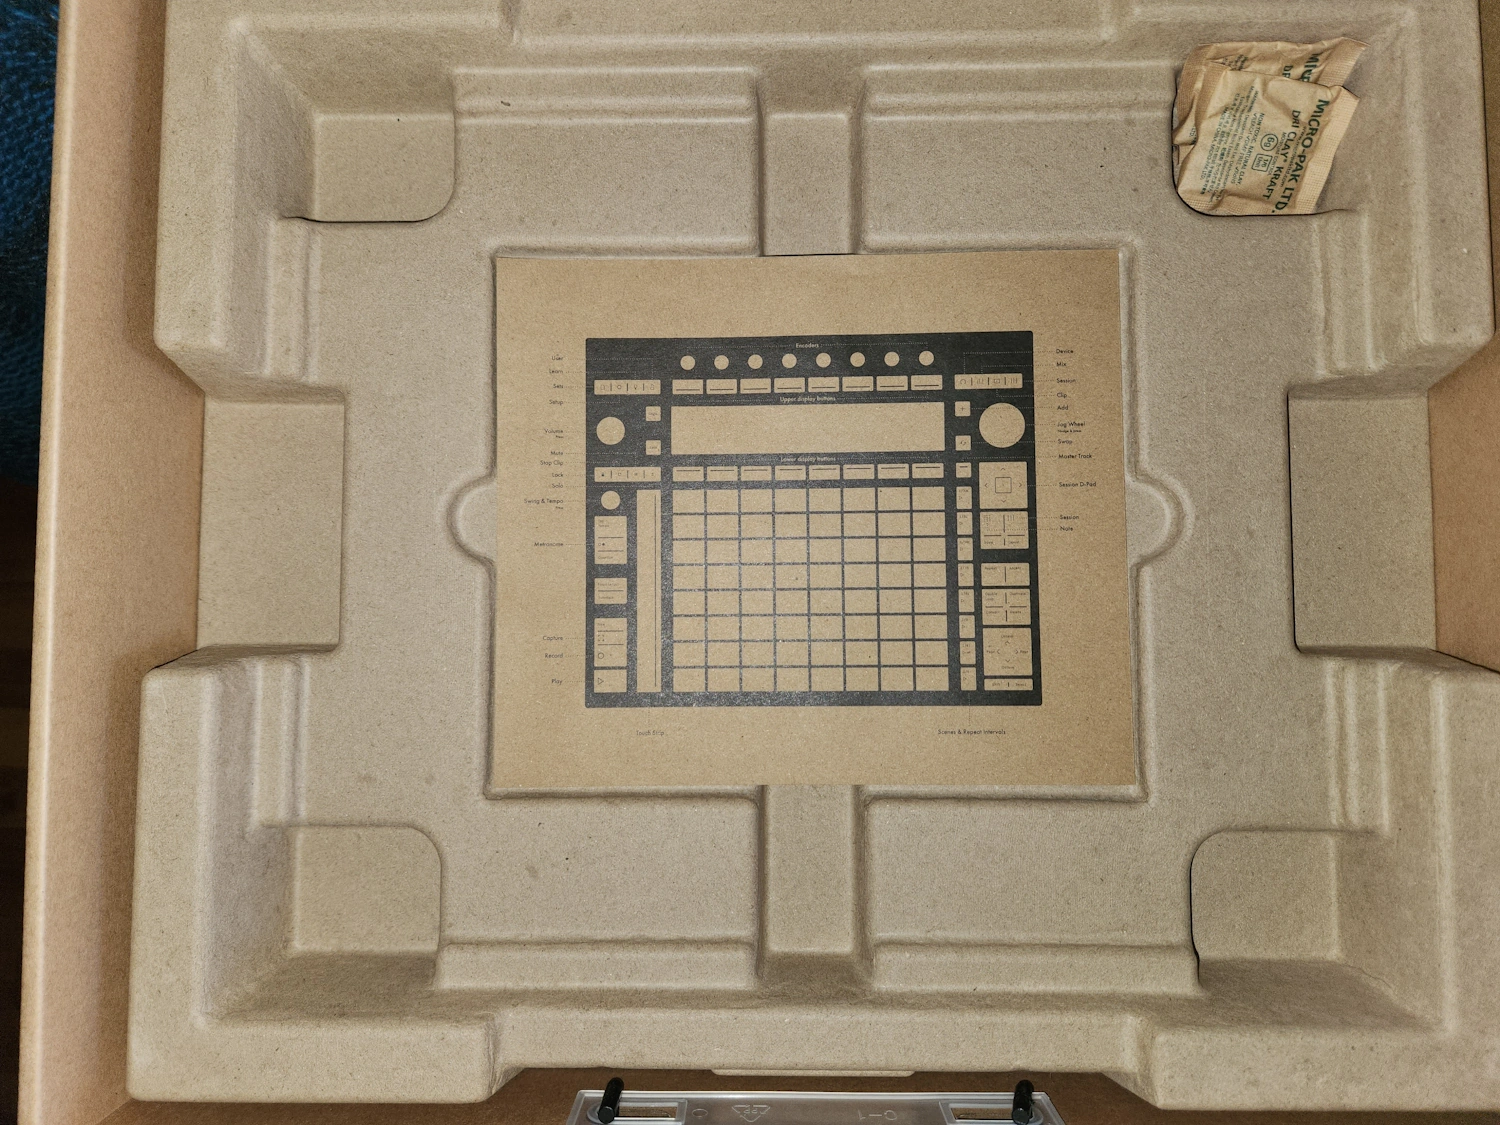
The text is also minuscule, and the black ink used does not contrast well against the brown paper it was printed on. The result is that the material is useless. I cannot read it without a bright light and a magnifying glass.
The same diagram is also provided on the first page of the manual.
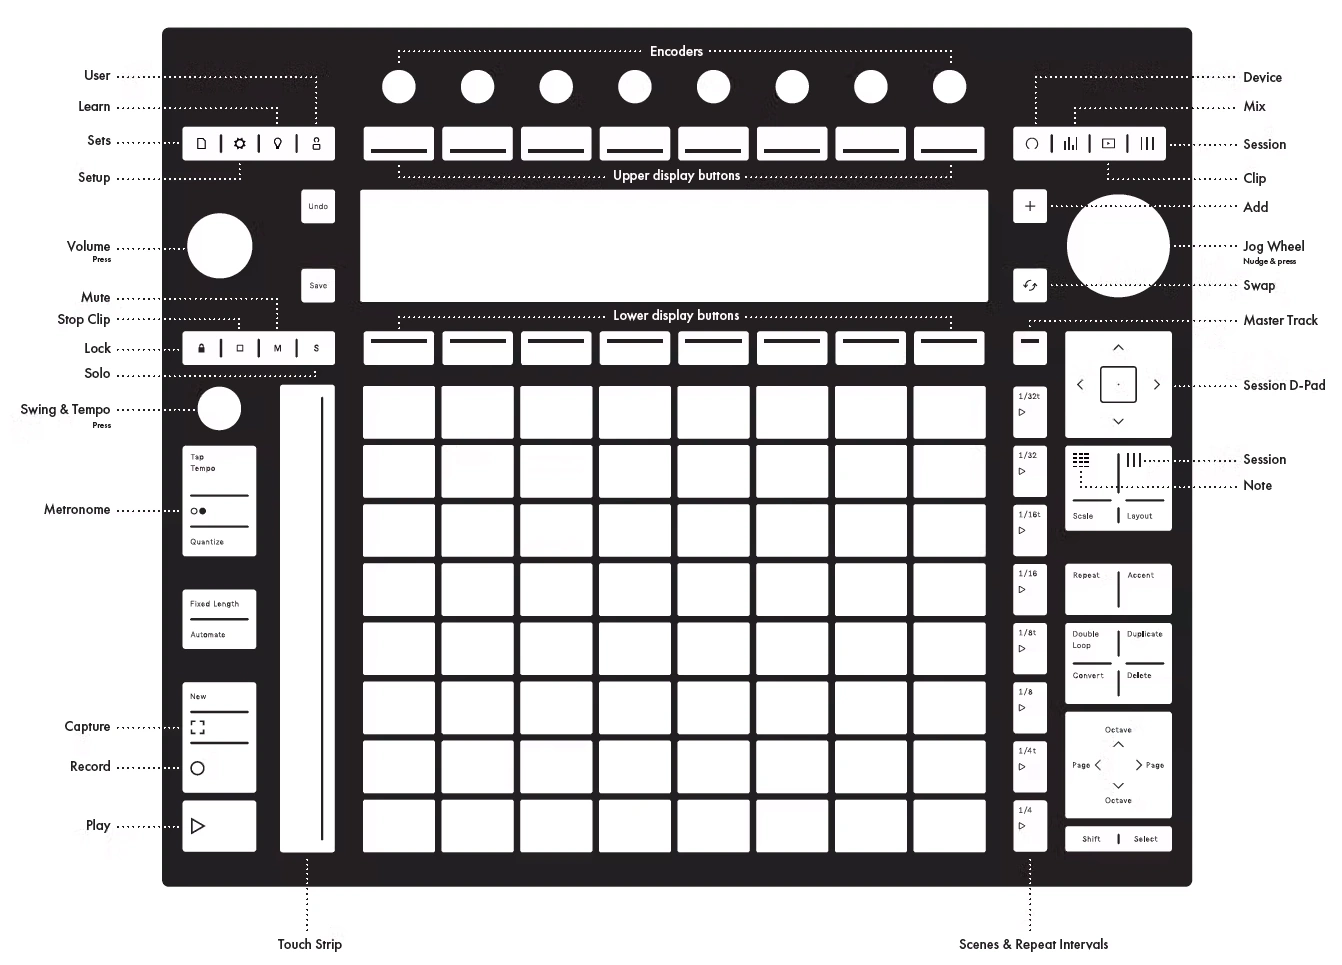
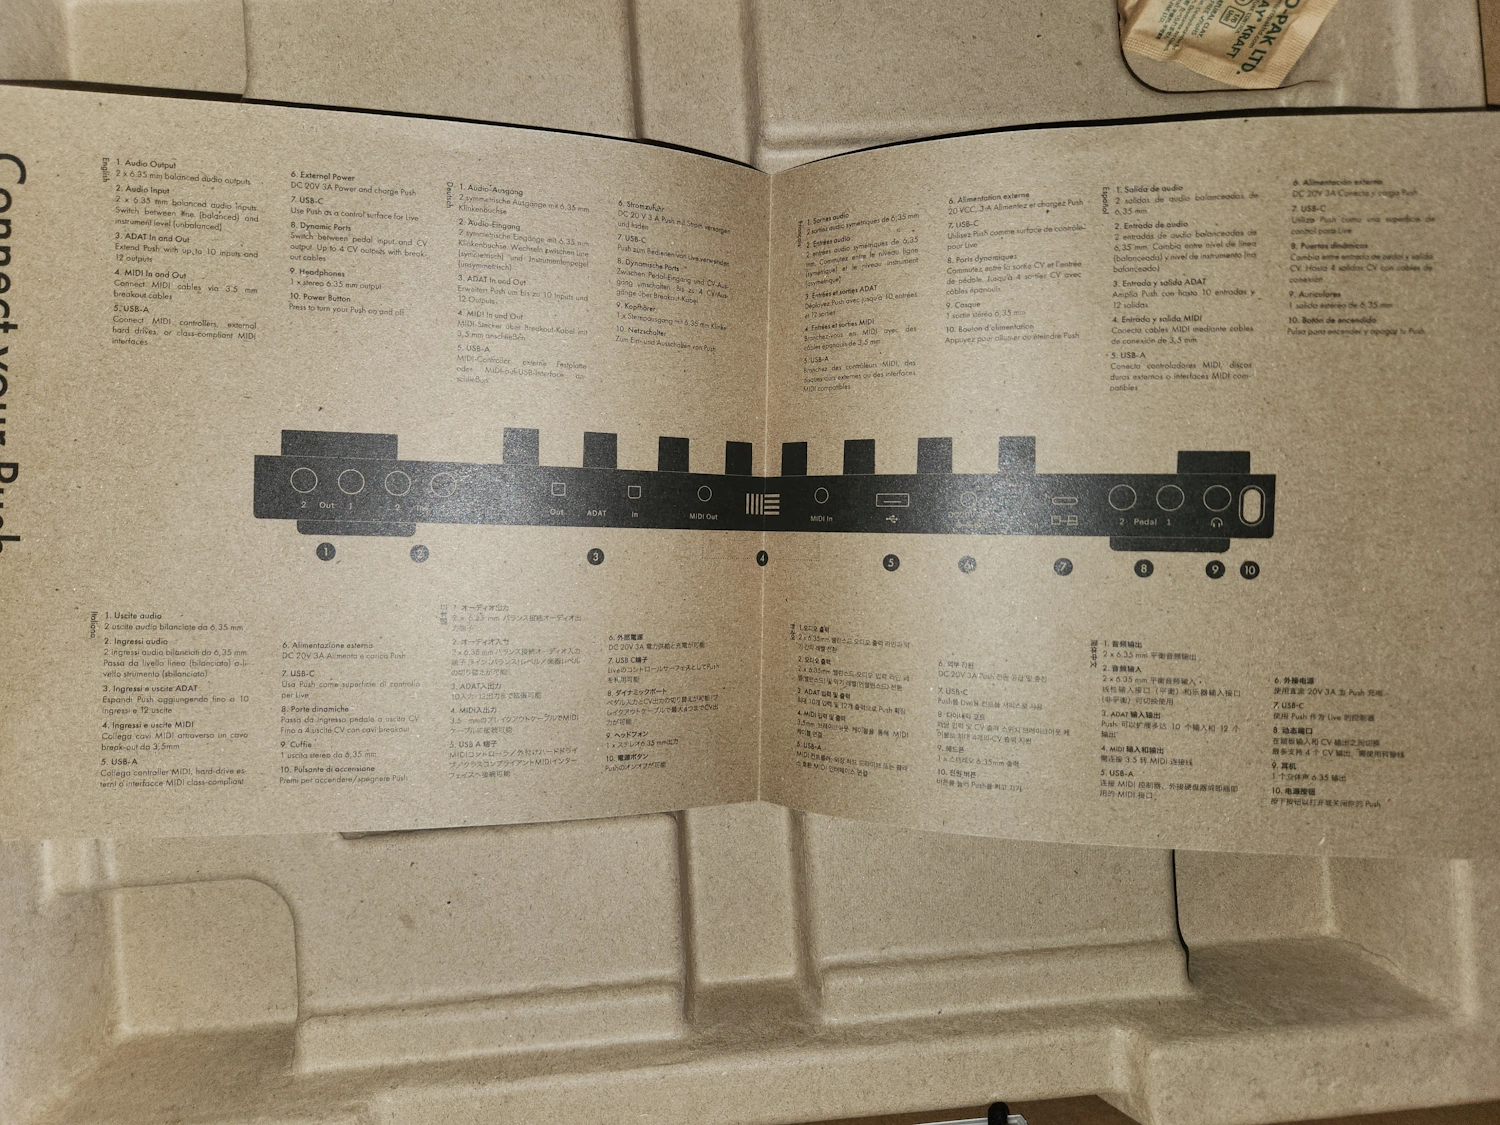
The same diagram is also provided on the first page of the manual; however, the explanatory text in the manual for this image, while legible, is less detailed.

- Audio Output: 2 x 6.35 mm balanced audio outputs.
- Audio Input: 2 x 6.35 mm balanced audio inputs. You can switch between line (balanced), instrument level (unbalanced) and high-Z (like a guitar).
- ADAT In and Out: Connect an ADAT extender to access an additional 8 inputs and outputs.
- MIDI In and Out: Connect MIDI devices via MIDI Type A 5-pin socket to 3.5 mm cables.
- USB-A: Connect MIDI controllers or class-compliant MIDI interfaces.
- External Power: Power and charge Push, DC 20V 3A.
- USB-C: Use Push as a control surface for Live.
- Dynamic Ports: Switch between pedal input and CV output. Up to four CV outputs are accessible with break-out cables.
- Headphones: 1 x stereo 6.35 mm output.
- Power Button: Press to turn Push on and off.
Toslink / SPDIF / ADAT
I purchased two 25-foot Toslink / SPDIF / ADAT cables. Although the specifications say 5 meters (16.4 feet) is the maximum length of this type of fiber-optic cable, much longer cables can be used. These cables do not carry electricity; they carry light generated by LEDs, so they do not need gold-plated connectors.
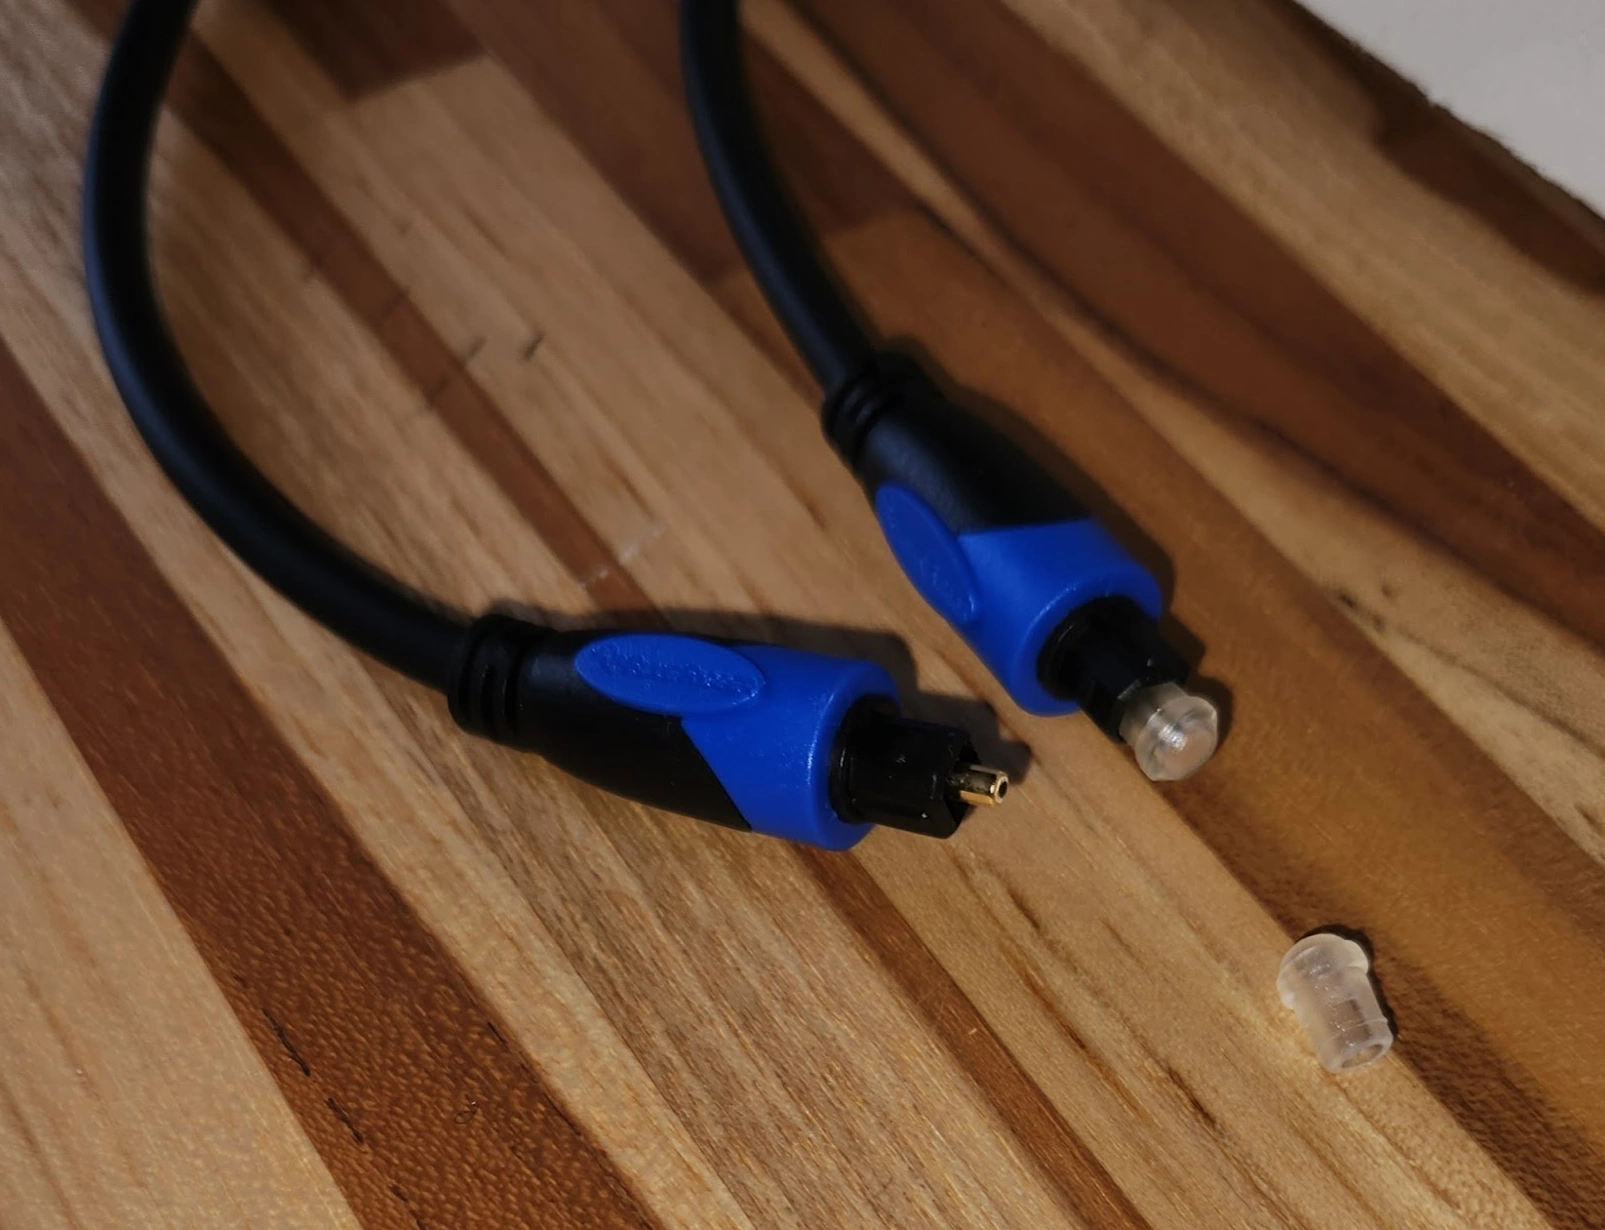
One end has a cap on; the other cap is shown in the foreground
Toslink fiber-optic cables are used for SPDIF and ADAT. These cables are provided with protective covers over the ends. Often, you can kinda-sorta plug in these cables without removing the protective covers, and they kinda-sorta work. However, they will not click into place and will fall out easily with the protective covers on. Be sure to remove the covers before use!
When you have two 1/4" audio cables, one for output and one for input, you cannot tell them apart unless they are labeled. Because of the potential for confusion, you might plug the cables into the wrong jacks. This is not the case with fiber-optic cables; when plugged in, the end of the output cable glows red because of the LED in the sending device that provides the signal. This is the cable that should be plugged into the P3S ADAT In jack.
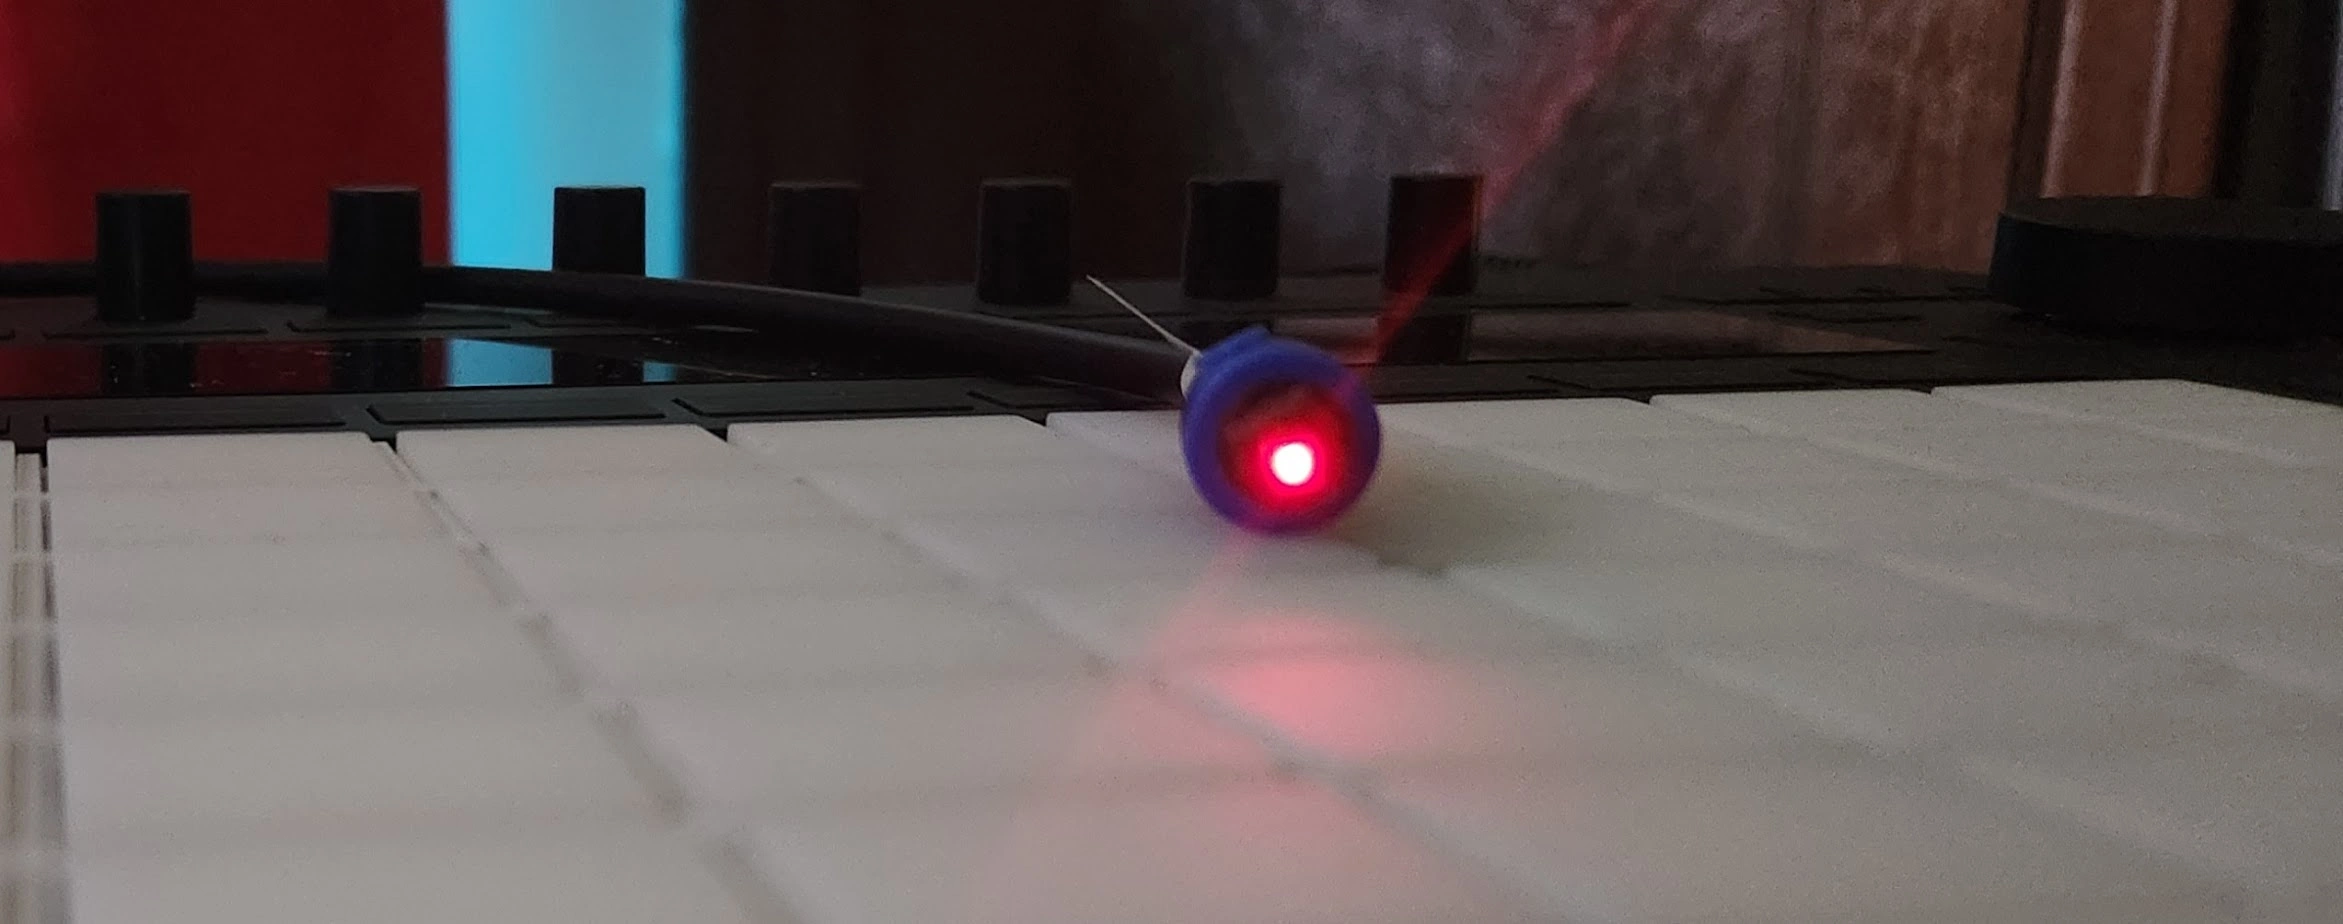
The red LEDs used in Toslink cables emit normal light; they are not lasers. If you accidentally point the light into your eye, there should be no damage.
P3S Cooling
The P3S has no fan; only convective cooling is possible through the bottom of the enclosure. However, the gap between the bottom of the heat sink and whatever the P3S is placed on is only about 1 mm, which does not allow for significant airflow. This severely limits the effectiveness of the heat sink.
The bottom surface of the P3S is uneven: the four rubber feet protrude slightly beyond the heat sink, and the heat sink covers less than half of the bottom of the unit. This means that unless the heat sink is removed, it is quite awkward to attempt to keep the unit cool by placing it on a heat-conductive surface like a slab of stone tile.
Thus, the best option for keeping a P3S cool is to place it on a stand that provides good airflow. A single large fan would be quieter than several smaller fans, because it would spin more slowly.
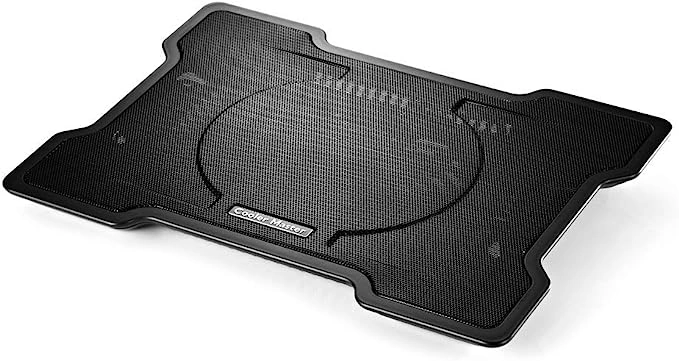
Tilted Stand
I find working on devices with this form factor awkward unless they are tilted up. It seems I end up hunching over for hours, resulting in neck and shoulder pain.
The display would be easier to read if the unit could be slightly tilted up.
The P3S is quite heavy, and you might press its pads urgently, so it would need a sturdy 15" wide stand. As mentioned in the previous section, airflow is important. I found an inexpensive solution: an adjustable folding guitar stand.
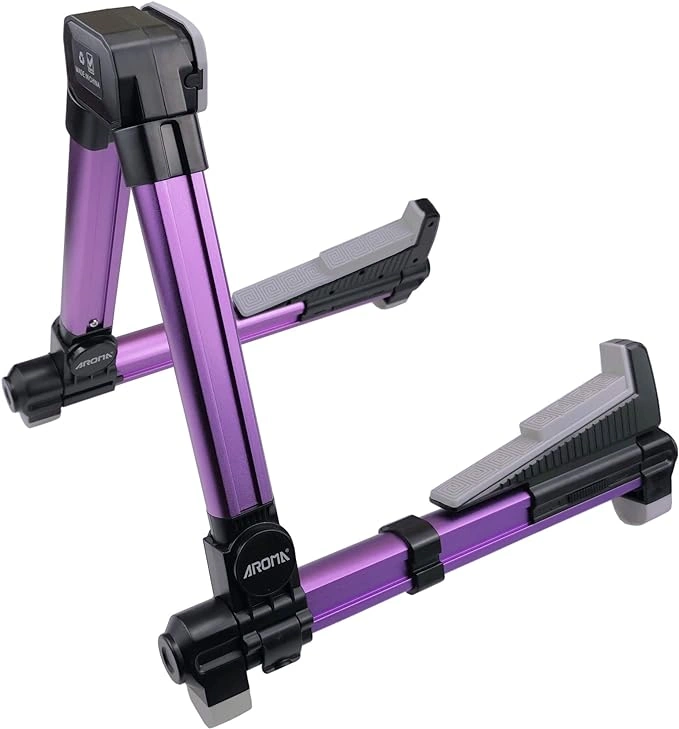
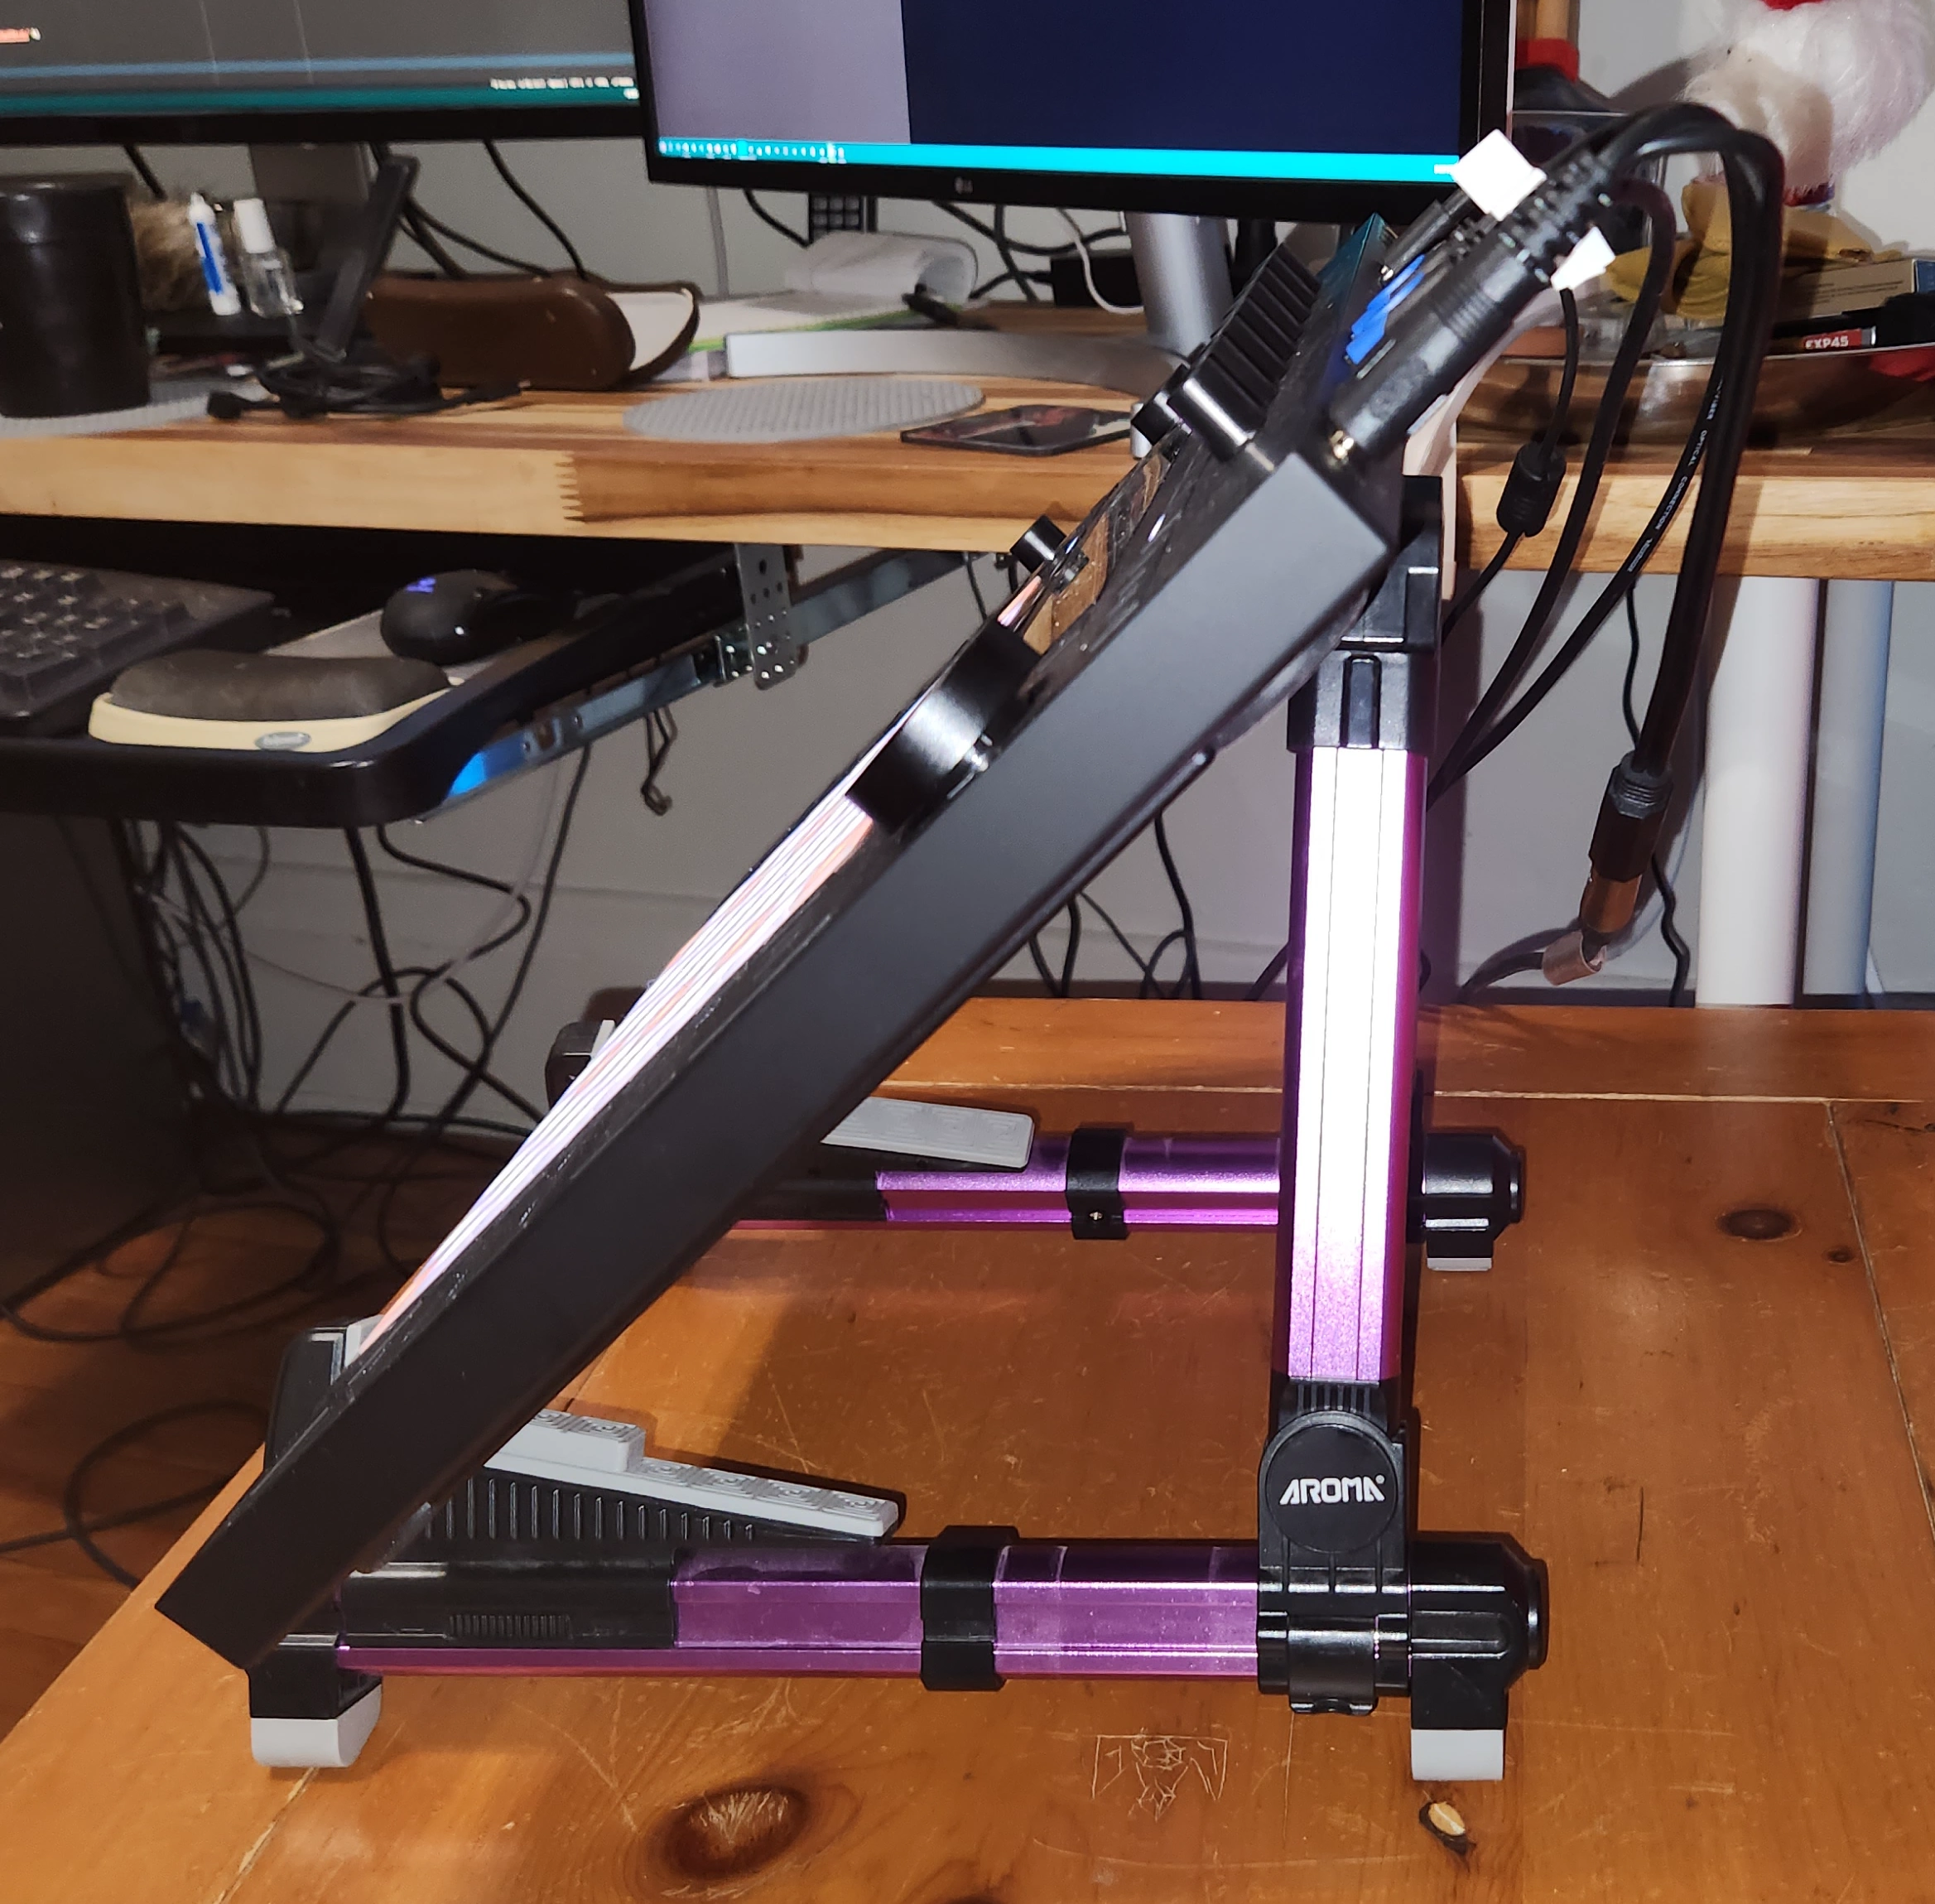
The stand does not weigh much, even though it is quite sturdy, and it folds up nicely. It does not tilt back, unfortunately. I am on the lookout for something equally light and portable, that provides more flexible options.
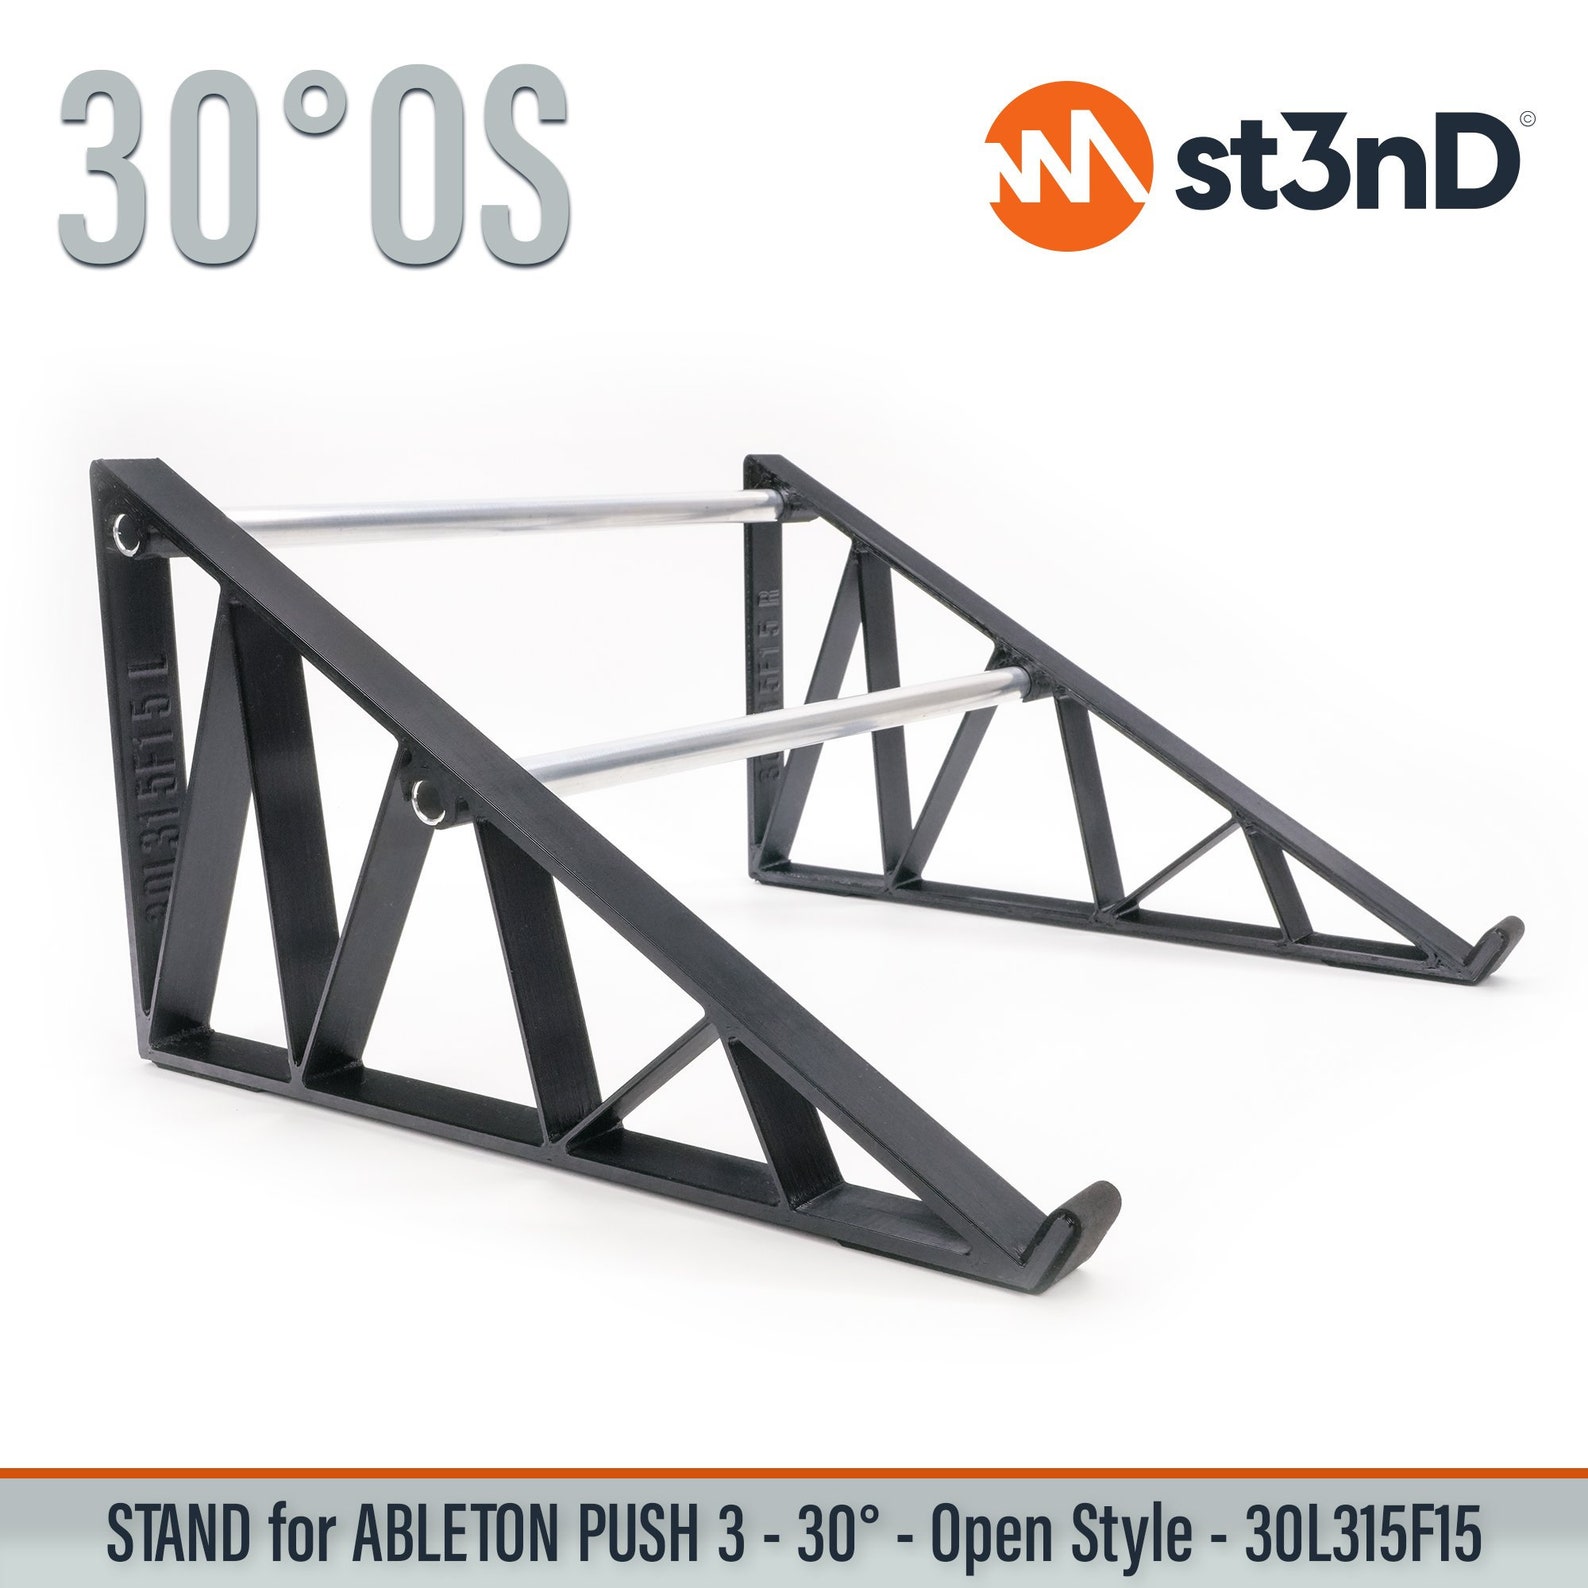
st3ndstore sells a stand on Etsy that seems interesting.
No Phantom Power
The P3S microphone input is unable to provide phantom power. This is unfortunate. That means only dynamic and some ribbon microphones can be used, unless phantom power is provided externally.
Furthermore, the P3S microphone preamp does not offer much gain. Some dynamic microphones, such as the popular Shure SM7B, put out a weak signal, which means the signal-to-noise ratio of that microphone when used with a P3S is poor.
I use a Cloudlifter CL-1 with my Shure SM7B; this preamp also works very well with condenser microphones such as my Neumann U87 Ais. However, because the Cloudlifter requires phantom power, I purchased a Neewar PP1 Phantom Power converter. Both of these items together compensate very well for the P3S’s shortcomings regarding microphone support.
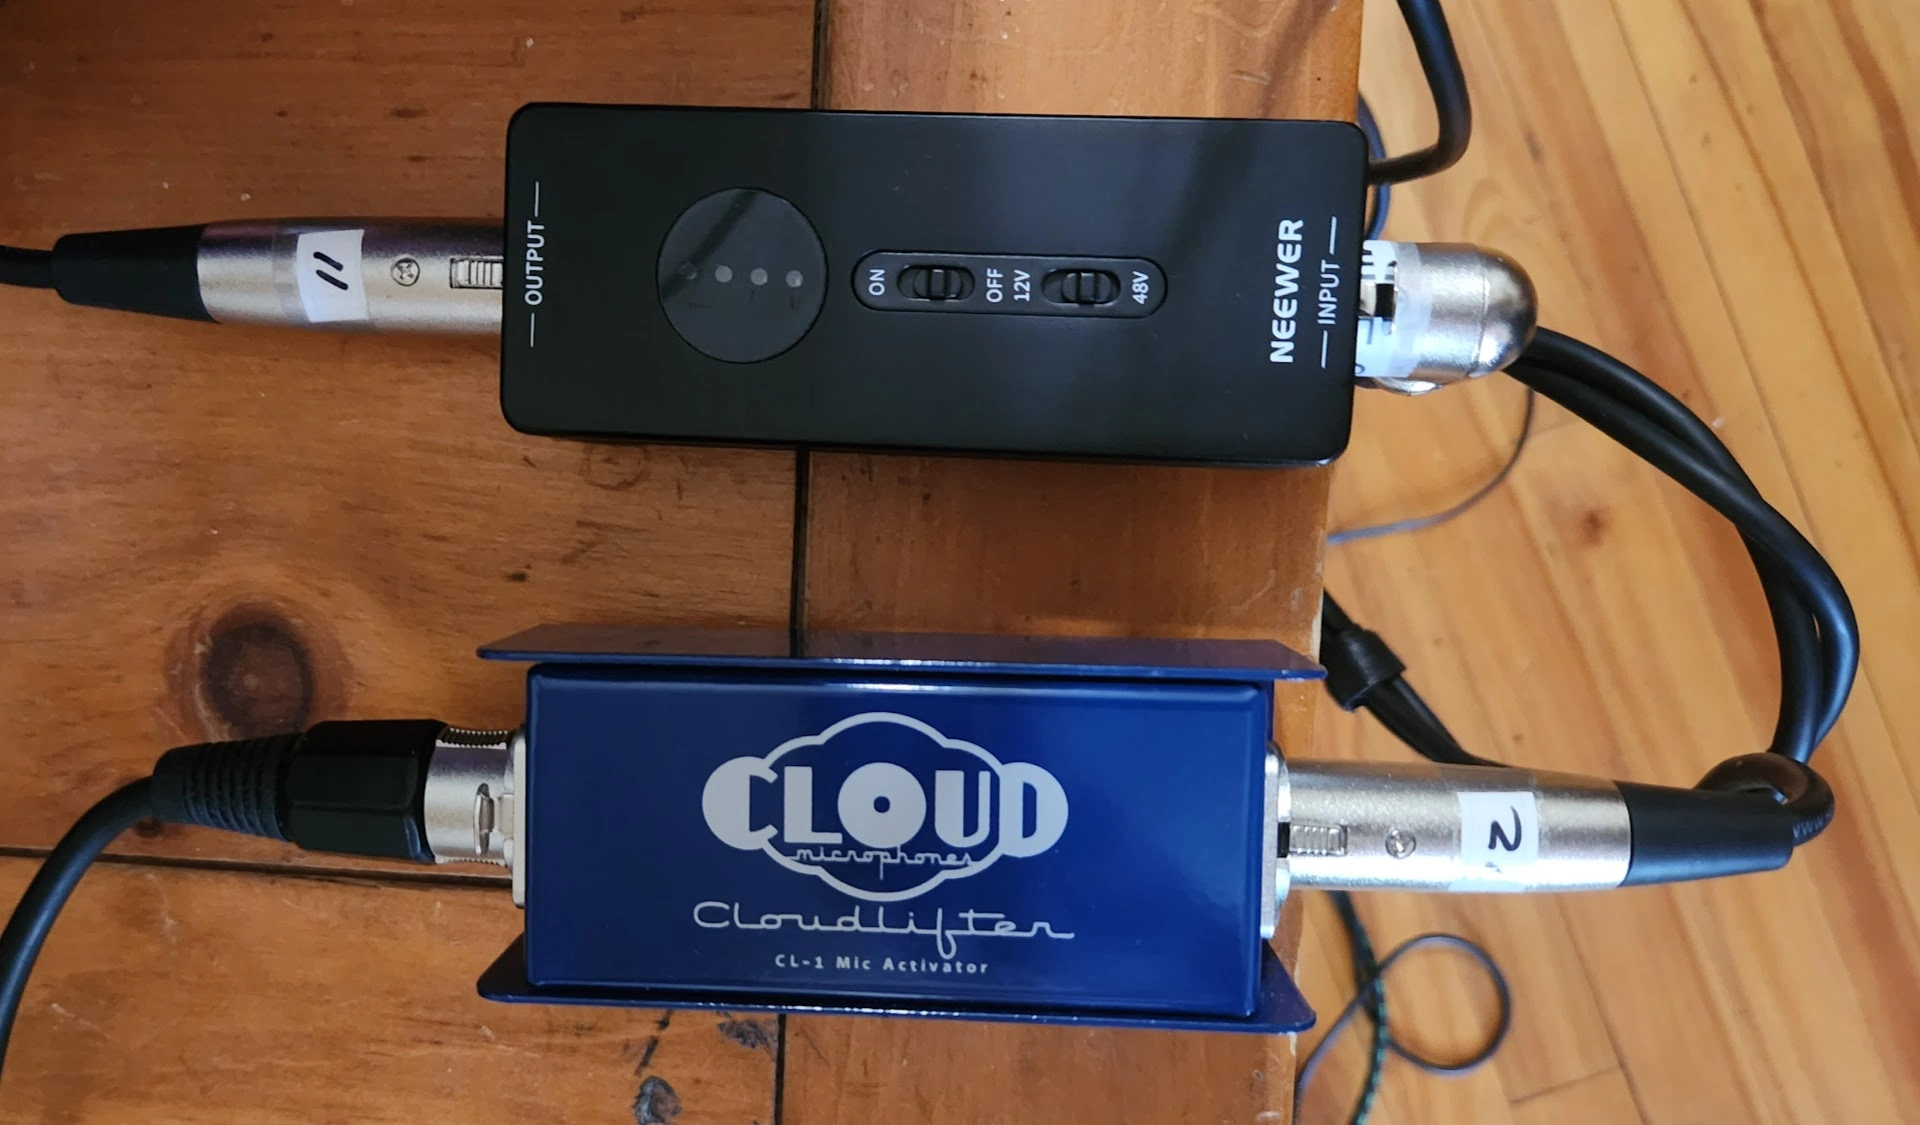
The Neewar PP1 has a battery that lasts up to 40 hours and recharges via USB-C. Be careful when turning it on - a large DC pulse is emitted. Mute the microphone input before turning the PP1 on or off.
The combination of Cloudlifter and a phantom power converter works well; however, they and their cables add to the list of things that could be sources of problems when setting up on location. These items should be unnecessary; the P3S preamp should provide phantom power. Providing phantom power is yet another reason the capacity of the P3S battery needs to be increased.
NB: The Neewar PP1 manual says that it should only be used with condenser microphones, and not with ribbon or dynamic microphones. Since the Cloudlifter behaves like a condenser microphone it works fine.
Cannot Configure Audio Inputs Separately
The two audio input jacks are configured together; the setup you specify applies to both inputs. That means they can both be treated as:
- Balanced line inputs, for example a microphone (+4 dBu nominal, +18 dBu maximum, signal path gain 0 dB)
- Instrument inputs, for example an electric piano audio output (-2 dBu, +12 dBu maximum, signal path gain +6 dB)
- High-Z inputs, for example, a guitar (-22 dBu, -8 dBu maximum, signal path gain +26 dB)
The P3S inputs cannot be individually configured; for example, it is not possible to configure one input as a balanced line input, while the other is configured to be high Z input.
The gain cannot be adjusted for either audio input. EQ and compression are also not available. These inputs are rather basic; I would like to see results from a proper test of these inputs.
If you want to have a guitar on one input, and a microphone on the other, set the inputs to line inputs and use a direct box on the guitar input to convert its signal to line level. Depending on whether the direct box features an XLR output or a 1/4" TRS output, an XLR-to-TRS adapter may also be required.
Living Dangerously

Missing Software
The P3S does not include essential utilities for maintaining a Linux system. This omission exposes all such devices to a wide host of possible issues, including hard bricking, due to perpetual lack of basic maintenance.
Some commands that I consider to be essential for doing basic maintenance include the all the commands used in Ableton Push 3 NVMe Replacement:
e2fsck.gparted.resize2fs.
A complete list would worthy of an entire article. More essential commands and the most basic security consideration (the P3S has no security provisions of any kind):
- Firewalls, for example
iptablesandufw. -
I find it odd that
sshis not available from a P3S shell, however thesshddaemon runs, andscpis provided.
Other essential tools not present on a P3S:
rsynccommand and daemon.
Backups Practically Impossible
Since the P3S does not provide a viable means for performing regular backups, owners of P3Ses are vulnerable to unrecoverable problems.
I wish the P3S provided the ability for the USB-C connection to export the filesystem, as if the P3S was just an SSD drive.
The would allow many different mechanisms for backing up the P3S, without any extra work by Ableton.
Alternatively, a second bootable partition could be provided containing a backup utility like clonezilla.
Licensing
Ableton Live is available in three editions: Intro, Standard and Suite. This table shows the capabilities of each edition. As you can see, one of the differences is that Ableton Live Intro is limited to 16 Audio & MIDI tracks.
P3S requires an Ableton Live license, and at the time of writing, a license for Ableton Live 11 Intro is included. Live 12 Intro will likely be included instead shortly; I do not know the timing on that.
MusicRadar published How many tracks can Ableton Push 3 Standalone actually run?, and they reported that P3S supported 40 tracks before encountering problems. I interpret this to mean that the limitations of Ableton Live Intro can be removed by purchasing a license for a more capable edition.
Getting Started
This morning, I received the following email:
Welcome to your new Push
Here’s some help getting started
Learn Push
Push’s built-in lessons will show on the screen the first time you turn Push on; they’ll take you through the essentials step by step. You can return to the lessons at any time by pressing the lightbulb button on the top left of your Push.
You’ll also find lots of helpful video tutorials in our Learn Push series. These cover everything from setup and Session View to sound design tips. Check out the Learn Push videos >
More help when you need it
Our Help area is the place to go to answer your questions about Push. There you’ll find articles covering almost every aspect of Push and Ableton Live, plus further video tutorials, a dedicated Push section of Live’s user manual, and much more.
Happy music-making!
– FromThat email was properly thought out. Kudos, Ableton!
Power supply and Heat
The 65-watt custom power supply produces 3.5 amps at 20 volts, which is common for laptop power supplies. This means the power supply is readily replaceable.
The Push has no fan and no vents. It is essentially an internally dispersed 65-watt heat source, thermally coupled by a 3" square thermal pad at its hottest point to the bottom panel, which acts as a heat sink. Letting a factory-fresh P3S rest on a blanket for 20 minutes while running did not cause overheating.
The small orange power button is located on the back of the unit, at the upper left when viewed from the normal orientation for usage.
After using the Push for a while on my lap, I noticed that the Push was warming my lap, much like a laptop would. Most of the heat comes from the right side of the Push. That area has a rubberized mat covering the underside, presumably for the comfort of a user who puts it on their lap.
In Ableton Push 3 NVMe Replacement I go into a lot more detail about the P3S heat situation, with many photos and a few definitions of technical terms.
Learning
Some articles about the P3 are available, including a few about the P3S. None of the articles have date stamps, unfortunately. All of my articles have date stamps for when they were originally published and when they were last updated. It would be helpful if Ableton did the same.
Unfortunately, most of what you need to learn about the P3S has not been published yet. Frequently, you must find documentation for the P2, and try to adapt it to the P3S. For example, I could not figure out how to delete a clip that I had recorded. An internet search retrieved dolltr!ck’s entitled “Ableton Push: How to Delete Clips”. Her videos teach viewers about the P2. The location of the Delete button is in a different location for the P3S; however, the information worked. All that is necessary to delete a clip is to hold down the Delete button and press the clip button.
The video My Ableton Push 3 Workflow. Interface, features and tips is the best way to learn about the P3S. It is made by Anna Fruit, not by Ableton. Once your P3S is authorized, learn by following along on your P3S as Anna goes through each step.
I discuss other learning resources in the rest of this article, and in the References section below, but I recommend you start with this one.
The next video is a performance that Anna recorded using a P3S.
More videos are provided at the end of this article.
Tutorial
I plugged in my P3S, turned it on, and several minutes later, “Welcome to Push” appeared on the display. The tutorial then started.
The tutorial could be slightly improved. “To adjust the volume of an output, first press the volume encoder to select the correct one.” I found that the rotating knob must be pressed down before turning it. A better message would have been: “To adjust the volume of an output, first press the volume encoder down several times to select the correct one.”
The P3S was connected to a stereo system via two 1/4" TS monophonic plugs. I had no idea if I was supposed to hear sound at this point or not. After I fixed a cabling issue, sound could be heard when I pressed on a pad.
I found myself wishing I could touch a button or combination of buttons that would play a demo, so I could adjust sound levels. I eventually figured out how to do this.
One of the instructions was: “Turn the jog wheel to highlight an item,
and press it to take action on an item.”
Turning and pressing did nothing.
The next instruction was, “You can also nudge the jog wheel left or right”.
Again, trying that did nothing.
I suppose if the Push was in a certain state, those controls might do something.
However, the tutorial failed to indicate how to achieve that.
Later, I learned that when you want to back up from a submenu to the previous menu,
just nudge the jog wheel left.
It would have been really helpful if the tutorial had mentioned that.
This tutorial was minimalist in the extreme. I had expected much more. In particular, this ‘tutorial’ did not generate music. Considering that the purpose of this device is to make music, a tutorial should have as one of its primary goals to show how to generate sound.
Demo Set
P3S has a demonstration Ableton set, accessible at the end of the disastrous tutorial just mentioned, by pressing the Demo Set option. You can restart the horrible tutorial at any time by pressing the Learn button, which has a lightbulb icon. Rapidly click through the tutorial until you see the Demo Set option, then push the lower display button under that menu item to load it.
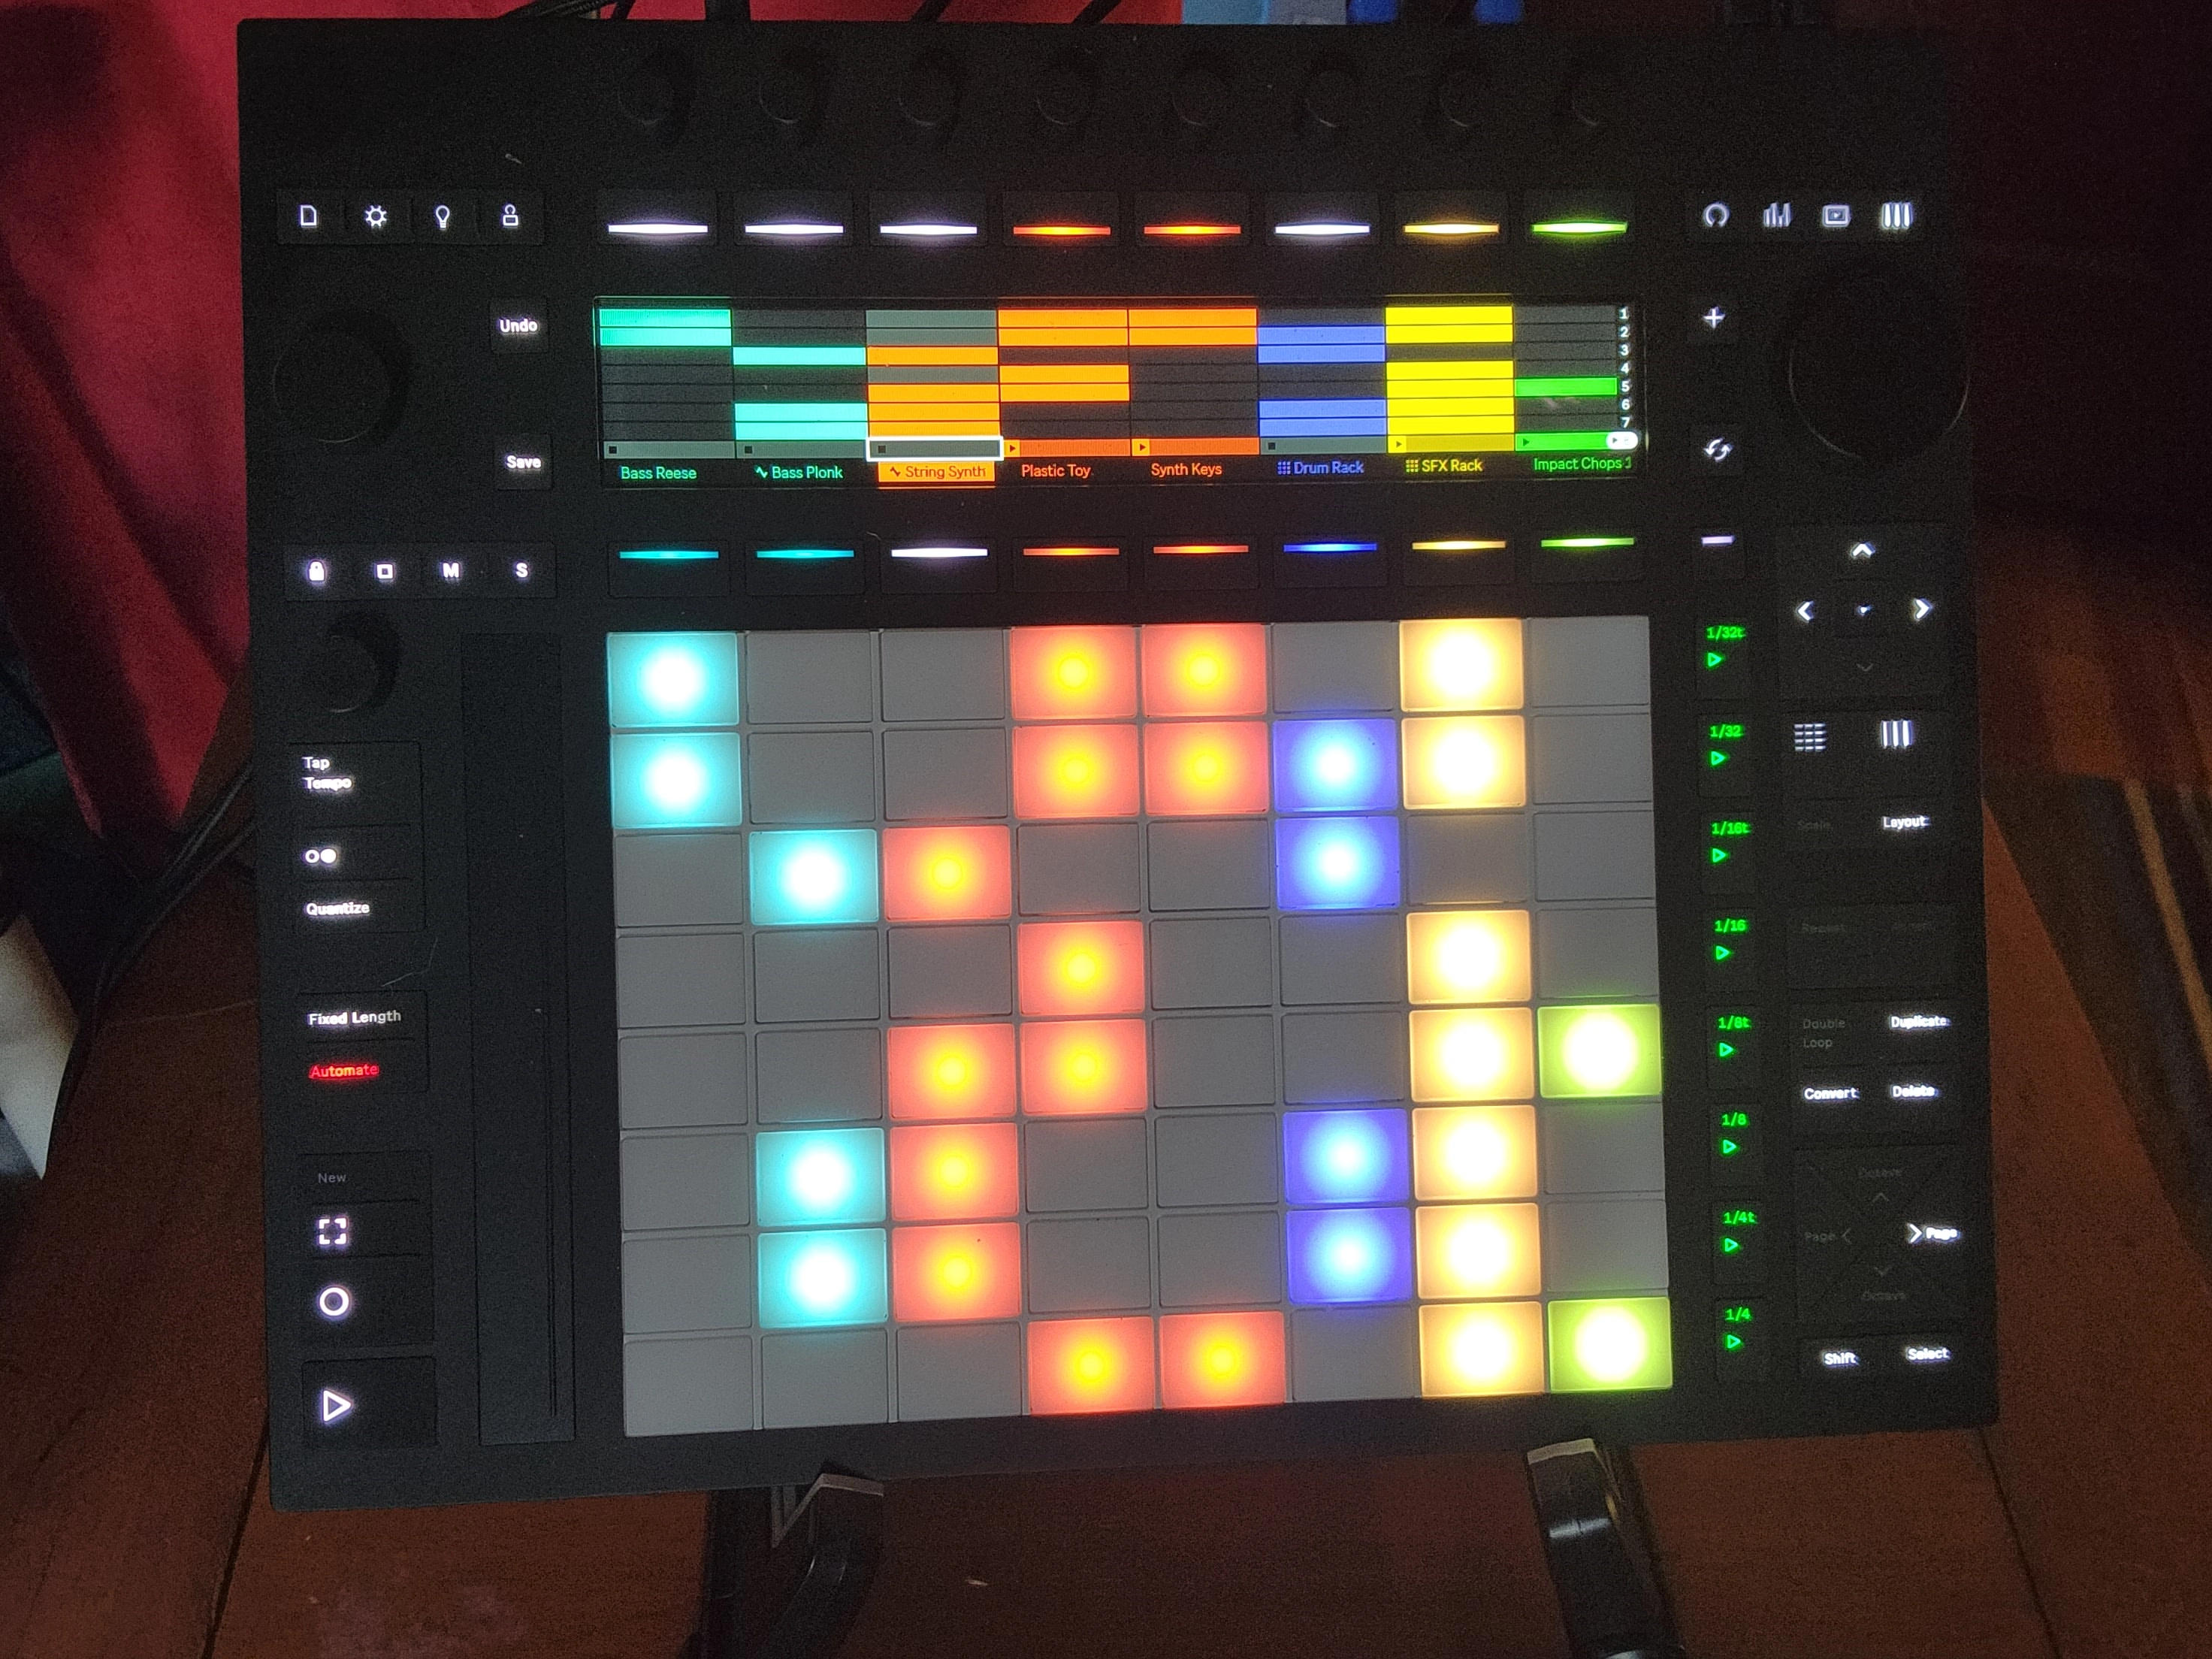
Save The Demo Set
Press Save as soon as it loads, so you can recall the original Demo Set at any time.
A name is automatically generated for each set when you save it. This is helpful because a computer keyboard is not provided with P3S, and computer keyboards are not recognized by the device. Spelling out file names using the jog wheel is tedious. The automatically generated name consists of several words stuck together, like "Embellished Disco Turnip," which is cute but problematic: two users who save the same demo set end up with different names for the same set. If you are preparing many songs in standalone mode, the automatically generated names must be changed to keep track of them. For me, the lack of computer keyboard support is a constant irritation.
If you have Ableton Live connected, the demo set will load into it, and you can save the set on your computer. The track lanes are rather narrow; to make them wider, hold ALT when resizing a track lane, and all the others will also resize. This is what you should see after resizing the track lanes:
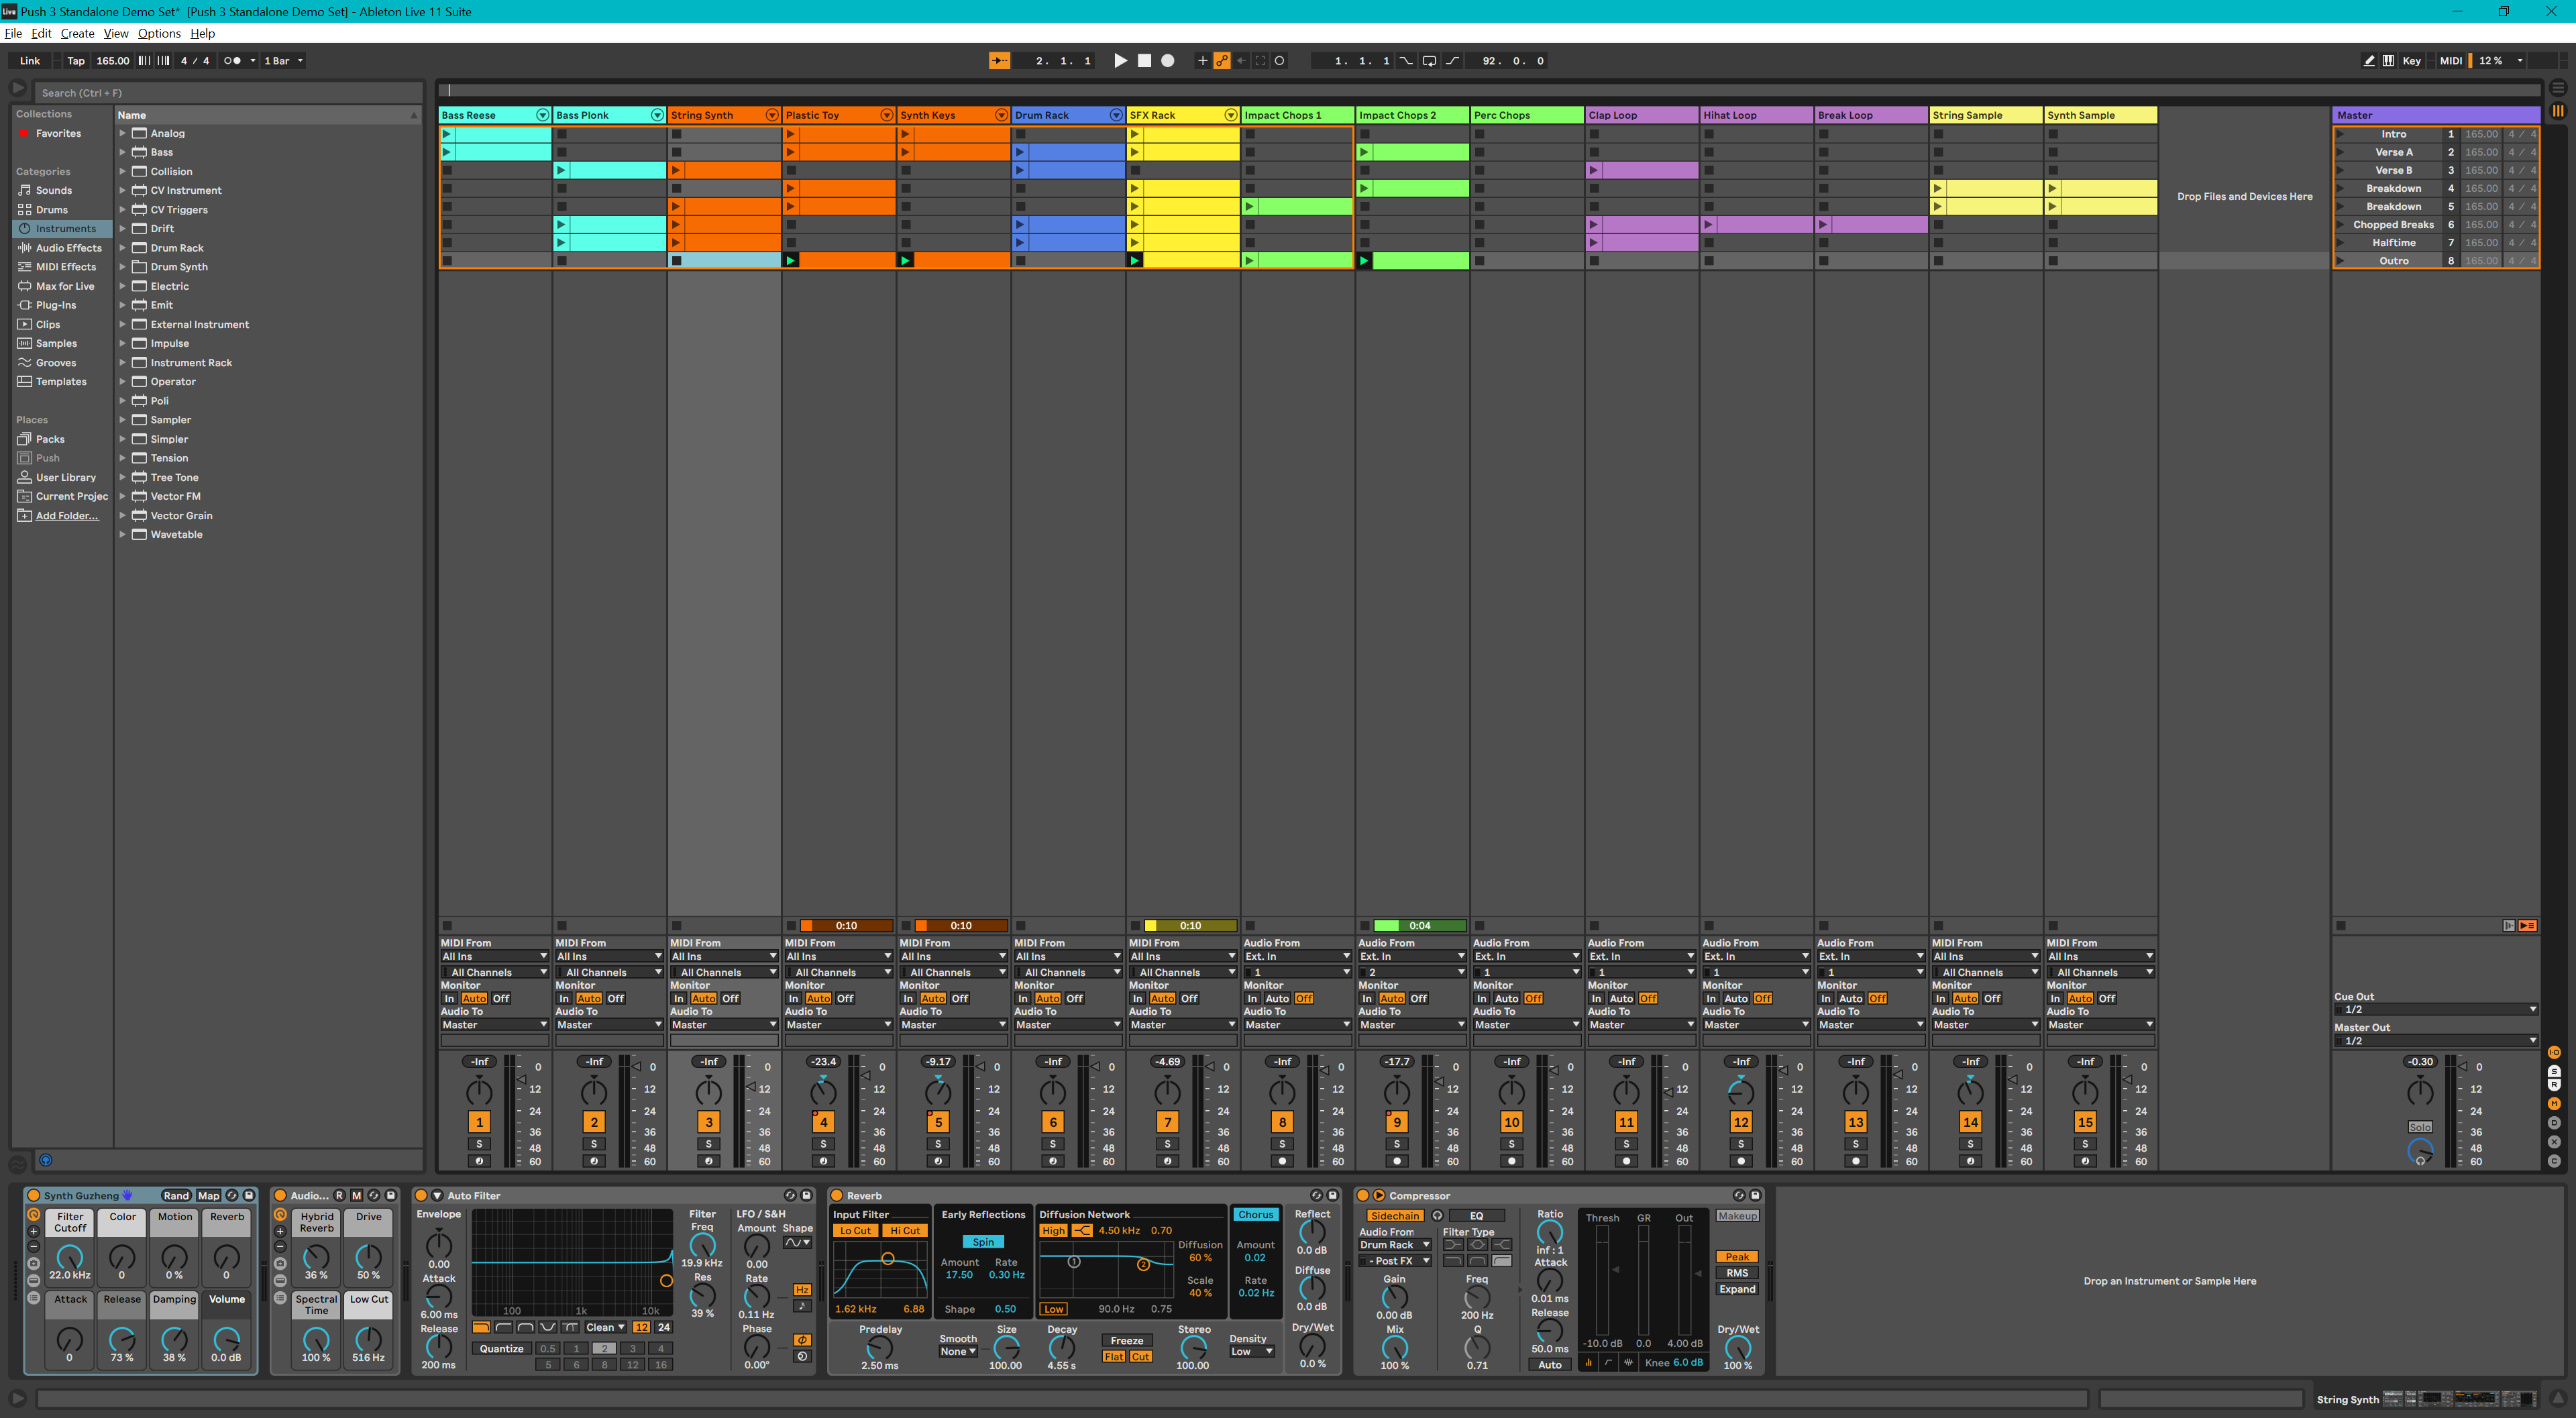
The next few sections are a few things you might want to try using the demo set.
Play Scenes
The demo set has eight scenes, laid out in horizontal rows. Each scene is shown twice: as a horizontal row in the display and as a horizontal row in the 8x8 button matrix.
When the demo set loads, the topmost scene, labeled 1, is selected in the display; this scene is named Intro.
Scenes are comprised of clips, which might be audio samples or MIDI notes. Clips are arranged in vertical columns, called tracks. By default, all the clips in a track share the same audio settings.
Press the jog wheel down to play all the clips in the selected scene (horizontal row). The scene will start to play at the beginning of the next bar.
Turn the jog wheel slightly to select another scene; scene 2 is named Verse A. Notice that the name of the selected scene is briefly displayed after you turn the jog wheel. Play it by pressing down on the jog wheel again.
Another way to play all the tracks in a scene is to press one of the scene buttons immediately to the right of the 8x8 button matrix. You can recognize a scene button because it has a green arrowhead on it that points to the right. Scene names and numbers are not shown on the scene buttons.
Scene buttons also double as repeat interval buttons, which is why you also see green fractions on the scene buttons. Don’t worry about repeat intervals just yet.
While a scene is playing, try pressing a lit button from another scene. The clip on the track that was previously playing will stop, and the chosen clip will start playing at the beginning of the next bar. This is because each track (vertical column) only plays one clip at a time.
To stop the set, press the Play button, which is the bottom-left button containing the green triangle. The triangle will change color to white when not playing a scene.
This UI Needs Work
Complex tasks are best performed when working with a user interface that presents context. Providing context, such as menu breadcrumbs, can be a big help for users.
I spent most of 3 days in the Ableton booth at Superbooth 24 (more on this later). Ableton provided about a dozen P3S devices, and they proved to be a popular attraction.
I gave myself a challenge: whenever a visitor spent a lot of time on a P3S, I went over to their machine right after they left and tried to learn the exact state of the P3S without touching it.
Whenever I could not guess, I would call over an Ableton expert. These were people who were the actual Live programmers, or trainers, and other expert users with years of experience. More than half the time, they could not figure out the state of the P3S either, so they would perform actions that would back out of whatever operation the previous user had initiated until they were able to recognize the state of the P3S.
Often the P3S had been left in an invalid state; for example, the cursor selected a MIDI note that was outside the loop area, which meant the cursor was invisible. This means the user quietly left in frustration. I learned that many potential users had quietly left the Ableton booth in frustration, and the Ableton employees in the booth were none the wiser.
I believe that I have proven that my ignorance is not the problem; the P3S just does not provide proper clues to the user regarding its internal state.
The menuing system should always display context, which might be implemented
as breadcrumbs.
The Help button could be extended to act as a modifier, so detailed
help information could be shown regarding specific controls as well as the
overall state of the P3S. That information is maintained internally but is
not summarized and presented to the user.
I expect that most of the P3S units that have been sold until now just sit on a shelf, unused, merely because the P3S does not have a succinct and consistent means of displaying context.
Here are some references regarding breadcrumbs:
- Breadcrumbs Design Pattern
- Breadcrumbs In Web Design: Examples And Best Practices
- Breadcrumbs: 11 Design Guidelines for Desktop and Mobile
- The Complete Guide to UI Breadcrumbs
- React Breadcrumbs component - Material UI
- The Ultimate Manual for UI Breadcrumbs
- Breadcrumbs UX Navigation – The Ultimate Design Guide
Updating
After the tutorial, the Push displayed “Update Push to use the latest features. To update, go to the Setup menu, connect to Wi-Fi and then navigate to the Software tab.”
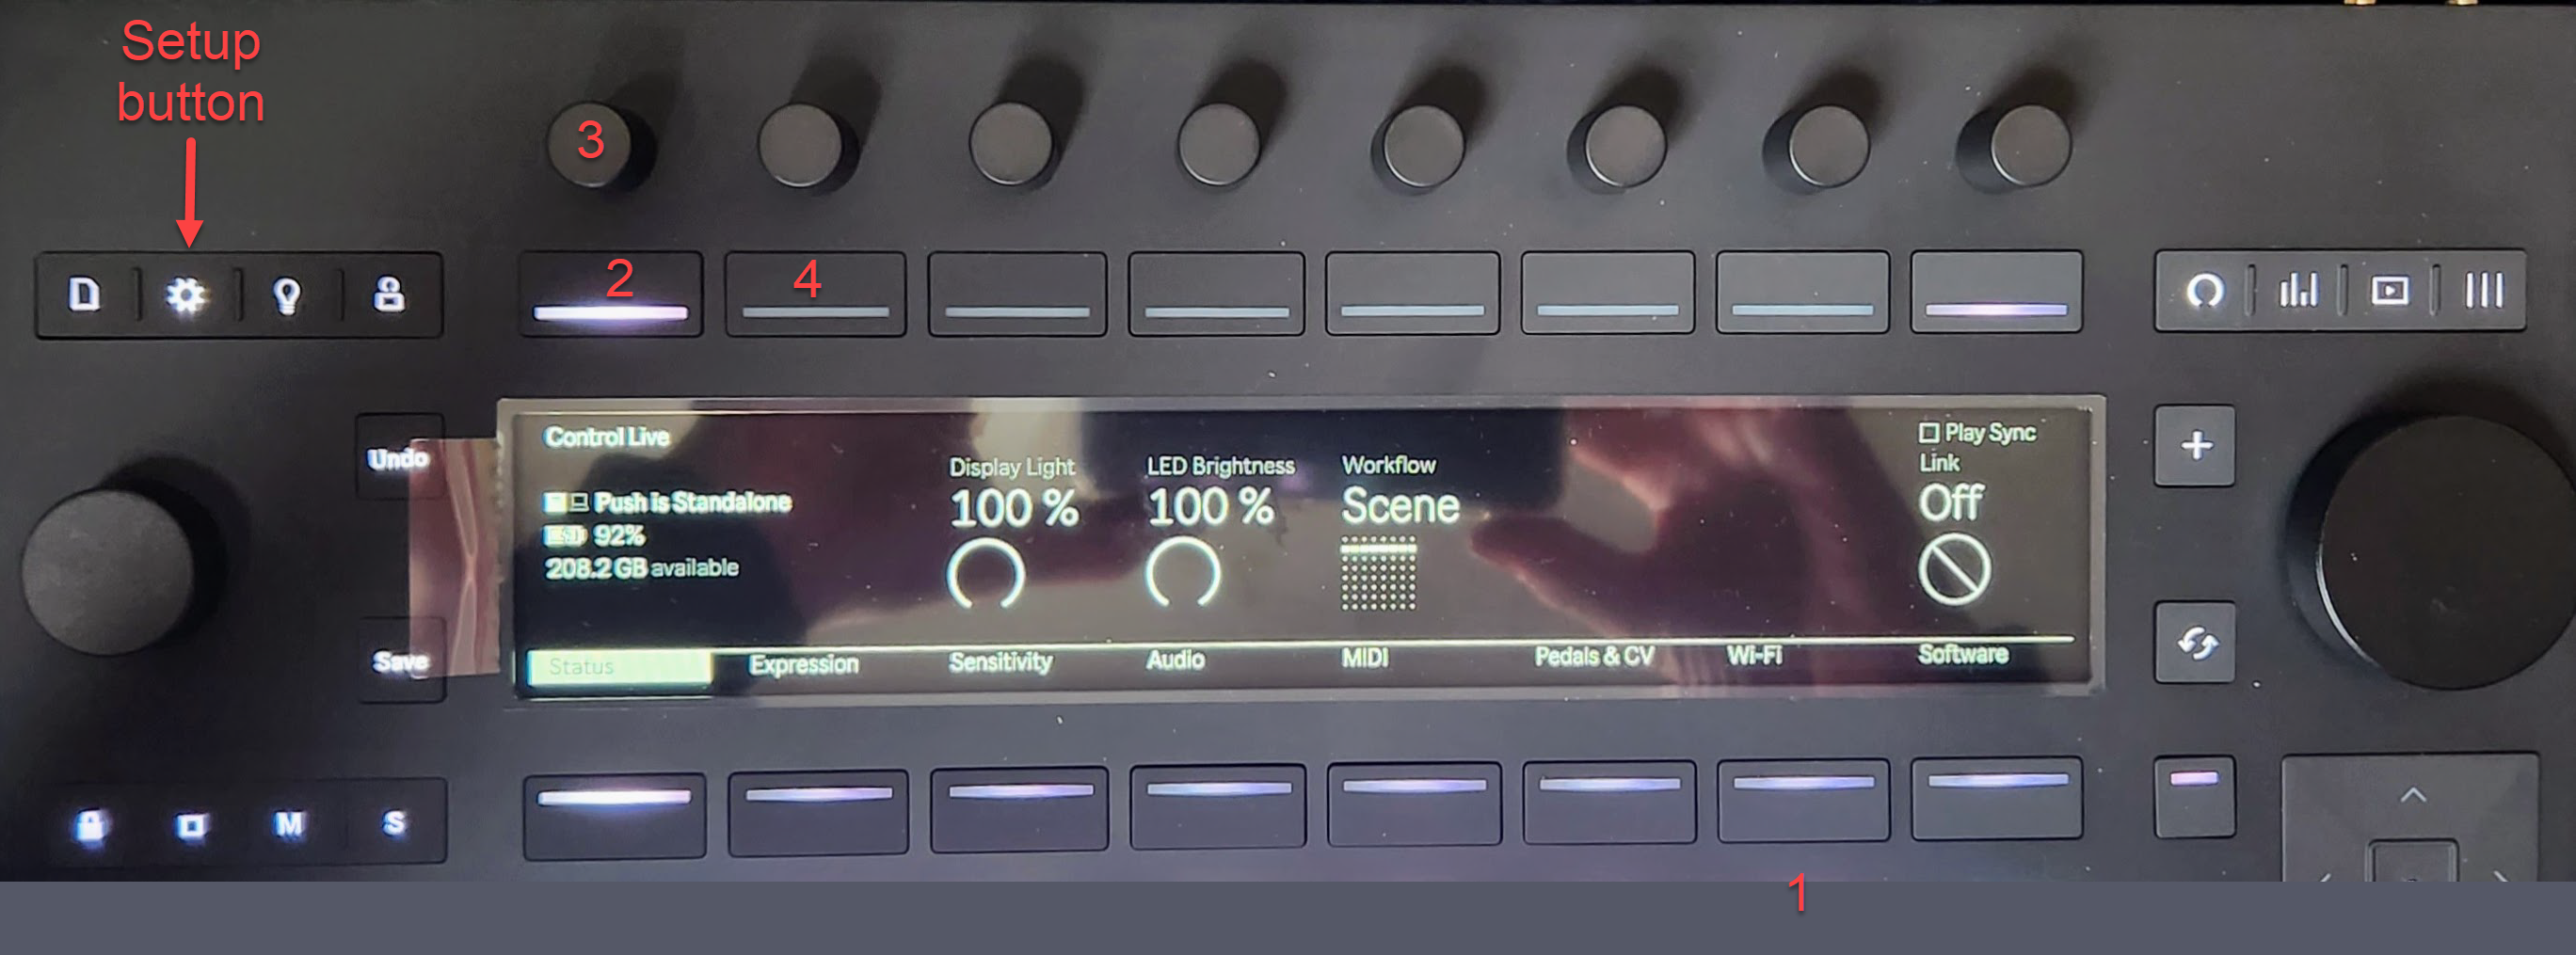
Before I could follow those instructions, I had to find out how to reach the Setup menu. After looking around for a bit, I saw a gear icon on a button on the upper left of the Push.
When I pushed it, the display showed many things, but did not self-identify with the word ‘Setup’ anywhere on screen. I found myself wondering, once again, ‘What am I looking at?’ If the UI had displayed contextual information, such as breadcrumbs, this would not have been a problem.
Connecting to Wi-Fi
I found this procedure to be non-intuitive. The photo above is labeled with the step numbers to follow to connect to Wi-Fi.
The Wi-Fi menu item is only displayed when P3S is in standalone mode, which means if Ableton Live is controlling a P3S, this menu item will not be seen.
- Press the button under the label Wi-Fi.
- Press the button above Wi-Fi off to turn on Wi-Fi.
- Wait while the list of Wi-Fi networks populates, then turn the knob above the list of Wi-Fi networks to select the desired Wi-Fi SSID.
- Press the button over the Connect menu item.
Now an unlabeled list of the alphanumeric characters appears. You are expected to realize that this is where you enter the Wi-Fi password.
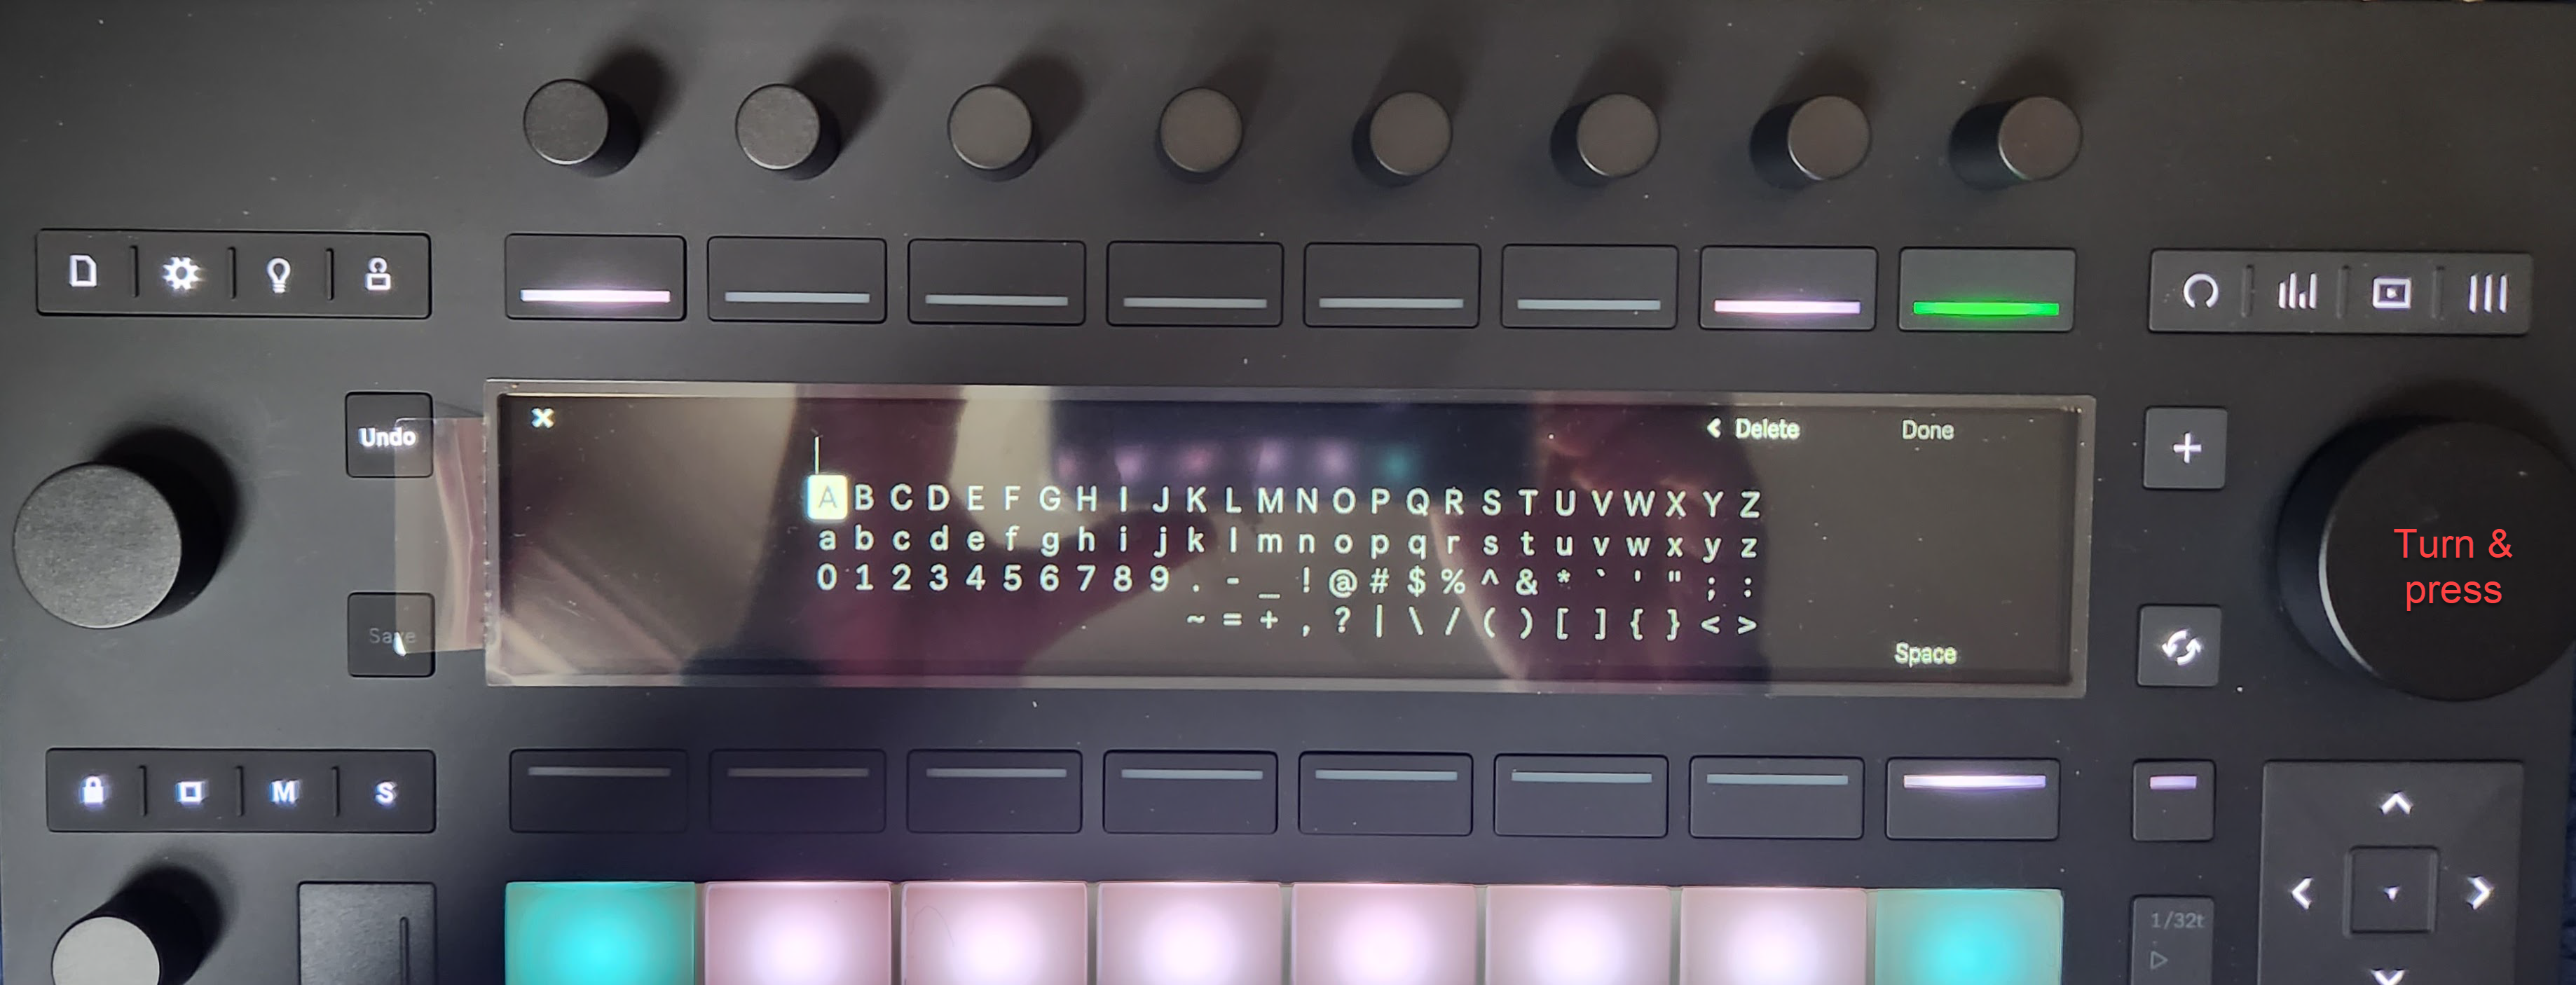
I connected an external USB keyboard, but the P3S did not recognize it. Keyboard support could easily be provided, and it should be.
The big round knob to the right of the display is used for that purpose. Turn it to select a character you want to enter, then press the round knob to enter it. There are buttons labeled Space and < Delete if you need them.
Press the button glowing green over the Done menu item when you have finished typing in the password.
If you typed in the password correctly, the SSID you attempted to connect to is shown at the top of the list of SSIDs in green.
Solved: Large DC Pulses
The following section (Update 2024-05-24) was written after owning the P3S for 6 months. The section after that (Updating the Firmware) was written when I first received my P3S. I presented the information this way because I wanted readers to know that the problem described in the older section has been solved, and to understand how they can update their P3S with firmware that implements the solution. I hope readers do not find the out-of-order presentation of information confusing.
Update 2024-05-24
I met with an Ableton programmer at Superbooth 24. He told me that he had personally addressed the DC pulse issue and that the fix would be provided in a firmware update. Other Ableton employees confirmed that the firmware update should either have been publicly released recently or would be soon. After arriving back home, I found that an update to v1.2.5 was available, and an update to an undisclosed version of the P3S internal Live v12 was also available.
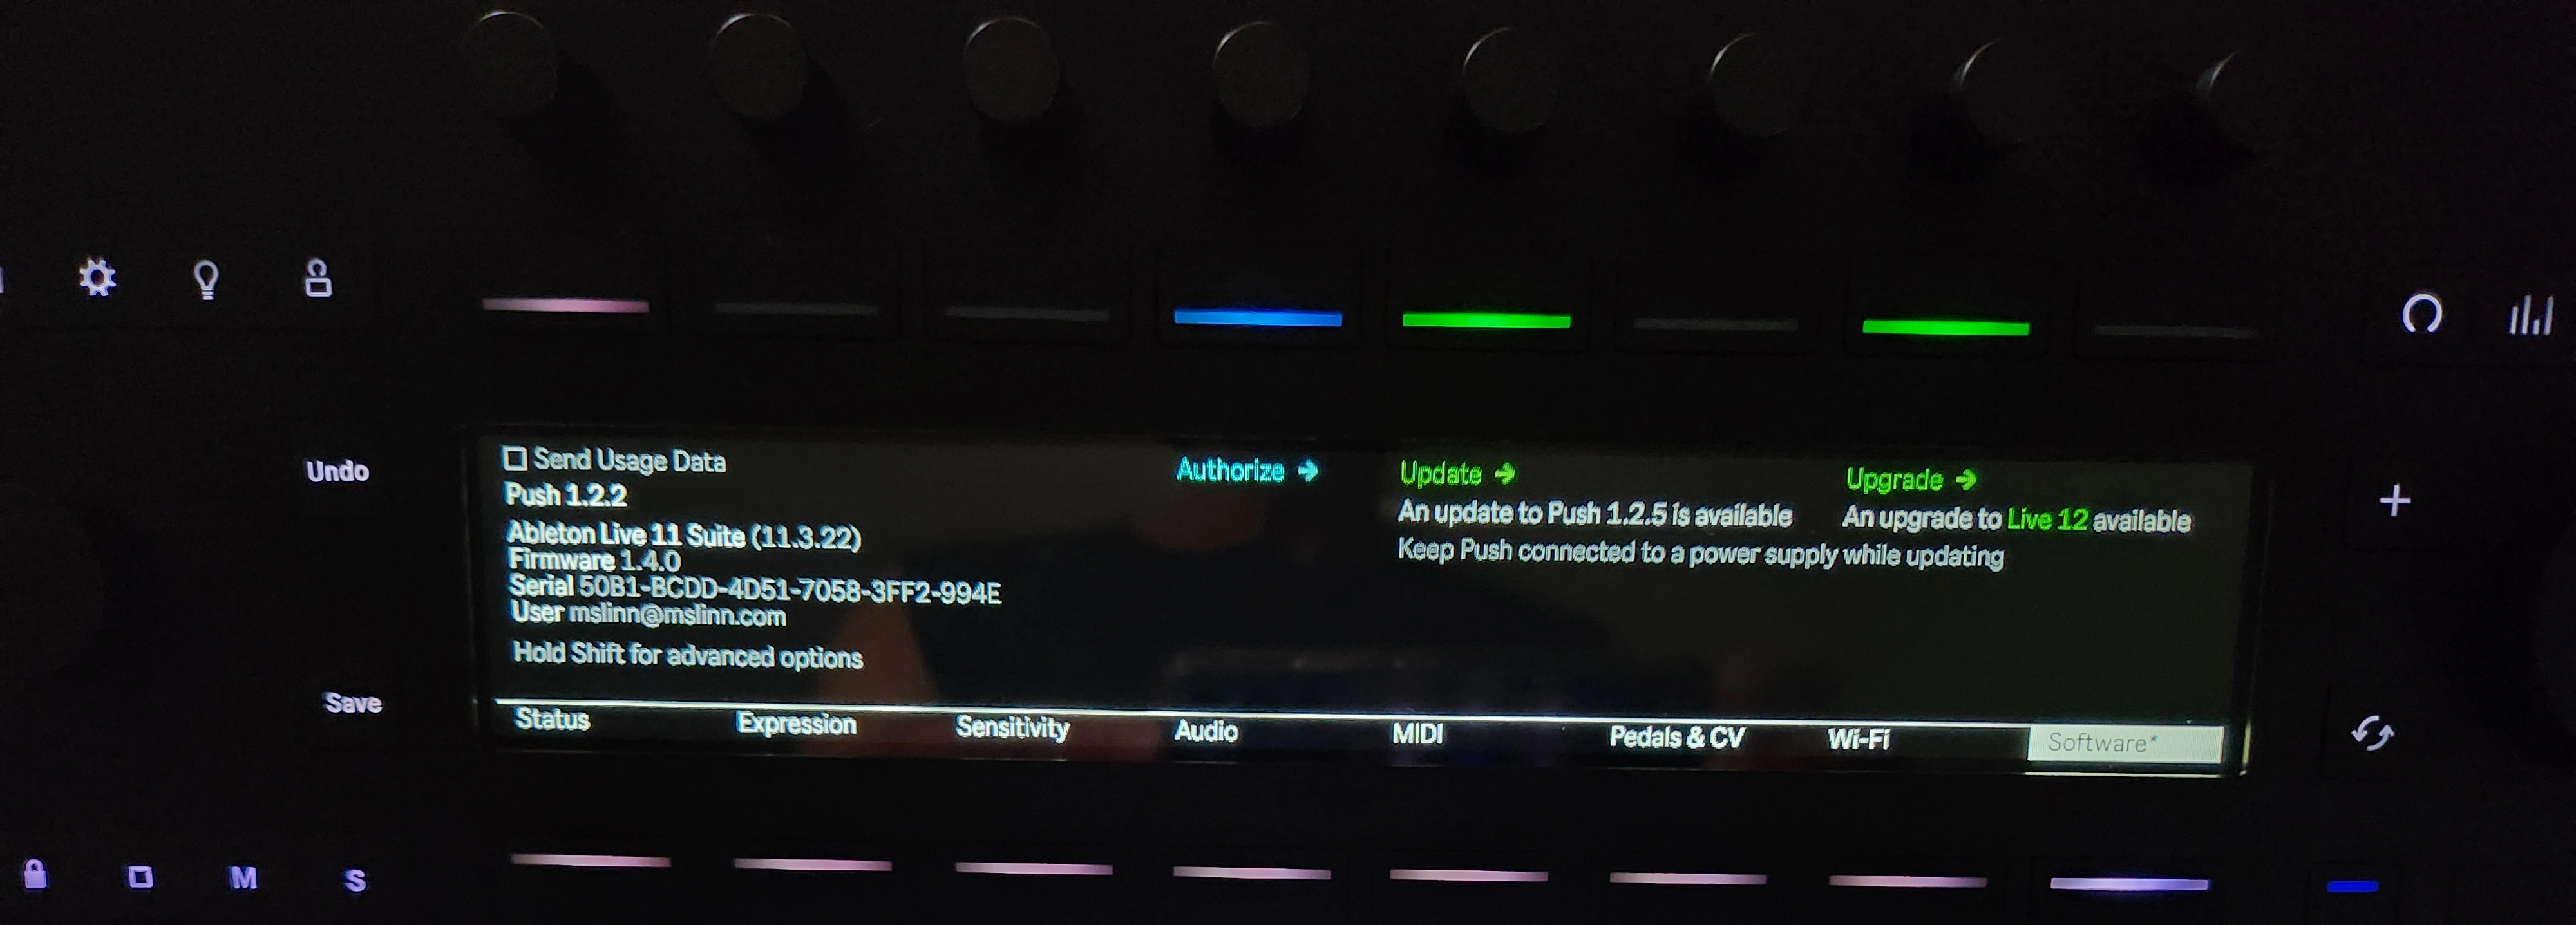
Firmware updates are not functional until after the P3S has rebooted several times. For a P3S that has firmware older than v1.2.5, this means many large DC pulses are emitted during the firmware upgrade process. Each DC pulse causes a loud boom to be heard if speakers are connected to the audio output jacks.
💥After the firmware update, the DC pulses that caused the loud booms were gone. The next section describes the problem that was solved with the firmware update. You should follow the steps described in that section to update your P3S; do this without connecting the TRS audio outputs.
I also upgraded to Push 3 v2.0.2, which apparently installs a version of Live 12.
After the update, I found that the main output level had to be set at -8.3 dB, or the output signal would be badly clipped. I am unsure at this point if this represents a change or not.
Updating the Firmware
Now that my Push was connected to Wi-Fi, I pressed the button underneath the Software* menu item. The display looked like this:
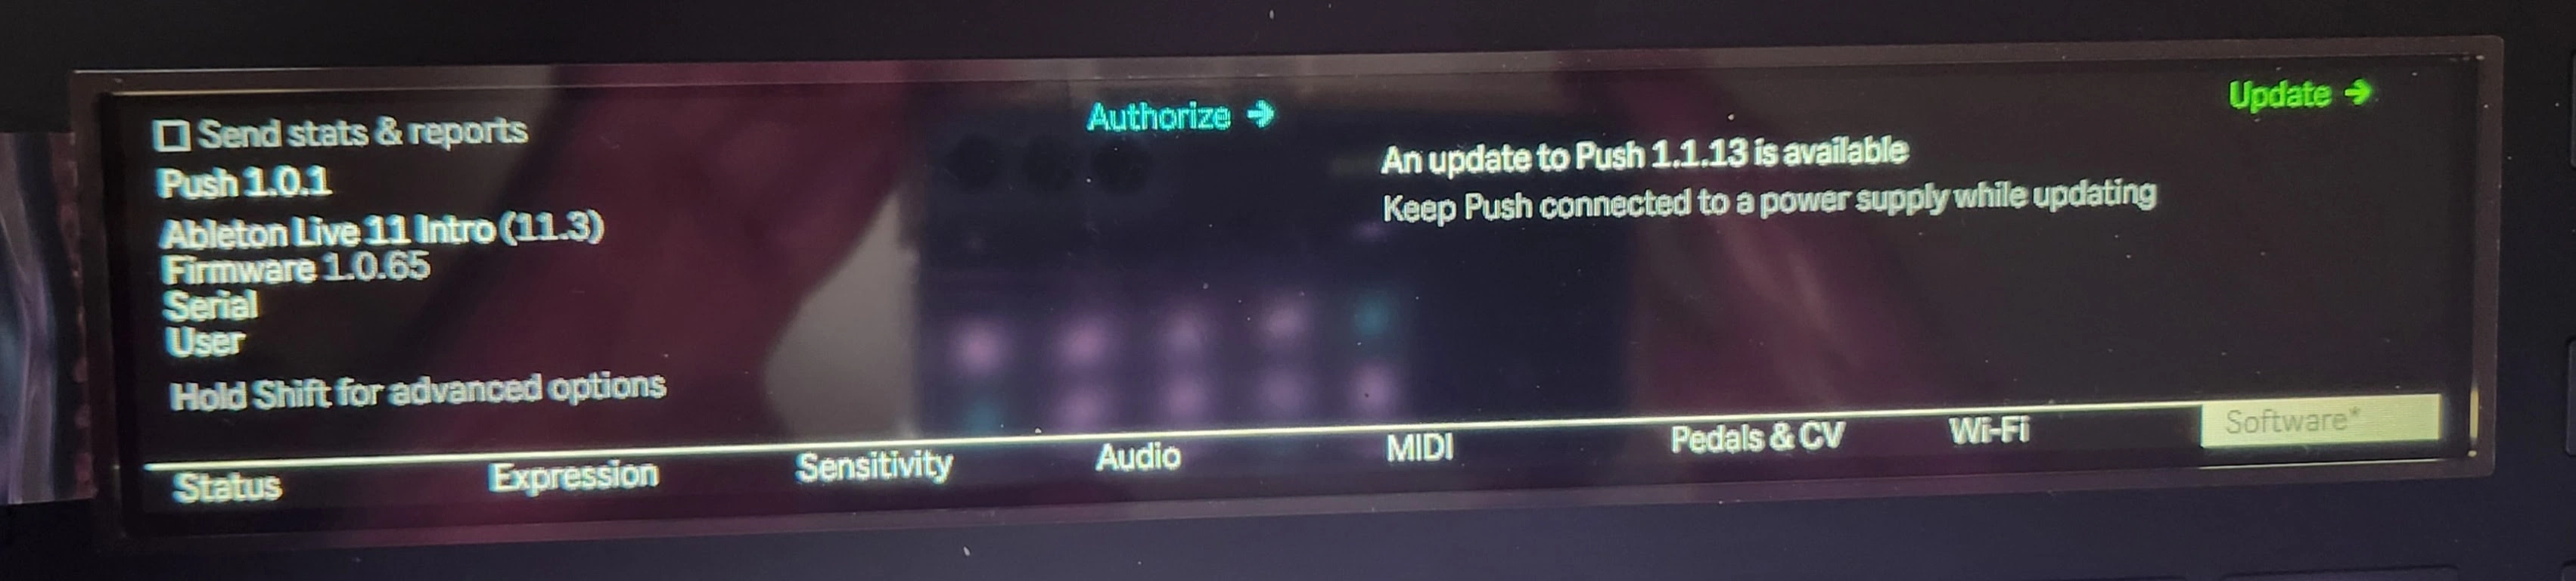
I thought I should update the unit before authorizing it, in case the updated device might authorize more reliably. I pressed the Update button, and in a few minutes, the device updated.
The Push went completely dark for about 15 seconds after updating, then the message “Updating firmware, please wait” appeared. After about 3 seconds, the message “Update finished. Please turn Push off and on again.” appeared.
💥A P3S emits large DC pulses through its two 1/4" TRS outputs whenever it is turned on and off. If you connect P3S audio via these outputs, be sure to turn down the audio system before updating P3S, and before turning it on or off.
💥I had to hold the power button down for a few seconds before it asked me if I wanted to turn it off. When it turned off, the stereo speakers went “boom”, twice. The P3S emits large DC pulses through the 1/4" outputs each time it turns off.
💥When I turned it on, the speakers were silent. The message “Updating the firmware” appeared for about 10 seconds, and the speakers again went “boom”. The message “Updating the firmware” appeared again for several minutes, and the speakers went “boom” twice more. The message “The firmware update was successful” appeared, and the speakers went “boom” three more times.
💥
The P3S emitted a total of eight large DC pulses during the update
process.
Audio devices should not behave this way!
I went back to the setup menu and saw the following versions:
- Push was now v1.1.13
- Firmware was now v1.0.71
- Ableton Live Intro was v11.3.13
Serial was blank, and User was blank.
No DC pulses are emitted through ADAT because that is a fiber optic medium.
Authorizing
I already had an Ableton Live Studio license installed on two computers.
I pressed the Authorize button on Push and saw this message:
http://push.local/authorize
– From
The P3S did not respond to the web browser.
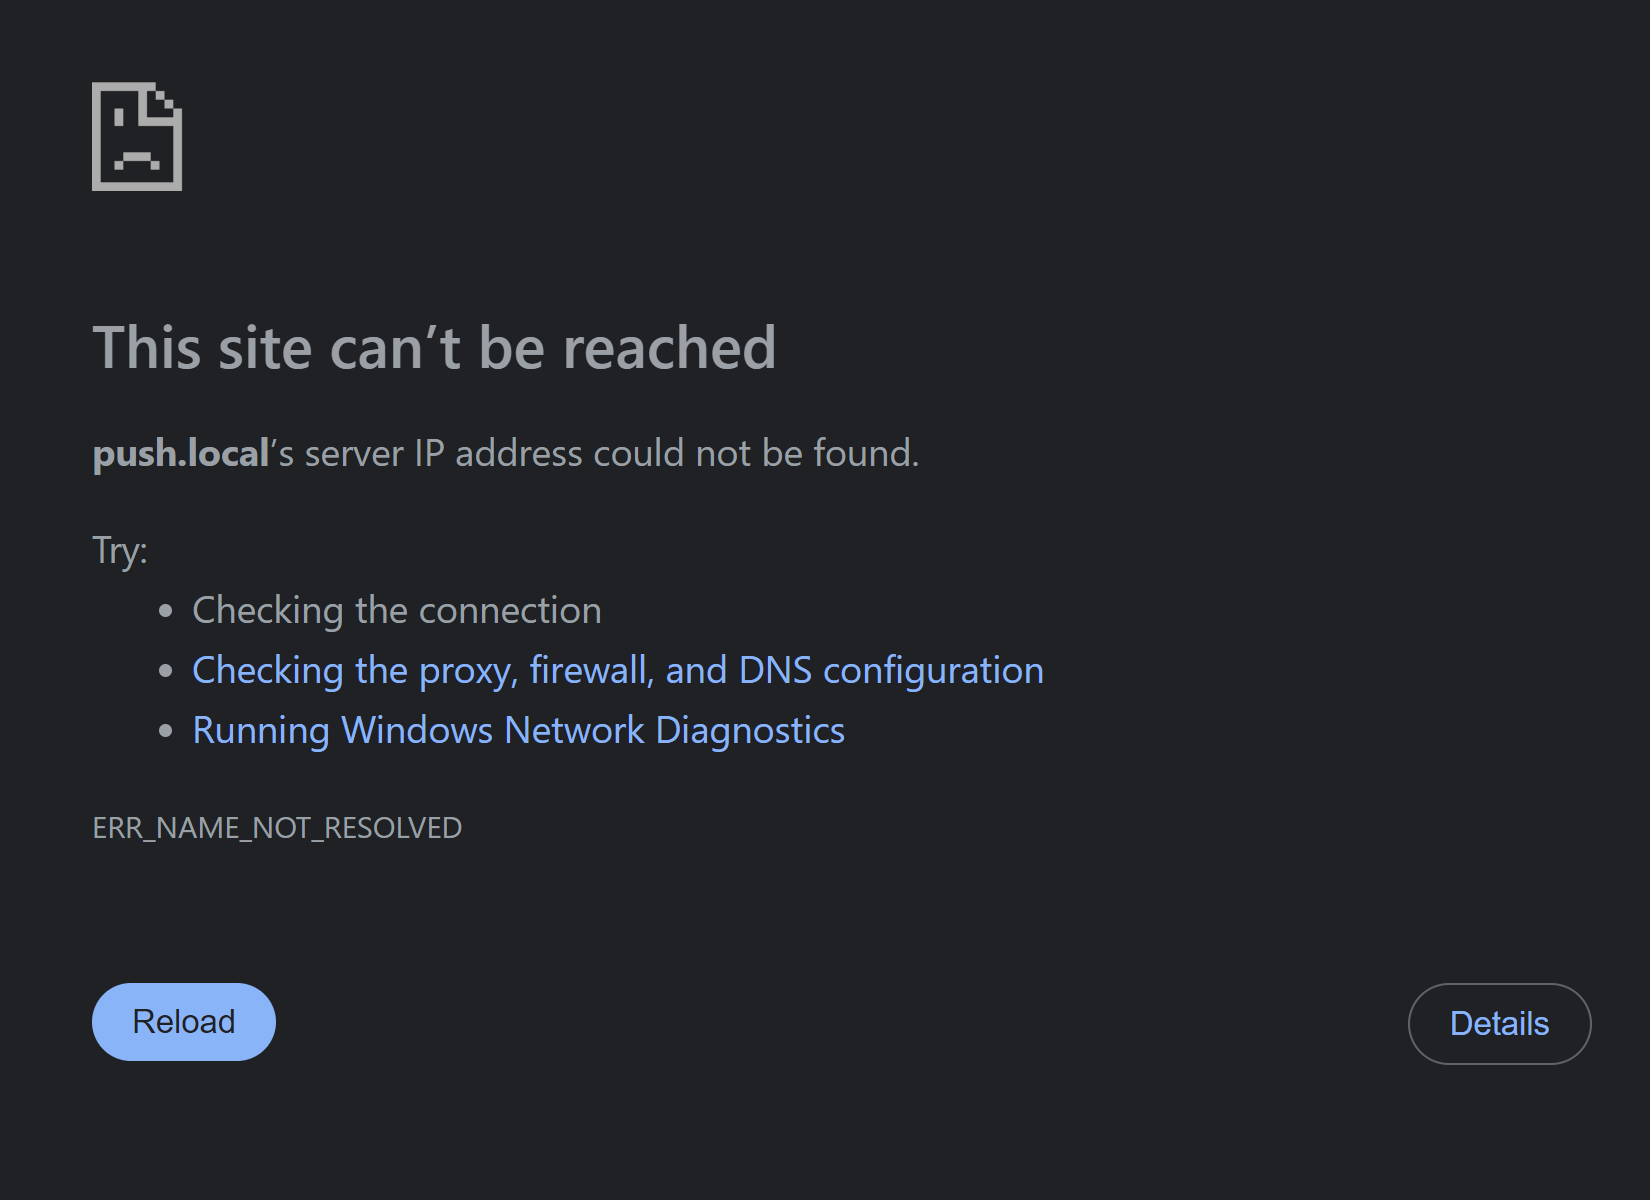
I used Fing to learn more. Fing seems to
believe that the P3S runs Microsoft Windows, but others report Linux. Fing
showed me that my P3S was at the IP address 192.168.1.175 and had
these open ports:
- 22 -
ssh - 80 -
http
Pointing my web browser to 192.168.1.175 brought up a blank web
page. When I looked at the source, I saw:
<!DOCTYPE html>
<html lang="en">

<head>
  <meta charset="utf-8">
  <meta http-equiv="X-UA-Compatible" content="IE=edge">
  <meta name="viewport" content="width=device-width,initial-scale=1.0">
  <link rel="icon" href="<%= BASE_URL %>favicon.ico">
  <script defer src="https://use.fontawesome.com/releases/v5.11.0/js/all.js"></script>
  <title>Ableton Push</title>
</head>

<body>
  <noscript>
    <strong>We're sorry but the Ableton Push Manager doesn't work properly without JavaScript enabled.
      Please enable it to continue.</strong>
  </noscript>
  <div id="app"></div>
  <!-- built files will be auto injected -->
</body>

</html>
I see from looking at the source code that the favicon had a templating expression,
as if the HTML had not been properly processed:
<%= BASE_URL %>favicon.ico">.
The developer windows for the Chrome and Firefox browsers showed that the only injected content came from browser plugins. Relying on injection is problematic; browsers often change their rules about injected content. Chrome is going through a rather traumatic time in that regard these days. This is proving to be a troublesome engineering decision by Ableton, and I expect that this will be found to be related to the problem I am experiencing.
Awaiting Support
P3S provided me with a bad first-time user experience. I see others have the same problem, while others have been able to get this working. Is it me or the unit?
I submitted a support request. The response was disheartening:
Hi there,
Your request (2844282) has been received by our Support team.
Please note, we are experiencing a very high number of support requests at the moment so likely won't be able to get back to you immediately.
Feel free to browse our Knowledge Base or explore our Learning content:
www.ableton.com/en/help/We'll do our best to get back to you soon. To add additional comments, just reply to this email.
All the best,
Ableton Support – From
The next day, I got the following response. I had sent a link to this article in my request. Clearly, it had not been read.
We're sorry to hear you have encountered this Push 3 (standalone) issue and would like to help you resolve it!
- Please first make sure that the unit is set up properly:
- Then, please try the troubleshooting steps outlined in this article:
- If the problem is ongoing, please test using a Hotspot (if you have access to one using your phone) or set up an Ethernet connection with your Push 3, as explained here:
We hope this helps!
If the issue prevails despite the troubleshooting, please send us a short video that clearly demonstrates the behavior and a Push log or a Status Report.
- To send files over 50 MB, use online storage (Google Drive, Dropbox) to generate a link, and paste the link into your reply.
Trying Another Computer
I decided to try with another computer that had Ableton Live installed.
This computer had a wired Ethernet connection.
Using this computer, I was able to connect to http://push.local/authorize, whereupon I saw:
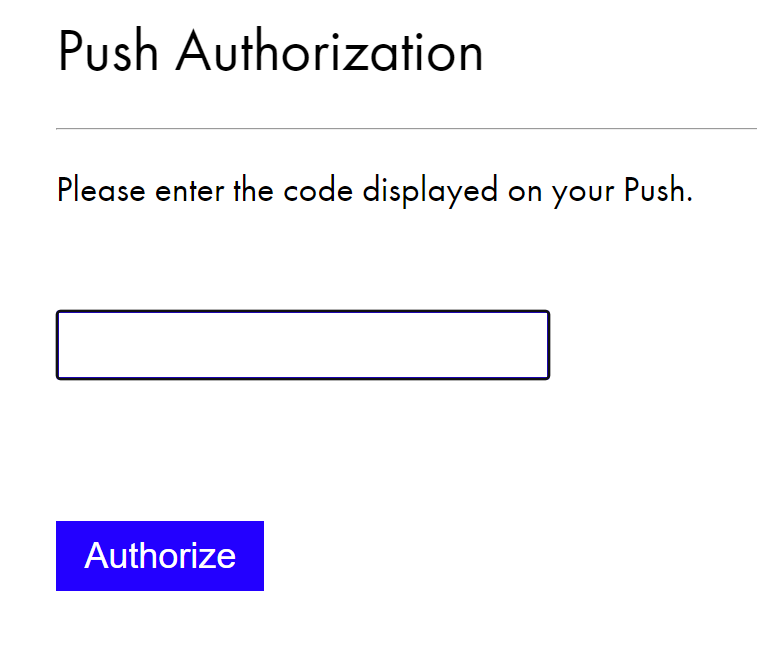
After entering the authorization code, the web browser displayed:
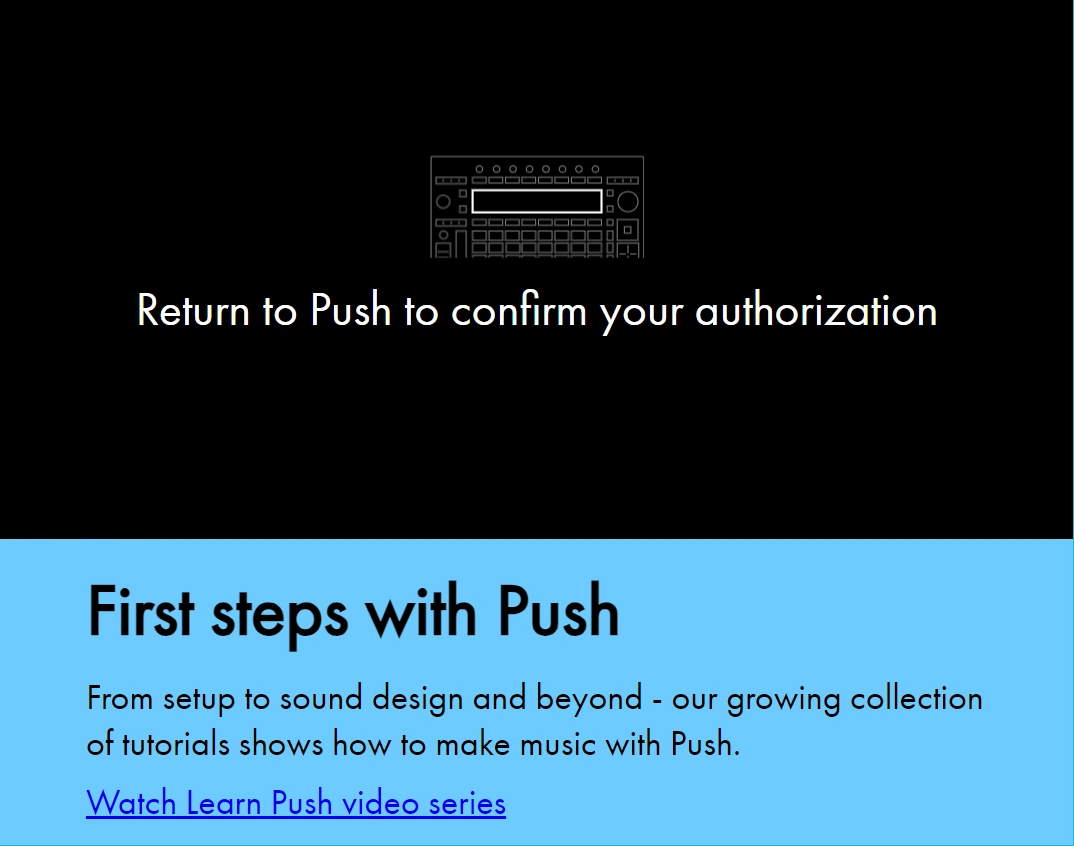
... and Push said, “You have succesfully authorized Live. Thank you, and have fun!’
I also received the following email from no-reply@ableton.com:
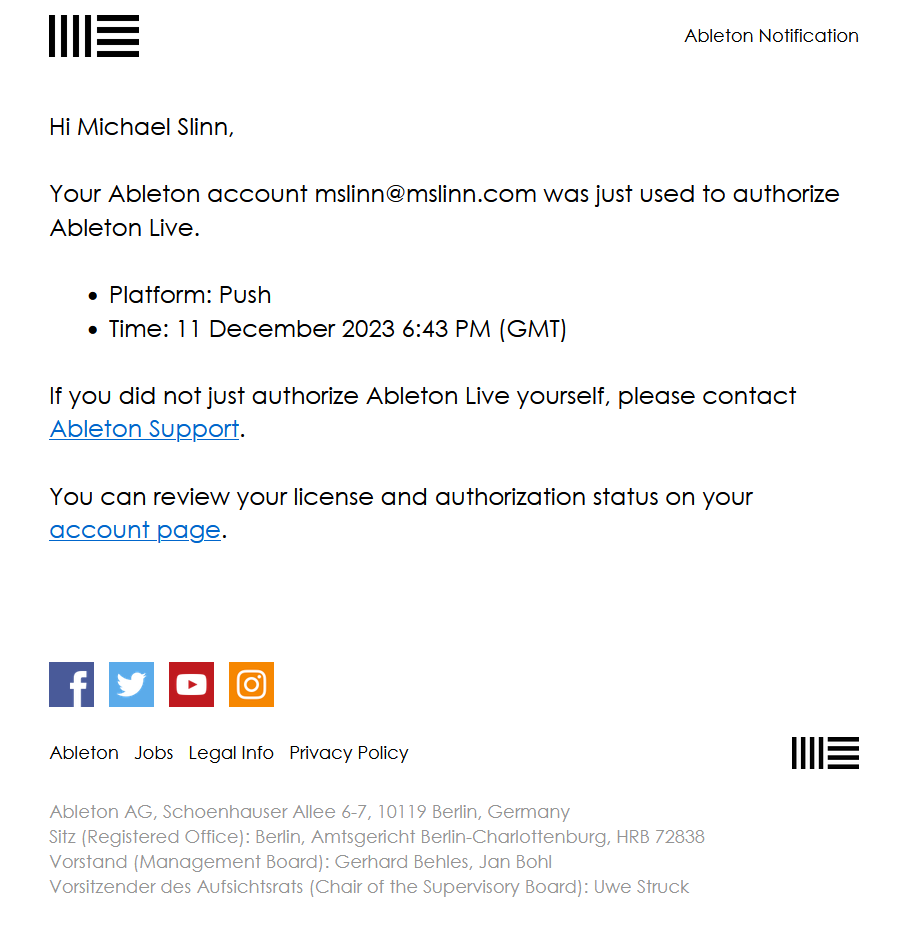
Demo
I needed a way to make the P3S continuously emit sound, so I could troubleshoot audio problems. I eventually figured out two ways of doing this, which I will share with you now.
- Play one of the two provided Ableton Live sets
- Continuously preview one of the many provided samples
There are probably easier ways of accomplishing this. If anyone would share with me quicker and easier ways of generating music from a P3S for debugging purposes, please tell me and I will update this page.
Play An Ableton Live Set
The P3S tutorial provides an Ableton Live demonstration set, whose name is automatically generated once you use it. The lack of a standardized name makes it difficult to refer to when discussing it with others, or finding a saved copy. The first time I saved the demonstration set, its name was Secret Eclipse, and the second time it was called The Possessed Opulence.
Here are the P3S controls shown previously, with red sequence numbers added.
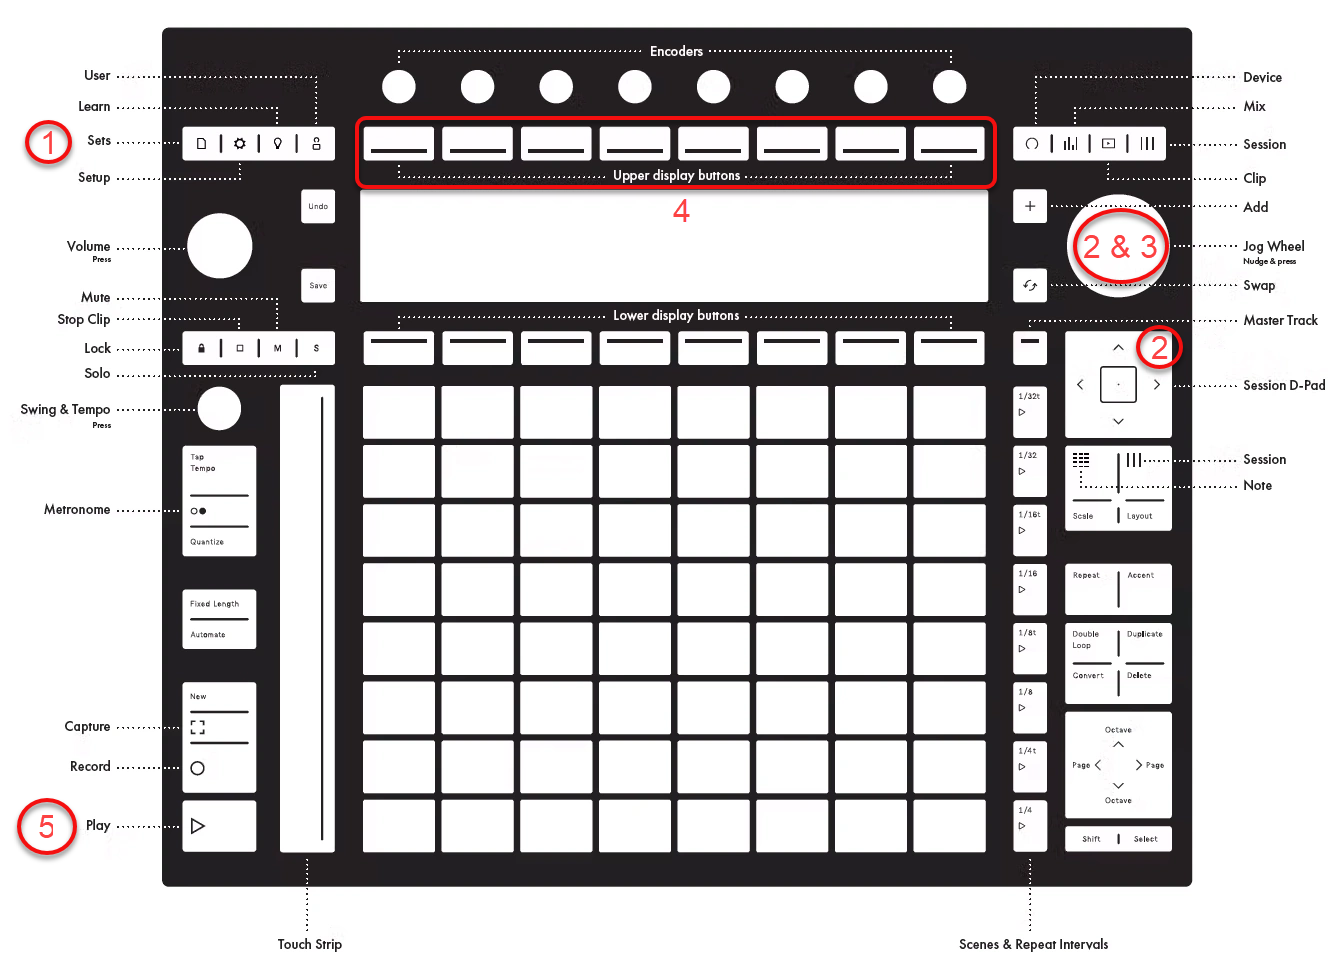
The red sequence numbers in the above diagram correspond to the numbered steps below, so you can follow along.
-
Press Sets. The Set Library is displayed, and the most recently used set is highlighted.

- You can either use the Jog Wheel or the Session D-Pad arrows to highlight the song you are interested in.
- Push down on the Jog Wheel to load the selected Ableton Live set.
- Press on one or more of the Upper display buttons to play a clip in the track underneath.
- The clip will continue playing until the Play button is pushed. The Play button is a toggle; it glows green while playing, and white when silent.
Continuous Preview
Here is a magnified portion of the P3S controls shown previously.
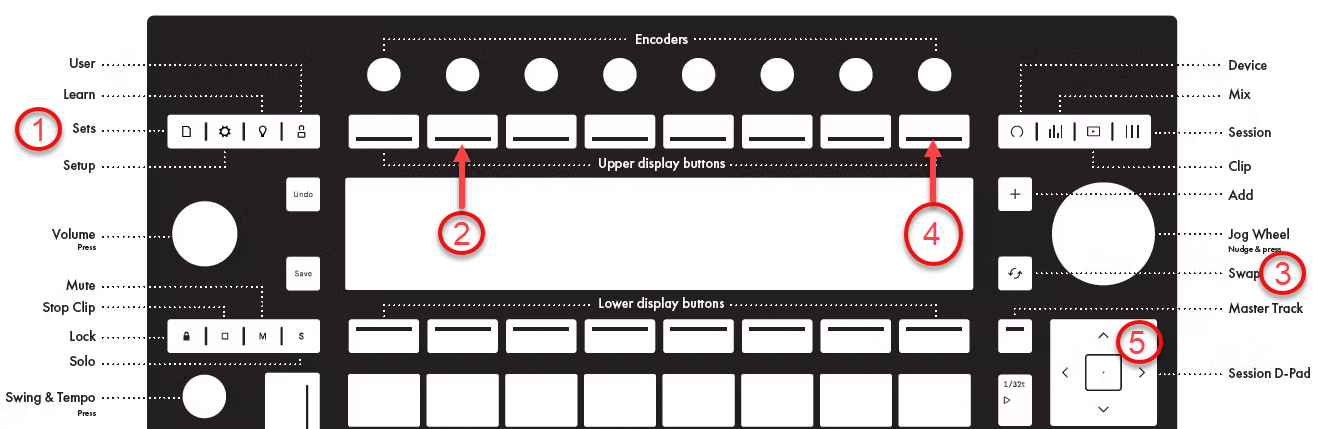
The following numbered instructions correspond to the red numbers in the above diagram.
-
Press Sets. The Set Library is displayed, and the most recently used set is highlighted.
- Press the User display button over the + New Set menu item. A message saying "New set created" will briefly appear.
-
Press Swap.

- The menu item Preview should be brightly lit. Pressing the menu key over it toggles it on and off. You want Preview to remain brightly lit.
- The Collections > menu item should be highlighted, which means it is selected.
- Press the upper display button at the far right, over the Load menu item. This should display a matrix of sound categories, including Ambient & Evolving, Mallets, Strings, etc.
- If you wish, use the arrow keys of the Session D-Pad to select a sound category. If you do not use the arrow keys, the selected category will be Ambient & Evolving.
- Once again, press the upper display button at the far right, over the Load menu item. You will now see a matrix of available sounds. Use the arrow keys of the Session D-Pad as before to make a selection if you desire. The selected sound will now be continuously generated.
- If you use the arrow keys of the Session D-Pad to make another selection, that sound will continuously be emitted.
ADAT
I attended the Ableton Sessions in Montreal on December 12, 2023. At the event, Ben Casey, Local Brand Manager, Ableton, who is based in Brooklyn, New York, demonstrated the following facts about the P3S ADAT implementation to me:
- Out of the box, P3S has ADAT disabled.
- The UI does not make any mention of ADAT; however, inputs 9–16 and outputs 9–16 are ADAT.
- Enabling ADAT output disables the two 1/4" audio output jacks. That is unfortunate and unhelpful.
- The Main output is configured per set; there is no way to globally configure the same main output for all sets. That means you should create a template set with output configured to ADAT; otherwise, every set you create will need to be reconfigured to use ADAT. Also, if you prepare several sets in the studio and then want to take the P3S on stage to perform, you must remember to modify each set that you intend to perform before they will play on the appropriate output. The sets can only be modified after you download them to the P3S, which is a massive PITA. This should be a global setting, like it is in Ableton Live.
Enabling ADAT For A Set
- Open the set that you want to play through ADAT.
-
Press Mix to enter global mix mode.
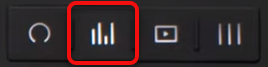
The Mix button

Global Mix mode -
Press Mix a second time to enter track mix mode.

Input settings in Track Mix mode
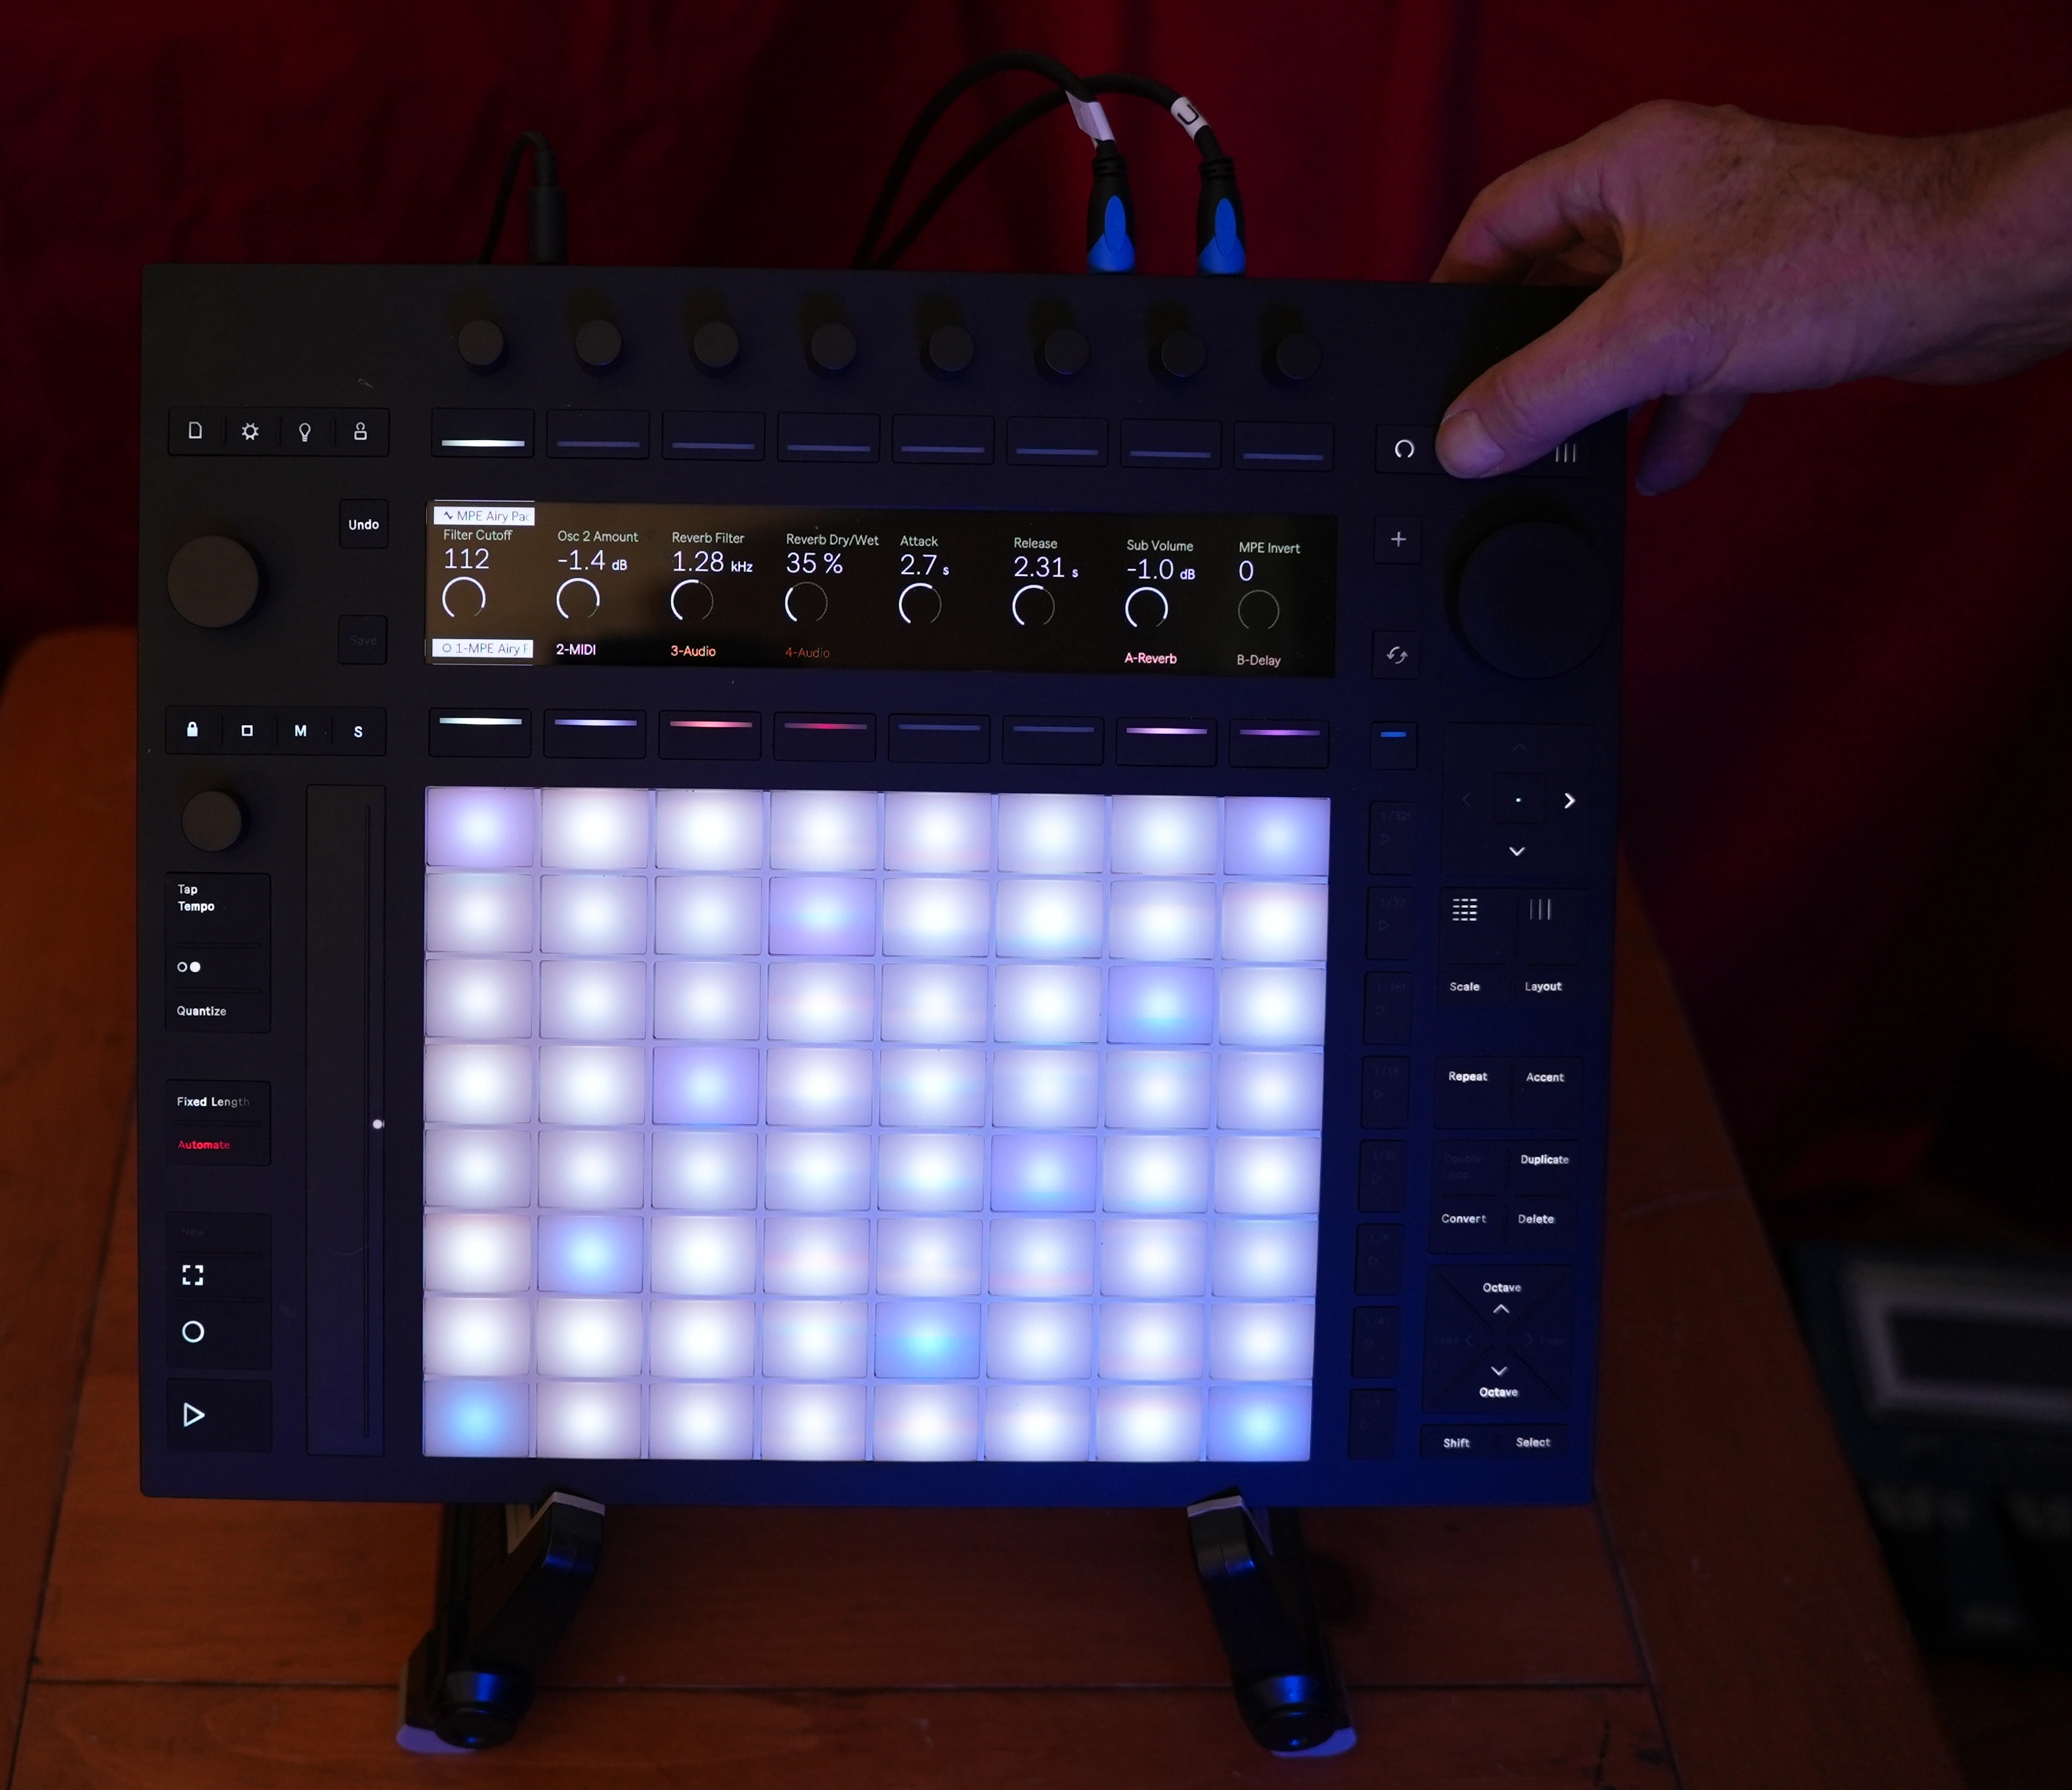
- Press the upper display button over the Input & Output menu item.
-
Rotate the encoder over the upper display button that you just pressed, so the display underneath changes from Input to Output.

Output settings in Track Mix mode - Press the lower display button under 3-Audio so the Output Type choices are displayed.
- Turn the encoder over the button you just pushed until Ext. Out is displayed
- Turn the next encoder to the right so Output Channel changes from 1/2 to 9/10, which is actually ADAT 1/2.
-
Press the Session button to return to your set.
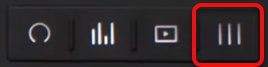
The Session button - Play the set by pressing the Play button with the white right arrowhead, or by pressing down on the jog wheel.
- Input signal should now be present on your ADAT device.
- Save the set by pressing the Save button, or the next time you load the set, it will not play through ADAT.
Connecting P3S to Live
The tutorial videos published by Ableton on YouTube do not properly explain how to connect P3S to Live. The first video is a feel-good overview that is rather vague and does not include many specifics. The second video dives straight into controlling Ableton Live on a Mac, without explaining the details of the connection.
No mention of the Windows interface is made, even though it is quite different.
The Ableton Push manual has a section entitled Connecting Push to a Computer, but it does not actually tell you how to make the connection and does not direct you to a page that explains the process.
The Ableton Live reference manual does not mention Push 3 at all. Instead, Section 31 is about Push 2, which caused me to wonder if this information was relevant for connecting a P3S to Ableton Live. After experimenting for a few hours, I discovered that there were more differences than similarities in this regard.
In a Nutshell
- P3S must be in control mode when cooperating with Ableton Live to make music.
- To transfer files between a computer and P3S, the P3S must be in standalone mode.
This means you cannot control Live with P3S and transfer files at the same time. This is another PITA. I have often wanted to transfer files while controlling Live from the P3S. This restriction should be removed.
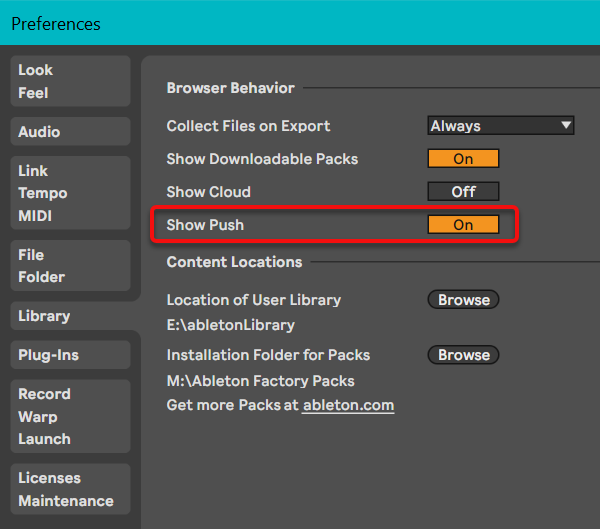
Press CTRL-, to bring up the Preferences dialog, then under Library, ensure that Show Push is enabled.
For some reason, my laptop had this disabled.
Ableton technical support was unaware of this setting until I discovered it and told them about it.
When you first turn it on, P3S will be in standalone mode.
Control Mode
- Connect the computer running Live to the P3S via a USB cable. My laptop has USB-3 type A ports, so I use a USB-A to USB-C cable.
- If Live is already running before you decide you want to include P3S in your session, no worries. In fact, it is a good idea to start Ableton Live on your computer now if it is not already running because Live takes a while to load, and the P3S also takes a while to change modes. Keep them both busy so you do not waste time.
- 💥 If you have speakers attached to the P3S’s 1/4" audio connectors, and you have not updated the P3S firmware to v1.2.5+: mute the audio or you will hear several loud boom sounds in the following steps.
-
You have two options to switch your P3S to control mode:
- Quicker Method
- On the P3S, hold the Shift button and press the User button.
- Slower Method
- On the P3S, press the Setup button.
- The upper-left area of the display now should contain the phrase Push is Standalone.
- Press the lower display button under the Status menu item so the menu item highlights.
- Now press the upper display button immediately above, labeled Control Live.
- Quicker Method
-
At this point, if you look at the P3S display, you might not realize that you just need to wait 10 seconds or so.
P3S does not suggest you wait; instead, it immediately presents two different options in a confusing way.
However, if Live is already running and connected via a USB cable to P3S,
the following message will display for several seconds,
just long enough to confuse you, and then it will load the Live project and be ready for use.
The confusing display message has two parts:
The upper-left corner of the display will say Standalone. Do not press the menu button above this menu item now because that will keep the P3S in standalone mode, or switch it to standalone mode. The P3S must be in control mode to make music with Live.
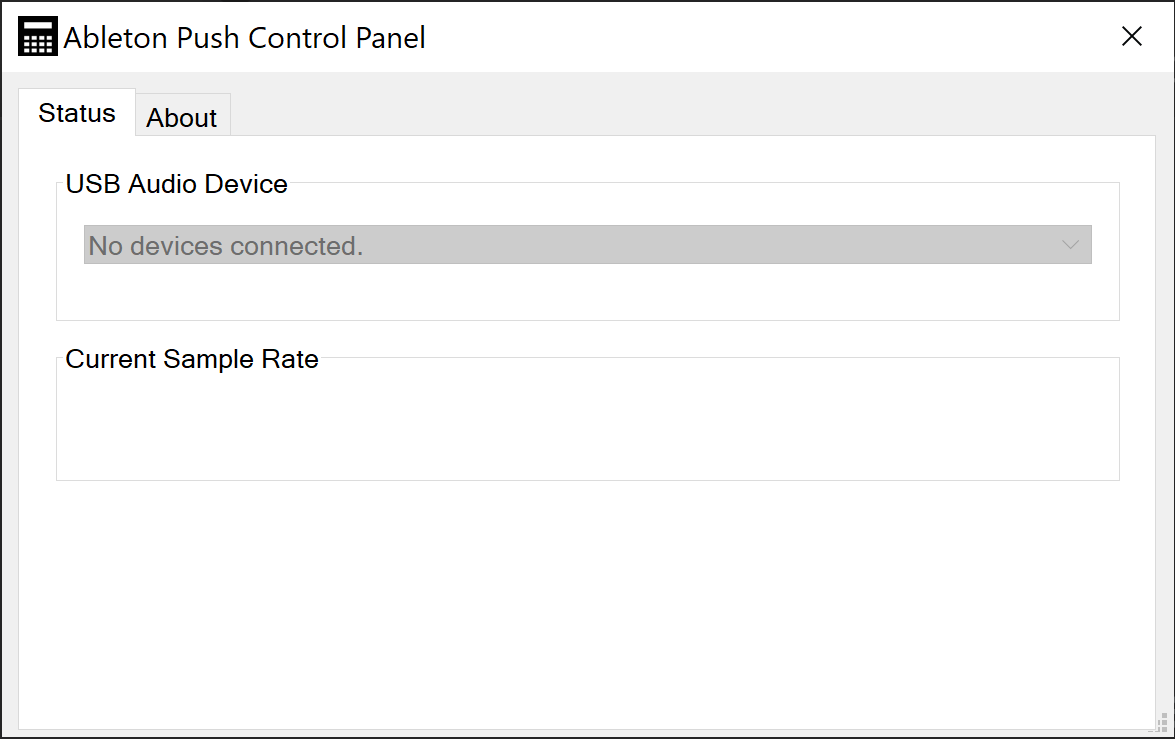
The P3S display will also say, "Connect Push to a computer and open Live to make music". This is supposed to inform you that all you need to do is start Ableton Live on your computer. However, if your computer is already running Live, just wait for the handshake between the P3S and Live to complete. - During the Live startup sequence, the Push Control Panel will change, so the displayed USB Audio Device changes to Ableton Push 3 Audio (xxxxxxxx), where xxxxxxxx is the Push serial number. Your audio speakers will also receive a large DC pulse, unless they are connected via ADAT, or you updated the P3S firmware to v1.2.5+.
- Restore the speaker volume.
User Mode
A third Push mode, user mode, appears to be a subset of Control mode. If you do not configure user mode, custom MIDI mapping on the P3S is impossible.
Live Audio Preferences
The following is not properly described in the P3S manual or the Live manual.
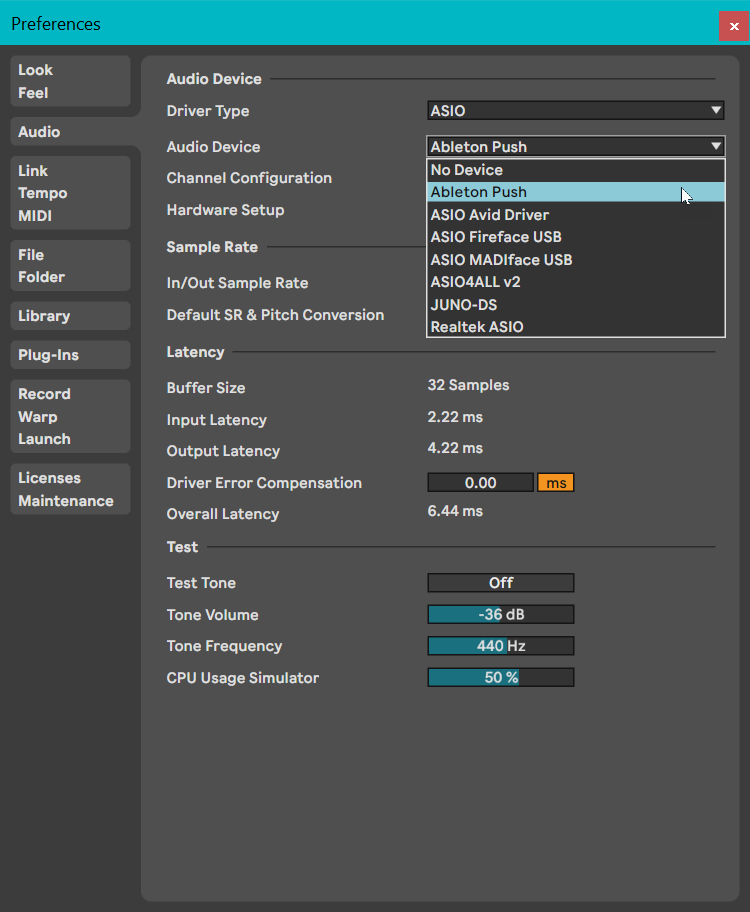
The P3S acts as an ASIO device, so select ASIO as the Driver Type.
Select Ableton Push as the Audio Device.
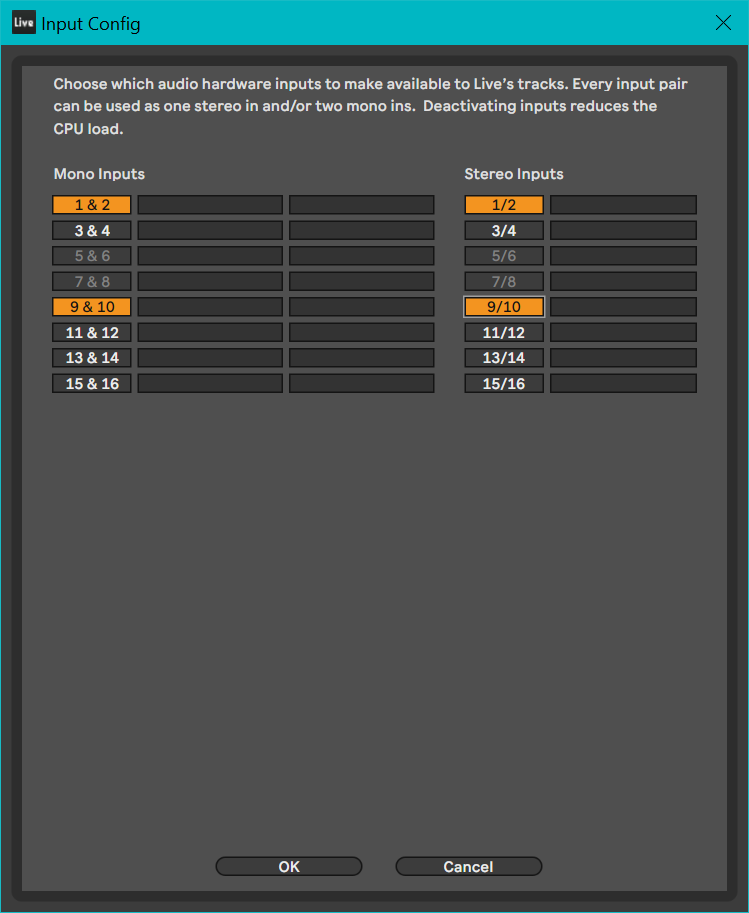
Pressing Input Config displays a window in which ADAT 1/2 inputs can be enabled; however, they are labeled as inputs 9 & 10.
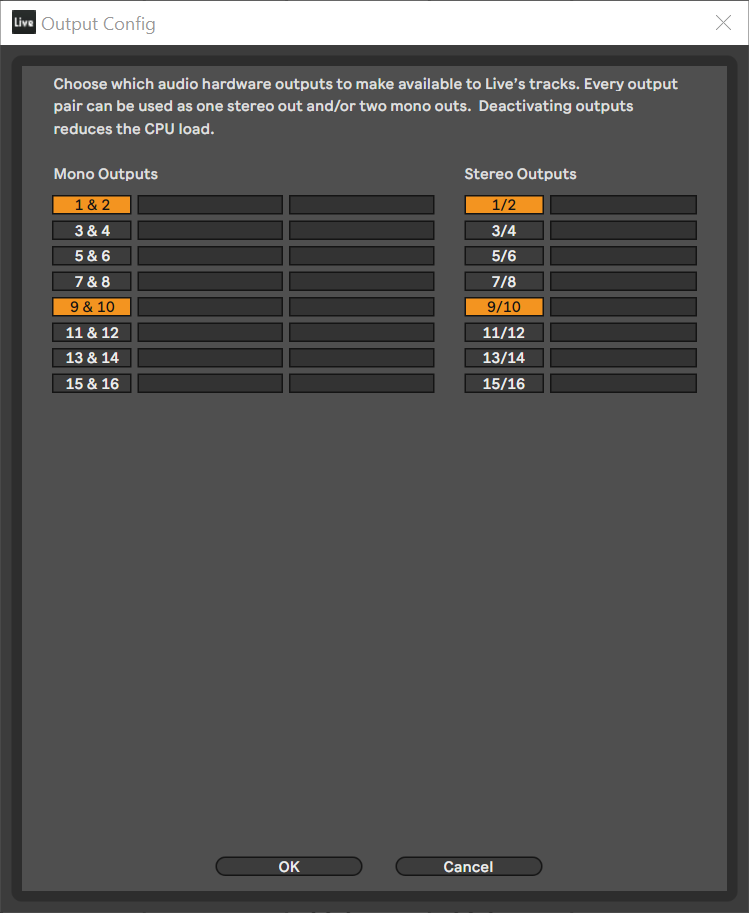
Pressing Output Config displays a window in which ADAT 1/2 outputs can be enabled; however, they are labeled as outputs 9 & 10.
If you switch to another audio device and then revert to Ableton Push, the previous settings are recalled.
Pressing Hardware Setup displays the Push 3 Control Panel.
Push 3 Control Panel
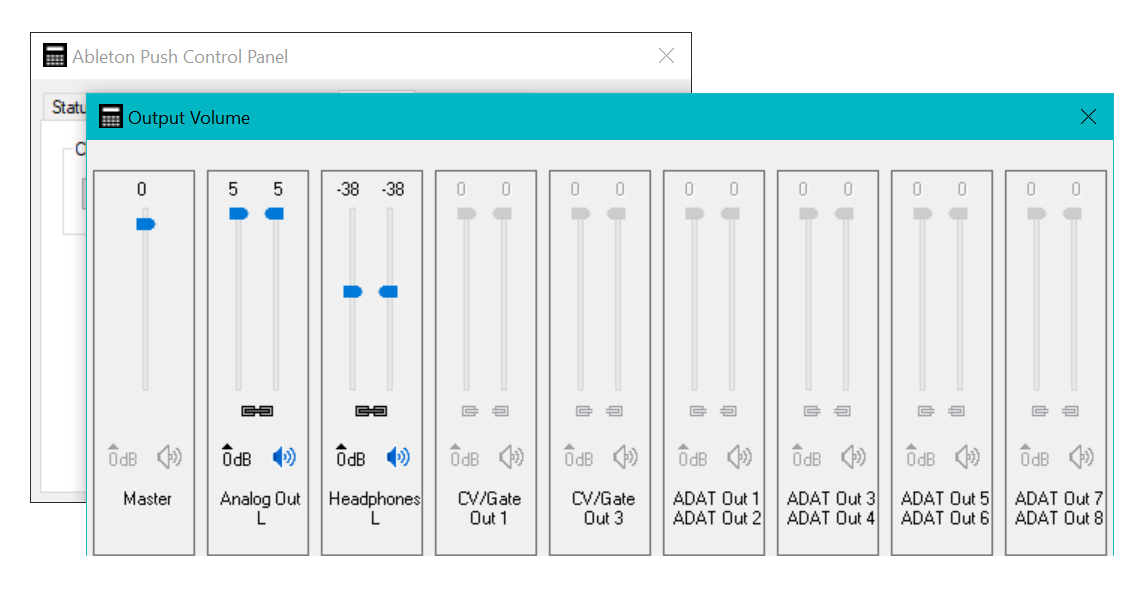
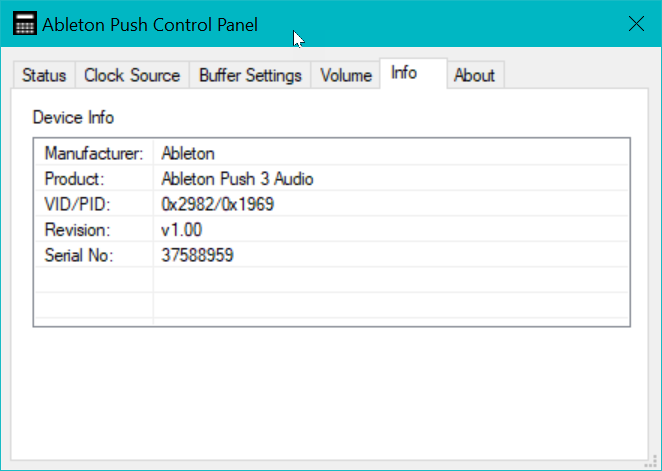
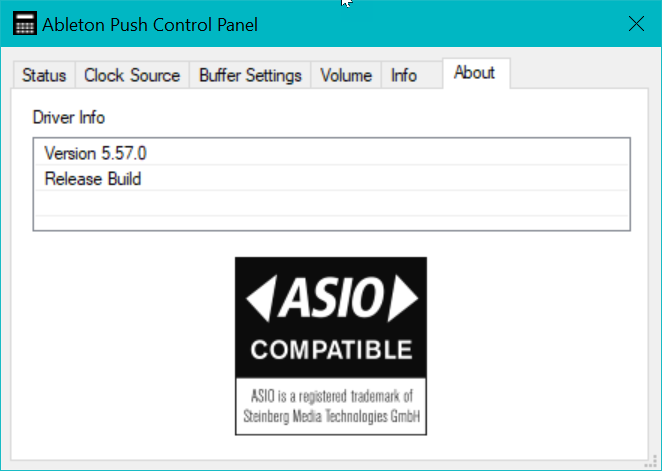
Here are the Push 3 Control Panel screens for Windows. I could not find any documentation on them.
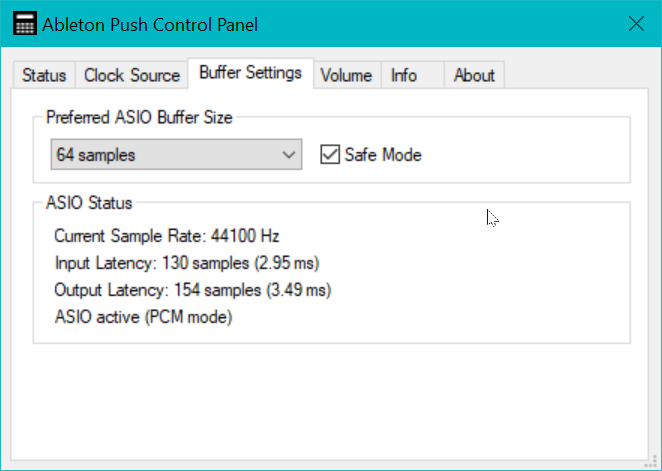
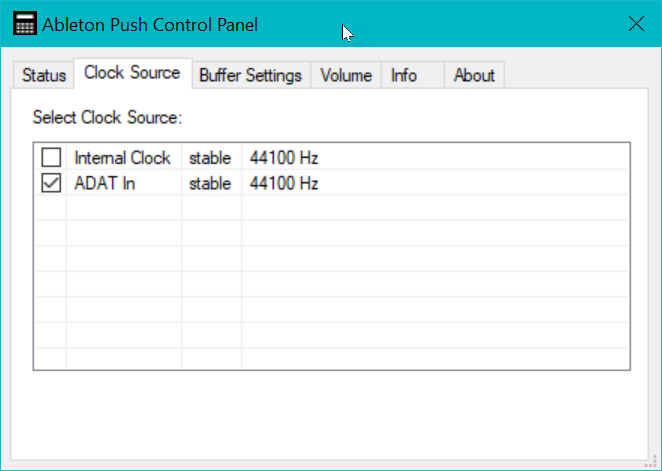
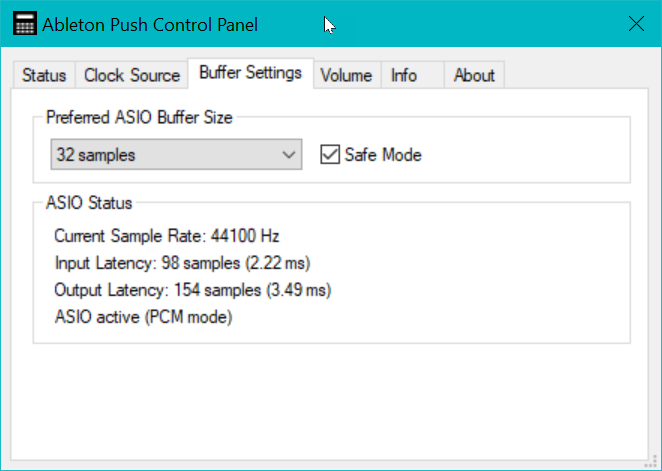
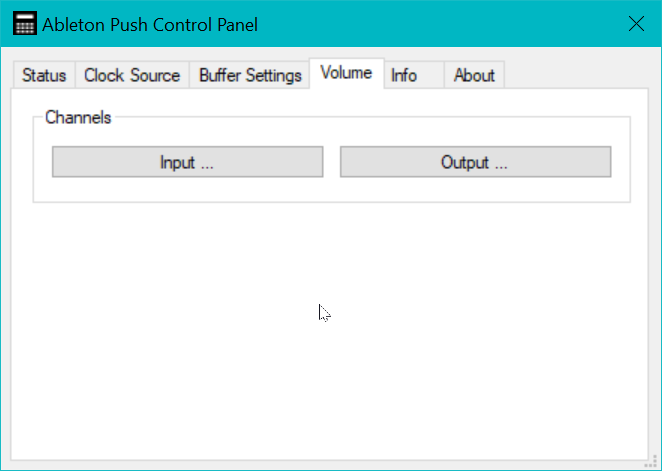
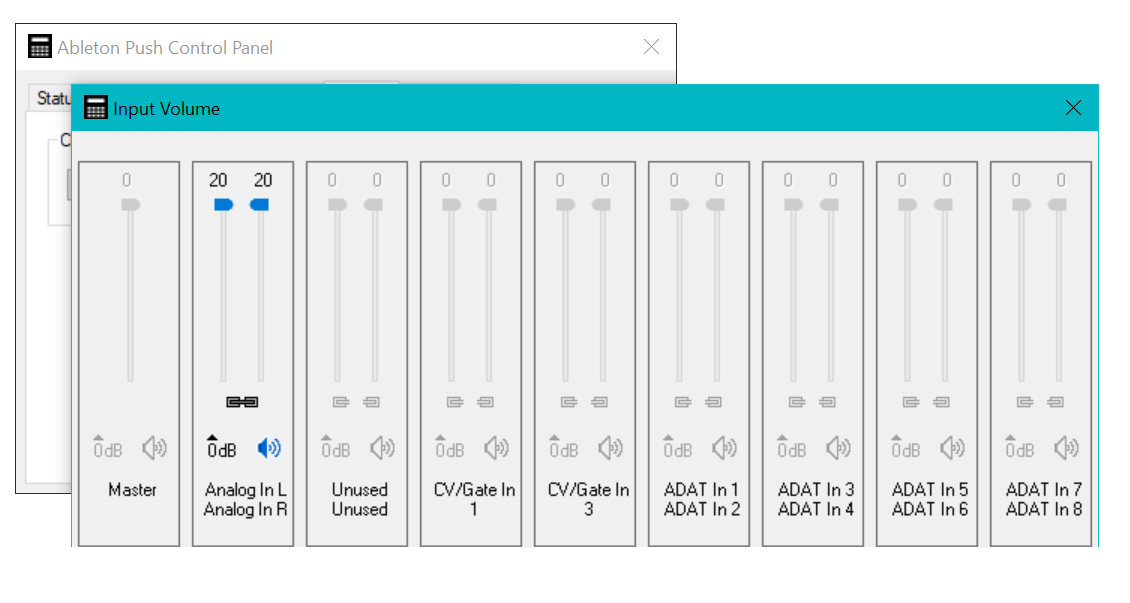
The windows for configuring volume settings have no OK or Cancel buttons. To save changes, press Enter; to cancel, press Esc.
Transferring Files and Sets
It is conceptually easy to transfer files between a P3S and your computer. Ableton made a nice, succinct video on the subject.
😠 😠Unfortunately, I found that this only kinda sorta worked on one computer, and not at all on another. Ableton tech support is not very responsive. Documentation is thin. There are few users so far, so the community is not very helpful.
NOT HAPPY!
Kit Maker published a short video on how to transfer drum kits.
Avoid Version Mismatch
An update for the P3S to bring it to Live 12 was released on March 19, 2024.
If you do not install this P3S update, the P3S will display the following error when attempting to play a Live 12 set:
The document is corrupt and cannot be loaded. (Unsupported MinorVersion (12.0_12049) (at line 2, column 154).
Your other option is to convert the Live 12 set to Live 11 format; I wrote a program for that called Live_set - Debug Tool For Ableton Live Sets.
Transferring Sets With Audio Clips
Prepare your Live set for transfer to P3S using the following sequence:
- Use Live’s File Manager to check for and correct any missing files.
-
Use Live’s File / Collect All and Save to copy audio files residing outside the Live project
directory tree into the project.
Before you do this, the contents of your Live set might look like this:
Live project
├── Ableton Project Info
│   └── AProject.ico
├── Backup
└── my_set.als
After you run Collect All and Save, a copy of the audio files will be placed in theSamples/Importeddirectory, which will be created if required.Live project├── Ableton Project Info │ └── AProject.ico ├── Backup └── Samples │ └── Imported │ └── audio files are stored here. └── my_set.als - Freeze all tracks.
This is a theory I am investigating; these statements might not be true.
Proper documentation would be so nice!
First, you must Collect All and Save the audio clips,
then freeze the tracks.
If you perform these steps in the wrong order (freezing tracks before collecting the clips),
then after you download the set to P3S, it will not play on the device.
Before attempting to transfer the Live set to the P3S, ensure that the P3S does not have an older copy of the Live set open.
Otherwise, the transfer will fail when the update for the .als file fails because Live on the P3S has the file open.
I suspect that .als files must have globally unique names, or the transfer to the P3S will fail.
Effects Did Not Transfer
Ableton's instructions say that audio clips with plugins should be frozen. A set I attempted to transfer had no effects applied to any track, except that the master/main track used the Color brick wall limiter from the Creative Extension pack.
Because plugins are defined as VSTs and AUs, it is my understanding that the audio effects provided with Live are not considered plugins. However, I found that the Color brick wall limiter was not present on the master/main track after transferring to the P3S.
Cannot Freeze Large Audio Clips
A set that I want to transfer to the P3S has dozens of stems in MP3 format for entire songs. When I attempted to freeze some of them, I got the error message The selected time range is too long to be rendered. This limitation has been problematic for Ableton Live users for at least 13 years.
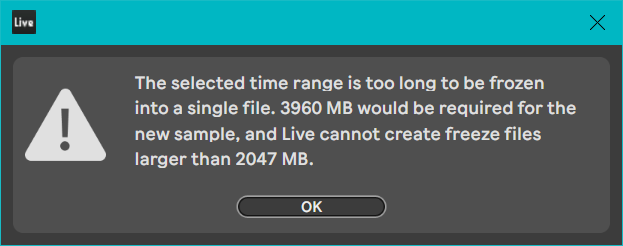
Ableton Live needs a bold hint for users that readily makes it apparent that the current set is too large to freeze.
I suspect that if a set cannot be frozen, it cannot be transferred to a P3S, and perhaps other problems might also manifest.
If a user persists in attempting to transfer a Live set to a P3S that is somehow problematic,
a modal dialog should be displayed, detailing specifics about the problem,
so the user would know exactly how to fix the problem(s).
My live_set program generates a warning when overly large clips or tracks are encountered.
Ableton Reached Out to Me
On January 12, 2024, I was contacted by Jesse Terry, Head of Hardware at Ableton.Microsoft Clarity showed me that this website received a lot of attention from Berlin for a few days. An NDA was signed.
Jesse and I had a long and very friendly chat. When I mentioned that I would like to meet certain Ableton staff, Jesse suggested that I attend Superbooth. He set up meetings for me at Ableton HQ, resulting in frank and positive conversations. These meetings were subject to the NDA that I signed, so I am unable to discuss them here. Not to worry, I expect the fruits of those discussions will manifest over time.
Superbooth 2024
Ableton exhibited at Superbooth 2024. I attended all 3 days, met many people from Ableton, and had quality in-depth conversations with their key developers. This article was well known amongst most of the people that I spoke with, and the reception was quite warm. I spent a morning of meetings at Ableton HQ on the next business day after the show.
SuperBooth is a trade show for electronic musical instruments and an annual meeting of a worldwide connected community around synthesizers, modular systems and other creative tools.
I attended all 3 days of Superbooth 24; I arrived 2 days before and stayed 3 days after, so I could meet people. I stayed at the Park Plaza Wallstreet Berlin Mitte. It was a good choice. If you decide to stay there for Superbooth, be sure to ask for the special Superbooth price months in advance.
I met lots of Ableton staff, customers and other vendors at this event.
Summary
My thoughts after owning a P3S for 2 months.
Not Really Standalone
The name of this product is misleading.

Without a capable computer attached most of the time, the Push 3 Standalone has very limited usefulness.
Ableton may have set themselves up for a class action lawsuit in the USA. Attorneys in the USA usually get about a third of the winnings right off the top, and their kill ratio is good enough that they are happy to take on those types of cases for free. Here are some suggestions for Ableton to prevent such a lawsuit from occurring:
- Make the product truly standalone.
- Change the name of the product.
- Publish a product roadmap with dates, showing how Ableton intends to implement standalone capability over time.
Better Support Needed
I expect much better support from a hardware manufacturer at the P3S price point.
To be specific, I expect that:
- There should be a support phone number to call
- The phone calls would be answered by a sufficient number of trained support personnel
- Each support person would have their own P3S and either a Mac or a Windows machine
This is what Japanese camera vendors at this price point provide, as well as computer manufacturers, computer equipment manufacturers at much lower price points, and mobile device manufacturers, etc.
Ableton uses Zendesk for product support. Zendesk has published documentation on best practices for customer support. Ableton does not follow any of these best practices.
P3S users who report any problems are immediately told that they should reset the device. Imagine your doctor performing a medical procedure on you before making a diagnosis. How long do you think they would keep their medical license? Asking users to reset their P3S without diagnosing the issue is a procedure that can cause more confusion instead of assisting with a solution or helping users learn how to use their P3S.
Significant Deficiencies
I believe the following product deficiencies should be addressed with a sense of urgency and with a high priority. Ableton should release a roadmap that indicates how and when the following P3S deficiencies might be overcome.
- Large DC Pulses (fixed)
- There is no computer keyboard support.
- If a computer keyboard is attached, detect it and allow the user to type in the name of a set before saving it for the first time.
- Support defining MIDI maps in standalone mode.
- Make printed materials legible; use nothing smaller than 10-point type. Focus on legibility and usability, not artistic presentation.
- Display the Wi-Fi menu item at all times, not just in standalone mode.
- Provide Windows documentation for connecting a P3S to Live.
- Document more precisely what must be done prior to attempting to download a project from Live to P3S. For exmple, must Collect All and Save be performed before or after freezing audio clips with VST or AU plugins? Also, explicitly and clearly tell users that MIDI tracks do not need to be frozen, and audio tracks with Ableton effects do not need to be frozen.
- Tell users where they can get complementary accessories, such as stands.
- There is no Ethernet support (the P3S firmware should support USB hubs with an RJ45 jack).
- Tech support should not suggest a reset unless there is no other recourse. Instead, perform a proper diagnosis before recommending such drastic action.
- There is no bluetooth support (useful for devices like keyboards that do not require realtime response; the P3S firmware should support Bluetooth USB dongles).
- There is no visibility of the internal Live GUI. This aspect of the GUI would be useful for static operations in arrangement view and setting preferences, etc., not for viewing real-time data.
-
No
rsynccabability for transferring files between P3S and Live. - Visible application context (such as breadcrumbs) is not provided.
- Support the transfer of files while the P3S is controlling Live.
- Help button should be a modifier; help information should be provided via a display overlay
- ADAT and the TRS audio outputs must be active at all times.
- ADAT must be configured at the system level, not set-by-set.
- Proper documentation for Push must be provided in the Live v12 documentation.
- 3x or 4x larger capacity battery needed.
- Provide the ability to save and load files from an external drive using USB-A or USB-C.
- A lightweight hardshell case is required. I suggest that the case be made available at cost when purchased with a new unit, otherwise it should be available with a normal markup.
- CPU and memory meters are not provided.
- Document the Push 3 Control Panel for Windows.
- Provide a useful tutorial.
-
Perform a sanity check before transferring a project from Live to a P3S.
For example,
.alsfiles must have globally unique names, or the transfer to the P3S will fail. Also, verify that the set does not need to be collected, and that audio tracks with non-Ableton effects have been frozen. Again, I wrote a F/OSS program for that in self-defense calledlive_set, but Live should do this. - Do not allow users to perform invalid actions, or at least provide immediate feedback that the actions they are taking are probably not going to yield a useful result.
- Much larger NVMe drive. Please read Ableton Push 3 NVMe Replacement for information about how to replace the NVMe drive with a larger one.
- No way of backing up the system without removing the NVMe drive.
- Add playlist feature
- Provide standard Bash utilities and common Linux software.
- Follow the best practices recommended by Zendesk for customer support.
Stretch Goal
To turn Ableton customers into ambassadors, offer a high-end Troubador package that includes:
- P3S
-
Light hardshell case with a carry handle and a clip-on strap.
I have a blue Protec case for my alto and tenor saxophones. Ableton should talk with Protec about making a P3S case. I call dibs on the first forest green P3S case!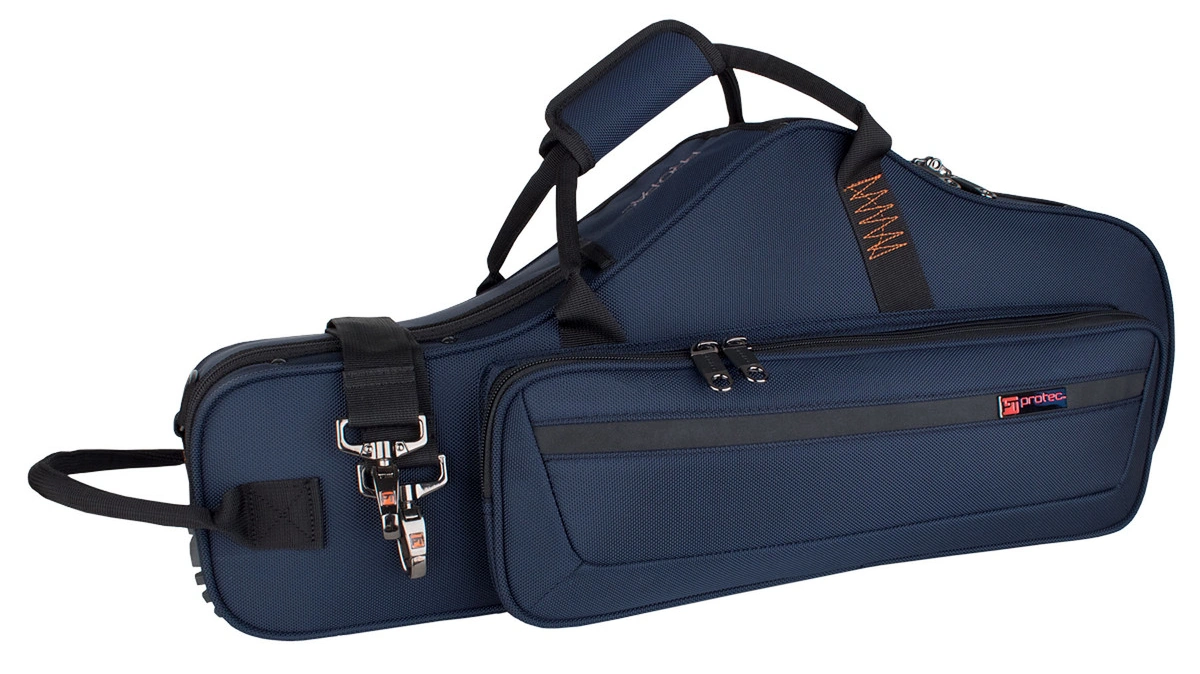
Each of the following would be in a separate pocket/pouch of the case:- Sheet metal foldout stand
- All possible dongles and cables
- Headset with a recording quality microphone
- Gooseneck lamp
- Fitted Jacquard cloth cover, embossed with "Ableton" and the logo
- Two unused pouches for the owner (one larger than the other). I would put a wireless transmitter in one pouch, and usb charging stuff in the other.
Third-Party Videos
These worthy videos were not previously mentioned in this article.
Reviews
Reviews by Loopop are interesting, in-depth, well-informed, and well constructed. The following review was published when the P3S was first released.
James Russller released the following video 32 months ago, after using it professionally for many months. His conclusion is not specifically directed at the P3S, but includes the P3S: “This is a big question: is [live electronic music] worth it? That depends on what you want to invest your money and, more importantly, your time in. If you want to push the envelope of music performance and use cutting-edge technology to make art that is being performed and created right there and then, in the moment, a living biological vessel of technologically enhanced creativity – then yes. If you want big frustration, technical issues, rabbit holes, upward and downward spirals, raw emotions and intense pre-show nerves, then yes. If you want to express yourself on arguably the most expressive and expansive instruments created by humankind in beta form, then yes. If you’re willing to surrender to the possibility of technical issues, absolute total elation, or annihilation, then live electronic music is for you. If you don’t want to take big risks and kind of put it all on the line, then this isn’t for you. You also will need to be willing to smile and say thank you when people congratulate you with nice DJ set after your performance would I personally say it’s worth it.”
Videos By Thavius Beck
I am not a fan of extreme piercing of body parts, but Mr. Beck is a great teacher who knows his subject well. This very short video is a good place to start.
The following continues the preceding video. It begins with an explanation of various controls, which are useful for all modes of operation of this device. Thavius then starts discussing material that requires Push to be connected to a computer that is running Ableton Live.
The following continues the preceding two videos. This well-thought-out video shows exactly how to use this device for percussion.
Mr. Beck talks like he might have a fourth video coming, however this video was released on 2023-12-09, 34 months ago, and no follow-up has been released yet.
LNA Does Audio Stuff
Learning
The following video is helpful for learning what the buttons do. The author is trying to make sense of the device. Ableton could do a better job of providing this information.
This video starts with Ned Rush playing a cool demo, and then he explains it. Ned often goes deep in his videos, and this is no exception:
Putting it all together:
Quick Tips
- Display all scenes
- (Push the) Session (button).
- Toggle count-in for playback
- Press the Metronome button. Press and hold the Metronome button to access the metronome and time signature settings for the set.
- Set scene tempo
- Use the Swing and Tempo encoder to adjust the swing amount or tempo for the set. Hold Shift and turn the encoder to shift the tempo in .1 BPM increments.
- Set master track volume
-
There are two ways to do this:
- Press the Volume encoder until the display shows Master Volume, then turn the Volume encoder. For fine control of the volume, hold down the Shift button while turning the Volume encoder
- Press the Master Track button, then turn the left-most top encoder. For fine control of the volume, hold down the Shift button while turning the left-most top encoder.
- Use the top encoders for individual track volume
- Select global mix mode by using the Mix button to toggle between track mix mode and global mix mode.
- Toggle track soloing using the lower display buttons
-
- Hold down Lock then press Solo.
- The message Solo locked should appear, and the Solo button should blink blue.
- Now pressing a lower display button should toggle soloing for that track.
- Press Lock again to unlock track soloing.
- Toggle track muting using the lower display buttons
-
- Hold down Lock then press Mute.
- The message Mute locked should appear, and the Mute button should blink red.
- While in this mode, pressing a lower display button should toggle muting for that track.
- Press Lock again to unlock track muting.
- Use Scene Workflow (the default) for emulating a multitrack karaoke machine
-
Press Setup then rotate the Workflow top encoder until it displays Scene.
In scene workflow mode:- The Duplicate button creates a new scene containing all the currently playing clips, and begins playing them back. This is the same as Live’s Create / Capture and Insert Scene menu item.
- The New button also creates a new scene that contains all the currently playing clips, except for the clip in the selected track. Instead, an empty clip slot is prepared in that track, allowing you to create a new idea.
-
Session D-Pad:
- The ^ and v buttons scroll the displayed scenes up or down.
- Trigger the selected scene by pressing the . button in the center.
- Trigger the selected clip by holding the Shift button and pressing the . button. This does not work for me.
- Delete a clip
- In session view, hold down the Delete button and push the pad corresponding to the clip
- Track operations: freeze, rename, group, flatten
-
In session view:
- Hold down the Shift button and press the lower display button for the track.
- So long as the Shift button remains depressed, the display will change to: Rename / Group / Ungroup / Freeze or Unfreeze / Flatten.
References
- Ableton Google Search
- Ableton Push 3 Standalone Mentor
- Online Ableton forum
- Push 3 Release Notes for Live 12
- Live 12 Release Notes
- Ableton beta testing community, open to all
- CA2600, an ARP 2600 emulation.
Push 3 Standalone
- Control Diagram
- Connections
- Videos by Ableton
- Setting Up Push 3 (standalone)
- Push 3 Windows Audio Driver
- Push 3 Manual selected sections (the following links only work for the English version of the manual):
Live