Published 2024-11-20.
Time to read: 3 minutes.
av_studio collection.
There are many ways of displaying on-screen lyrics. This article describes how to scroll three lines at the bottom third of the screen. Readers are assumed to be familiar with the material described in DaVinci Resolve Notes.
This is the completed music video with scrolling lyrics:
Inspiration
Justin Robinson provides brief written instructions to add lyrics. In addition to the text instructions, Justin also made a video showing an expanded version of the same instructions:
I made the following improvements to the instructions:
- The compound clip should only include the elements on the timeline that require lyrics. For example, if your video has an intro and/or an outro, do not include those elements in the compound clip.
- Placing the scrolling lyrics into an underlay box would make it easier to recognize the purpose of each node, should you ever need to modify how the lyrics work in the future.
- A proxy would accelerate the process of creating the scrolling lyrics. My powerful desktop computer stuttered badly when rendering in Fusion mode, which made it difficult to set up the keyframes properly.
- The video contained several tangents that briefly explored related topics. The tangents contained useful information but made following the video difficult, and neither the tangents nor the main thread were fully explained.
Problems
After reading the Black Magic Design documentation, I expected that Fusion clips would work better than compound clips when working on Fusion. For the scrolling lyric functionality, a Fusion clip would allow the subclip timings to be staggered. For example, I did not want to see the lyrics until the second frame. However, I instead discovered that overlapping clips with cross-fades would dip to black instead of properly cross-fading.
It is problematic to click on the small left and right arrows surrounding the small diamond that creates and deletes keyframes. The mouse pointer is somehow not lined up exactly where I expect, so I must click slightly to the right of the arrows. Sometimes this means I accidentally delete or create keyframes. Instead of using the mouse, hotkeys are a better alternative to move between keyframes. To select the previous keyframe: CTRL-[, and to select the next keyframe: CTRL-].
Creating the Fusion Lyrics Feature
The completed lyrics Fusion component is:
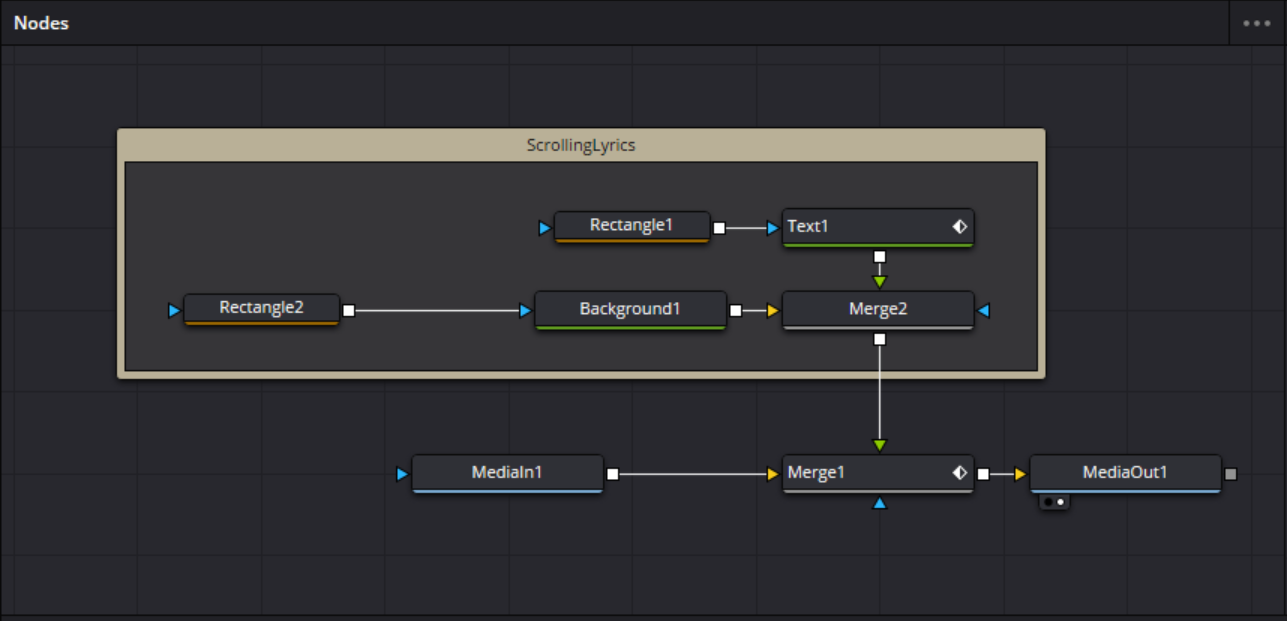
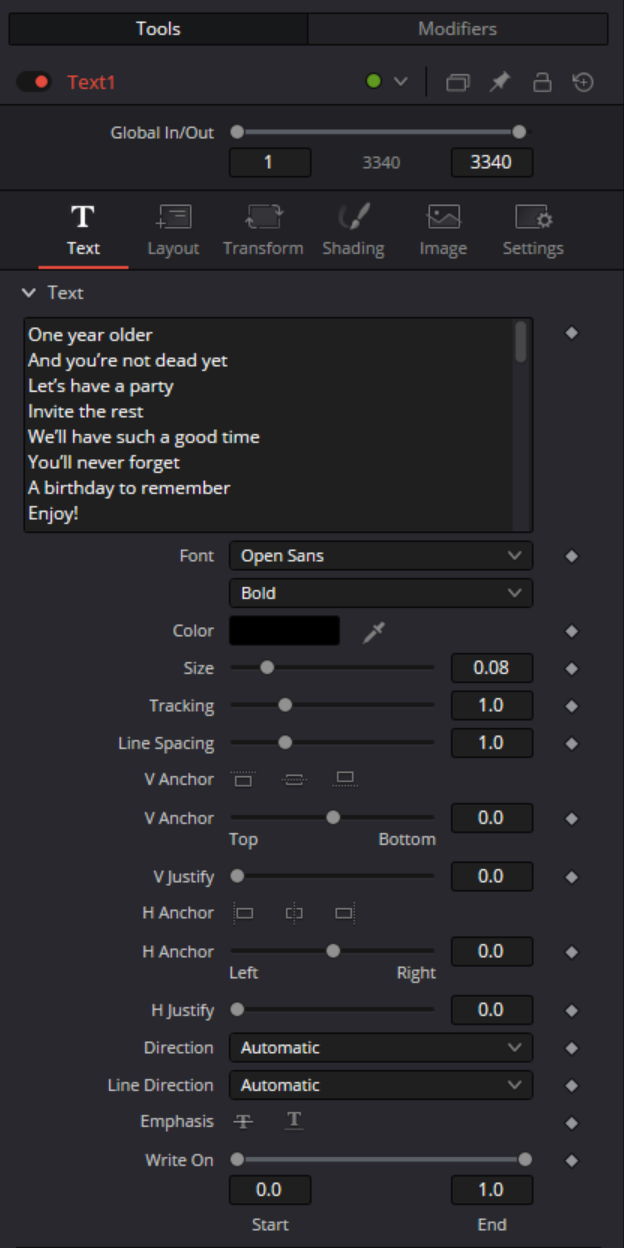
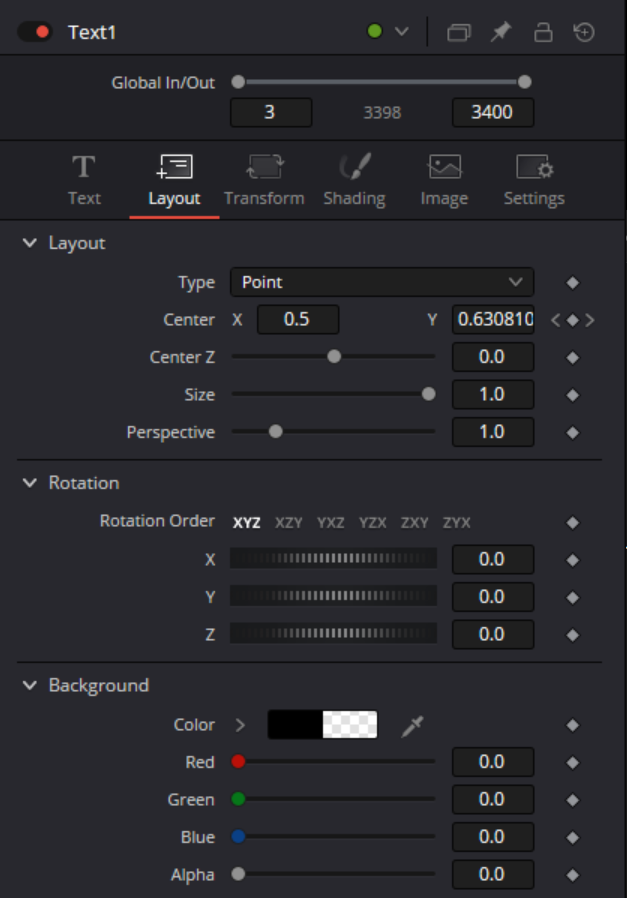
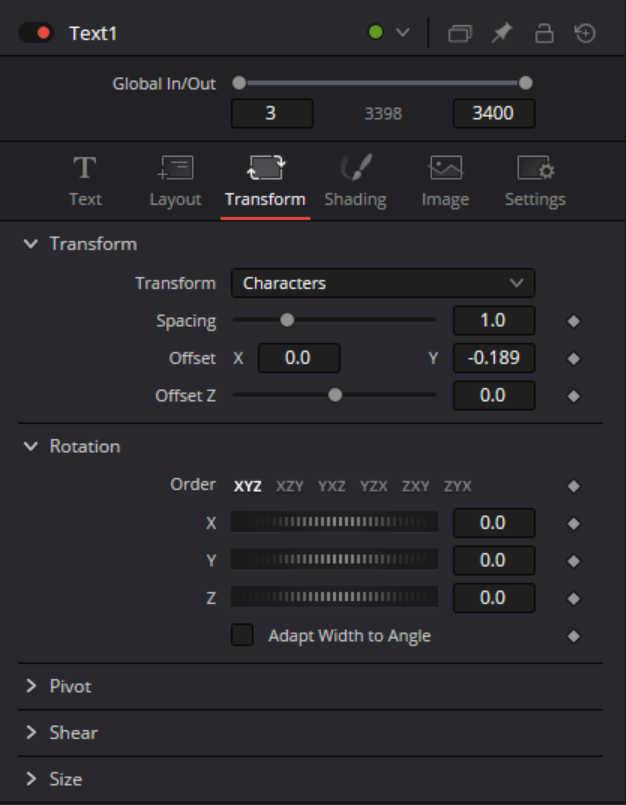
The settings for each node are:
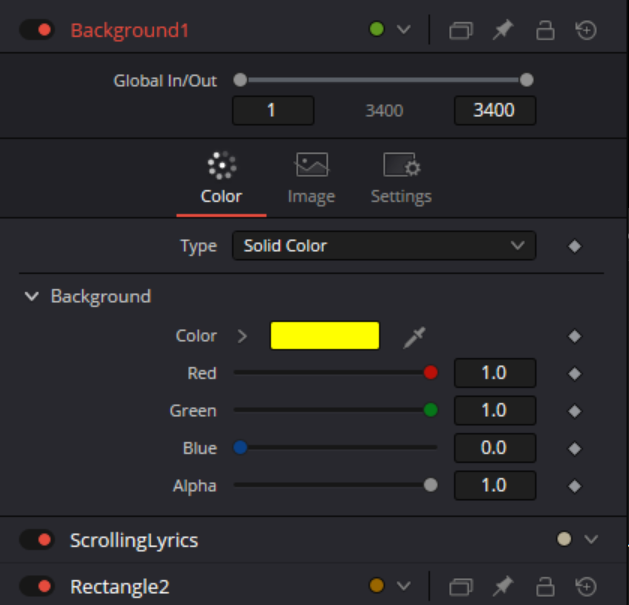
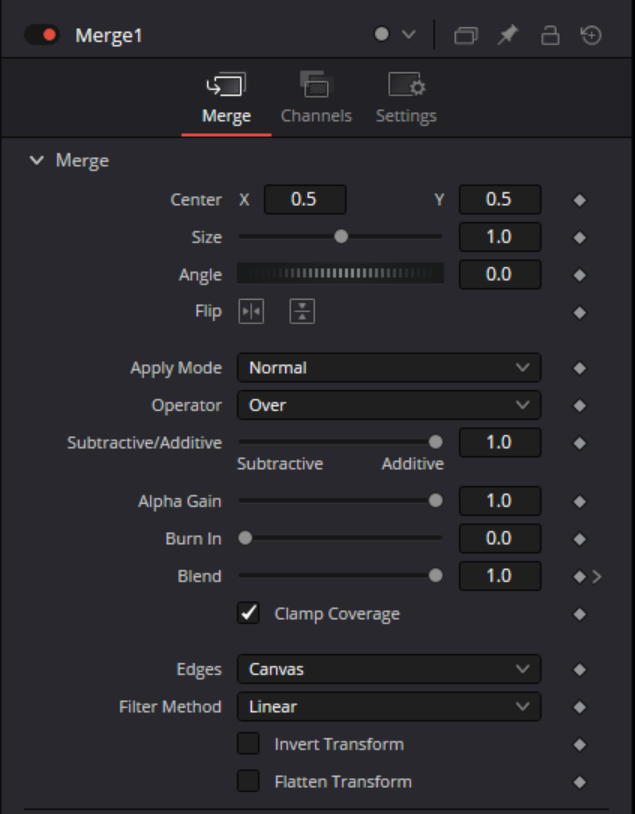
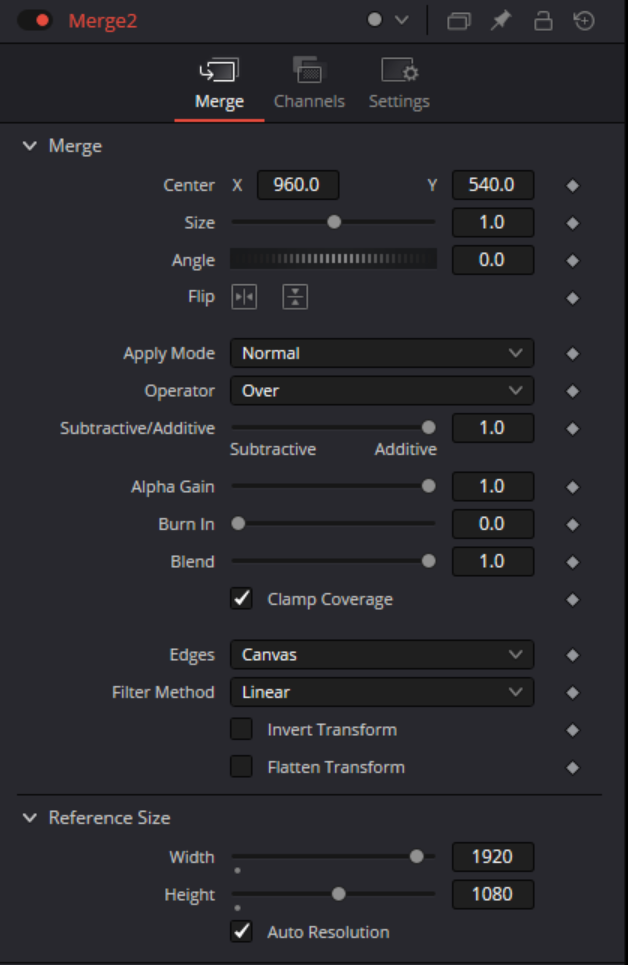
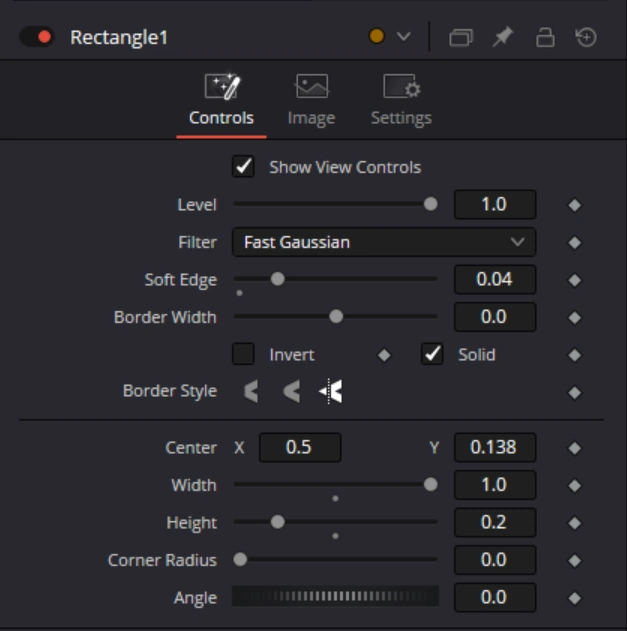
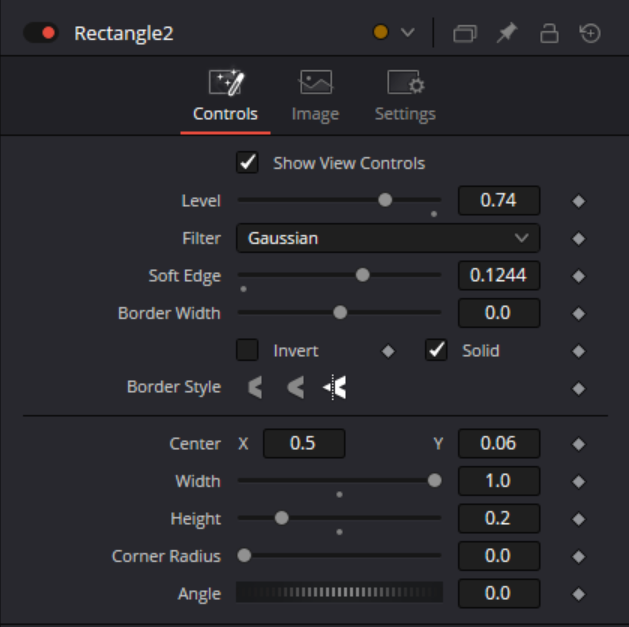
The Text1 node has three subpanels to consider: Text, Layout and Transform.
Tips and Tricks
Here is additional helpful information.
Select the Text1 node, then select the pin icon in the Inspector. This will keep the Text1 properties visible, even when other nodes are selected. More than one node can be pinned.
The compound clip should only include the elements on the timeline that require lyrics. For example, if you have an intro and/or an outro, do not include those elements in the compound clip.
Placing the scrolling lyrics into an underlay box will make it easier for your future self to recognize the purpose of each node, so you can modify them.
Pan, enlarge and reduce the contents of the Keyframes panel with CTRL-wheel and ALT-wheel, same as in Editor mode.

When a node finally works properly, and you want to tweak it, but you are concerned that you might break something, use the Versions icon to experiment with another version of the node. It is next to the Pin icon in the Inspector.
If you follow the directions, then alter the lyrics so the number of lines changes, the length of the scrolling window will be changed, and you will have to adjust the start point. To accomplish that, ensure the Text1 node is selected, then open the Transform panel in the Inspector and adjust the Y offset.
If the song has a section that should not have lyrics displayed (for example, an interlude), use keyframes on the Blend property of the final merge node (Merge1). When the Blend property is zero, the scrolling lyrics are invisible; when the Blend property is maximum, the scrolling lyrics are strongest.
The lifespan of each node in the keyframe editor can be modified by click-dragging their endpoints. The image of the Keyframes panel in step #4 above shows different end points for the various Fusion nodes. It can be easier to modify when each node is active than to create keyframes for each node.


