Published 2018-08-20.
Last modified 2025-11-06.
Time to read: 6 minutes.
wsl collection.
I’ve been using Windows Subsystem for Linux (WSL) headless since it was first released with Windows 10 version 1607 in August 2016. The April 2018 release of Windows 10 (version 1803) significantly improved WSL. Many updates have been released since then.
Version 2.0.0 of WSL, released in July 2024, included support for mirrored networking under Windows 11, which motivated me to finally upgrade my Windows 10 workstation to Windows 11.
It is possible to work with Ubuntu graphically on a vanilla Windows machine. No special drivers are required. No special Linux or Ubuntu support is required from the computer vendor.
")
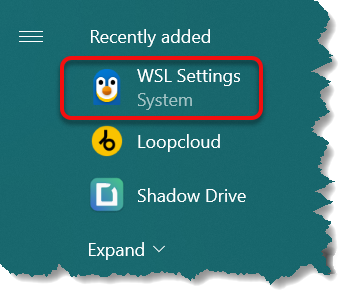
WSL Settings Application
WSL 2.3 introduced a useful and user-friendly new Windows application for configuring WSL and WSL2, called the WSL Settings app. Older versions of WSL did not provide this app and users had to modify configuration files manually.
Key Features
The app allows users to:
- Configure WSL settings without needing to remember syntax or manually edit text files. It provides an intuitive interface to adjust various options.
- Set the number of virtual CPUs, memory allocation, and disk size limits for WSL virtual machines directly through the app.
- Configure networking settings.
Installation
Check the installed version of WSL:
C:\Users\Mike Slinn> wsl --version
WSL version: 2.1.3.0
Kernel version: 5.15.146.1-2
WSLg version: 1.0.60
MSRDC version: 1.2.5105
Direct3D version: 1.611.1-81528511
DXCore version: 10.0.25131.1002-220531-1700.rs-onecore-base2-hyp
Windows version: 10.0.19045.6093
The above version of WSL is old and does not include the WSL Settings app. Updating WSL is easy. Open a CMD or PowerShell window as Administrator and type:
C:\Users\Mike Slinn> wsl --update
Checking for updates.
Updating Windows Subsystem for Linux to version: 2.5.9.
Be patient and wait for the command-line prompt to reappear.
The updating process can take 10 minutes or more.
Not only will C:\Windows\System32\WSL.exe be updated,
but the Linux kernel, WSLg, MSRDC, and DXCore will also be updated.
When complete, check the WSL version again:
C:\Users\Mike Slinn> wsl --version
WSL version: 2.5.9.0
Kernel version: 6.6.87.2-1
WSLg version: 1.0.66
MSRDC version: 1.2.6074
Direct3D version: 1.611.1-81528511
DXCore version: 10.0.26100.1-240331-1435.ge-release
Windows version: 10.0.19045.6093
The WSL Settings app should now be available. Press the Windows key and you should see it.
Manual Configuration
You can manually configure WSL settings using the wsl.conf and .wslconfig files.
The wsl.conf file is used for per-distribution settings,
while the .wslconfig file is used for global settings across all WSL distributions.
This is my WSL configuration file, in my Windows home directory (%systemdrive%%homepath%\.wslconfig).
See Advanced settings configuration in WSL.
# See https://docs.microsoft.com/en-us/windows/wsl/wsl-config#configure-global-options-with-wslconfig
# See https://github.com/microsoft/WSL/issues/4166
[wsl2]
memory=8GB
swap=60GB
#processor=4
localhostForwarding=true

[experimental]
autoMemoryReclaim=drop
sparseVhd=true
Run Associated Windows Program
To run the Windows program associated with a file,
preface the file with cmd.exe /C start.
For example, to run the default Windows video viewer for .mkv files, type:
$ cmd.exe /C start my_file.mkv
I defined a bash alias to make this easier:
alias run='cmd.exe /C start'
Reload the bash aliases after editing ~/.bash_aliases:
$ source ~/.bash_aliases
Now use the run alias to run the default Windows video viewer for .mkv files like this:
$ run my_file.mkv
Networking
To access a Windows networking app from Linux, you need to use the IP address of the Windows host.
WSL networking can be configured in various ways to enable communication between Windows and Linux applications. The default networking mode is NAT. Most network address translators map multiple private hosts to one publicly exposed IP address. This network mode is awkward because NAT prevents other devices from accessing WSL virtual machines.
With NAT networking, the Linux VM its own IP address, separate from the Windows host.
To access a Linux networking app from Windows, you can use localhost.
Conversely, to access a Windows networking app from Linux, you need to use the IP address of the Windows host.
Unfortunately, that IP address changes every time the computer restarts.
Starting in July 2024, Microsoft began recommending the new WSL Mirrored networking mode
to get the latest features and improvements.
Mirrored mode
exposes the Windows network interfaces to Linux VMs, allowing for improved compatibility and new features.
Enable mirrored mode networking by using WSL Settings app; this is a user-friendly way of
modifying .wslconfig so networkingMode=mirrored is set under [wsl2].
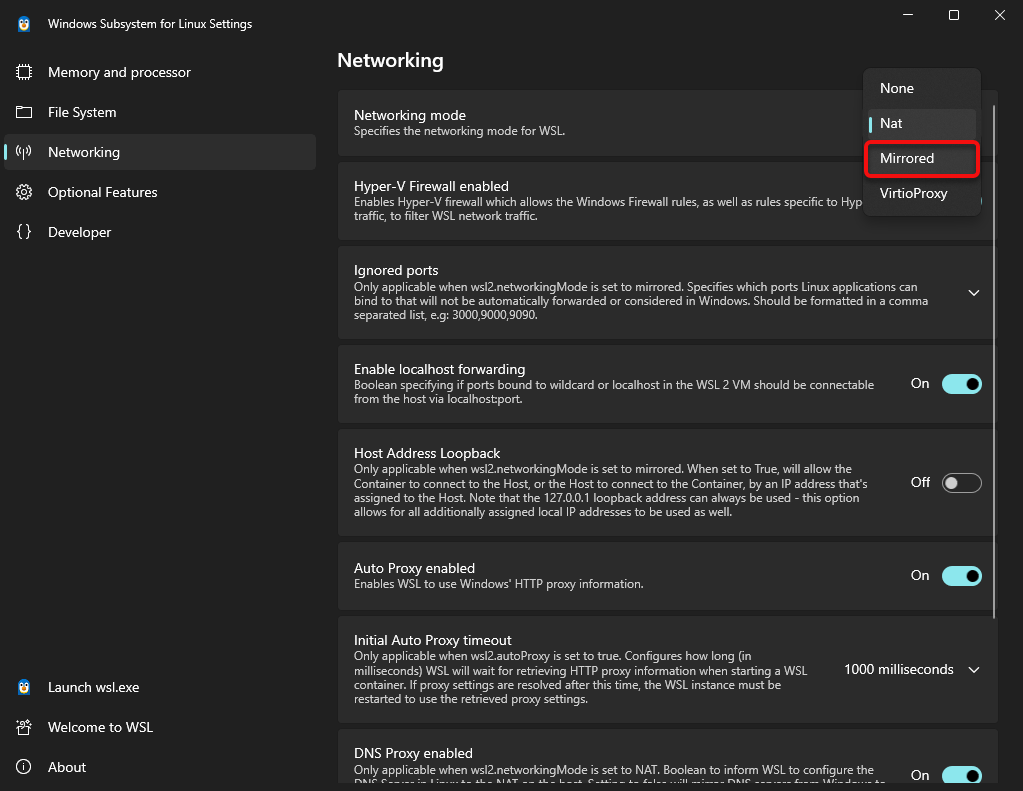
Networking mirrored mode provides the following benefits:
- Enables IPv6 connectivity
- Allows connecting to Windows servers from within Linux via
localhost(127.0.0.1) - Improved networking compatibility for VPNs.
- Enables multicast networking.
- Allows other devices on the network to directly connect to WSL. This includes other users on the same Windows computer.
This is the feature that caused me to finally upgrade from Windows 10 to Windows 11 for computers that can be upgraded.
I did not see any warning in WSL Settings app when I enabled mirrored networking on Windows 10. The feature simply did not work. The WSL Settings app would be more helpful to Windows 10 users if it disabled all setting widgets that are non-functional on Windows 10.
You can configure advanced networking settings using the wsl.conf and .wslconfig files.
The wsl.conf file is used for per-distribution settings, while the .wslconfig file
is used for global settings across all WSL distributions
The following configuration enables mirrored mode networking, DNS tunneling, and automatic proxy settings.
The values shown for dnsTunneling and autoProxy are the default values.
Note that dnsTunneling requires Windows 11.
[wsl2]
networkingMode=mirrored
dnsTunneling=true
autoProxy=true
Restart WSL after making these changes. To do that, you can either reboot the computer, or open CMD or PowerShell as Administrator and type:
PS C:\WINDOWS\system32> wsl --shutdown

PS C:\WINDOWS\system32> wsl -d Ubuntu
OpenSSH Server
To install OpenSSH on an Ubuntu-based system, use the apt package manager in the terminal.
First update package lists.
$ sudo apt update

$ yes | sudo apt install openssh-server
Ensure the SSH service starts automatically at boot.
$ sudo systemctl enable ssh
Start the SSH server immediately.
$ sudo systemctl start ssh
Verify the SSH service status, confirming if it is active and running.
$ sudo systemctl status ssh
If a firewall like UFW is in use, allow SSH traffic:
$ sudo ufw allow ssh
The OpenSSH server should now be installed, enabled, and running. You might need to open the Windows firewall to allow incoming TCP on port 22.
Serving From WSL to the LAN
If you have a service (like Jekyll) that runs on WSL but needs to be accessible from other network nodes, two Windows firewalls need to be opened: the native Windows Firewall and the firewall for the virtual machine running WSL. The following example shows both steps for opening port 4001 for HTTP requests from other machines.
First use PowerShell to open port 4001 of the Windows Firewall.
$ New-NetFirewallRule -DisplayName `
  "Allow TCP 4001 Inbound" `
  -Direction Inbound `
  -Action Allow `
  -Protocol TCP `
  -LocalPort 4001 `
  -Profile Any
Name                          : {a6dd90d7-8c1b-4d1e-ae3b-5dc5b5b1a030}
DisplayName                   : Allow TCP 4001 Inbound
Description                   :
DisplayGroup                  :
Group                         :
Enabled                       : True
Profile                       : Any
Platform                      : {}
Direction                     : Inbound
Action                        : Allow
EdgeTraversalPolicy           : Block
LooseSourceMapping            : False
LocalOnlyMapping              : False
Owner                         :
PrimaryStatus                 : OK
Status                        : The rule was parsed successfully from the store. (65536)
EnforcementStatus             : NotApplicable
PolicyStoreSource             : PersistentStore
PolicyStoreSourceType         : Local
RemoteDynamicKeywordAddresses : {}
PolicyAppId                   :
PackageFamilyName             :
Now open the firewall of the WSL VM. Note that the response from the first command is used in the second command, which allows all incoming traffic.
PS C:\WINDOWS\system32> Get-NetFirewallHyperVVMCreator | `
  Where-Object { $_.FriendlyName -eq 'WSL' } | `
  Select-Object -ExpandProperty VMCreatorId
{40E0AC32-46A5-438A-A0B2-2B479E8F2E90}

$ Set-NetFirewallHyperVVMSetting `
  -Name '{40E0AC32-46A5-438A-A0B2-2B479E8F2E90}' `
  -DefaultInboundAction Allow
History
2024-02-20 Update
The WSL v2.1.3
prerelease sets the default memory reclamation mode to dropcache.
The following is now a default setting:
wsl2.autoMemoryReclaim=drop
The memory will be freed using dropcache after 10 minutes of inactivity. Upgrade WSL to the early access version of WSL using bash, CMD or PowerShell:
C:\Users\Mike Slinn> wsl.exe --update --pre-release
Aug 17, 2020 - Upgrading from Ubuntu 19.11 to Ubuntu 20.04
Display whether you have WSL1 or WSL2 by typing the following into a CMD or PowerShell prompt:
PS C:\Users\mslin> wsl --list --verbose
  NAME STATE VERSION
* Ubuntu Running 1
The above shows that a machine has WSL1 installed.
Ignore this step if you have WSL2.
The default Ubuntu sleep command does not work on WSL1.
sleep must work properly in order for the upgrade to succeed.
To fix the problem, replace /bin/sleep with an equivalent Python 3 program prior to running do-release-upgrade.
This will avoid the problem sleep: cannot read realtime clock: Invalid argument described in
this askubuntu posting.
To do this, type:
$ sudo mv /bin/sleep{,-} # renames sleep to sleep-

$ sudo vi /bin/sleep # I use vi, but you can use any editor with sudo
Enter the code for /bin/sleep shown below using your favorite editor:
#!/usr/bin/env python3
import sys
import time

time.sleep(int(sys.argv[1]))
Save the file.
Now make your replacement for sleep executable:
$ sudo chmod a+x /bin/sleep
Ensure that all previous upgrades have been applied:
$ sudo apt update

$ yes | sudo apt upgrade

$ yes | sudo apt dist-upgrade
Verify that the last line of /etc/update-manager/release-upgrades is Prompt=normal.
If not, edit with your favorite editor:
$ sudo vi /etc/update-manager/release-upgrades
Run the upgrade.
Because Ubuntu rolls out its upgrade to users gradually, you might have to try this several times over a few days.
Some of my machines update earlier than others, even though they are in the same building.
You may find instructions elsewhere that advocate "Force direct upgrade by using the -d switch".
This is incorrect.
There is no such thing as a direct upgrade, instead the -d switch installs a development version,
which means you will forever after install a whole lot of prerelease software.
Don't do that unless you have a good reason.
This is what most users should type:
$ sudo do-release-upgrade
The installation will die after a while with the following error:
dpkg: error processing package libc6:amd64 (--configure):
installed libc6:amd64 package post-installation script subprocess returned error exit status 1
Errors were encountered while processing:
libc6:amd64
To fix the problem
(from https://stackoverflow.com/a/61697214/553865),
edit /var/ and comment out this line near the top of the file:
set -e
so it looks like this:
# set -e
Now type:
$ sudo apt -f install
To conclude the upgrade, type:
$ yes | sudo apt upgrade --fix-missing

$ sudo apt upgrade

$ yes | sudo apt-get dist-upgrade

$ sudo apt autoremove

$ sudo apt autoclean


