Published 2024-02-02.
Time to read: 5 minutes.
av_studio collection.
Ableton Live is designed to work with arrays of clips in a live music setting. This makes it ideal to provide sound for OBS Studio streaming sessions. Uses include background music, theme music and foley.
I tried various ways of sending audio from Ableton Live to OBS Studio, but the only way that worked was the method described in this article.
Overview
The process described in this article is efficient and does not introduce any noticable delay.
The weird thing about these instructions is that we just need a virtual audio cable because OBS Studio requires an audio device in order to receive audio. The fact that the virtual audio cable is not connected to anything might be surprising. Instead, the audio from Ableton Live is provided via a VST plugin in Ableton Live talking to another VST plugin in OBS Studio. This technique is not difficult, even though it is rather unique.
ReaPlugs VST FX Suite
The free ReaStream VST2 plugin is the key ingredient. It is one of the VST2 plugins in the free ReaPlugs VST FX Suite. Download it here and install it into the default directory.
Virtual Cable
I used the VB-CABLE Virtual Audio Device to play the part of an audio device.
The installation process makes the output of the new virtual audio device the default audio device. That is not helpful because the installation process does not connect anything to the input of the virtual audio device. As a result, you no longer hear any sound from any program after installing VB-CABLE and rebooting your computer. All you have to do after installing VB-CABLE and rebooting is to change the default audio device back to what it used to be.
There are two ways to configure VB Cable under windows, each does something different:
-
Run
%ProgramFiles%\VB\CABLE\VBCABLE_ControlPanel.exeas administrator.
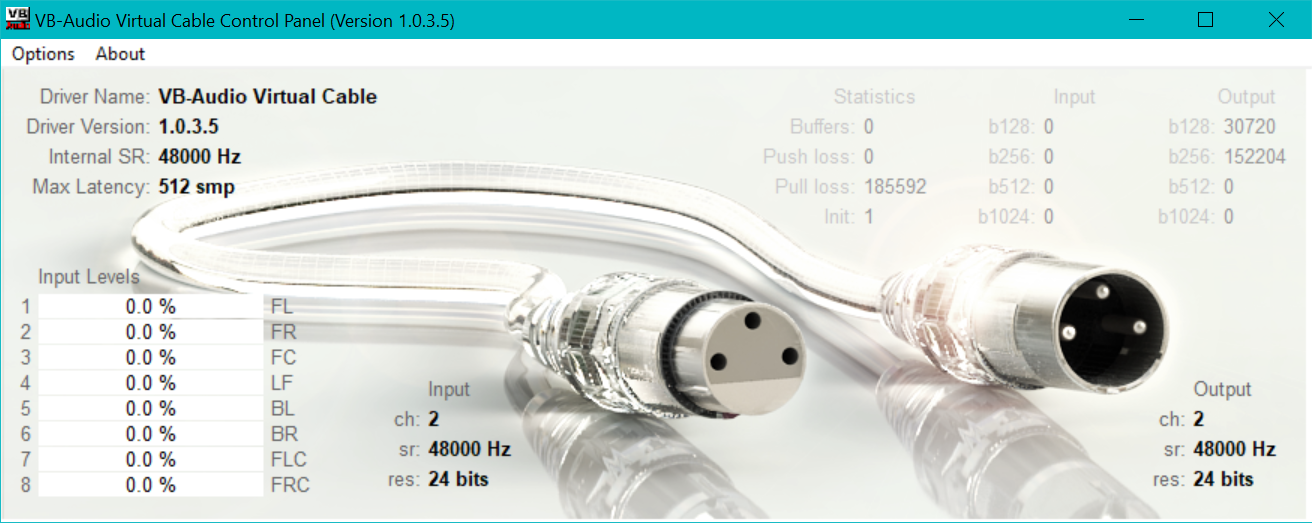
You can only set these options:
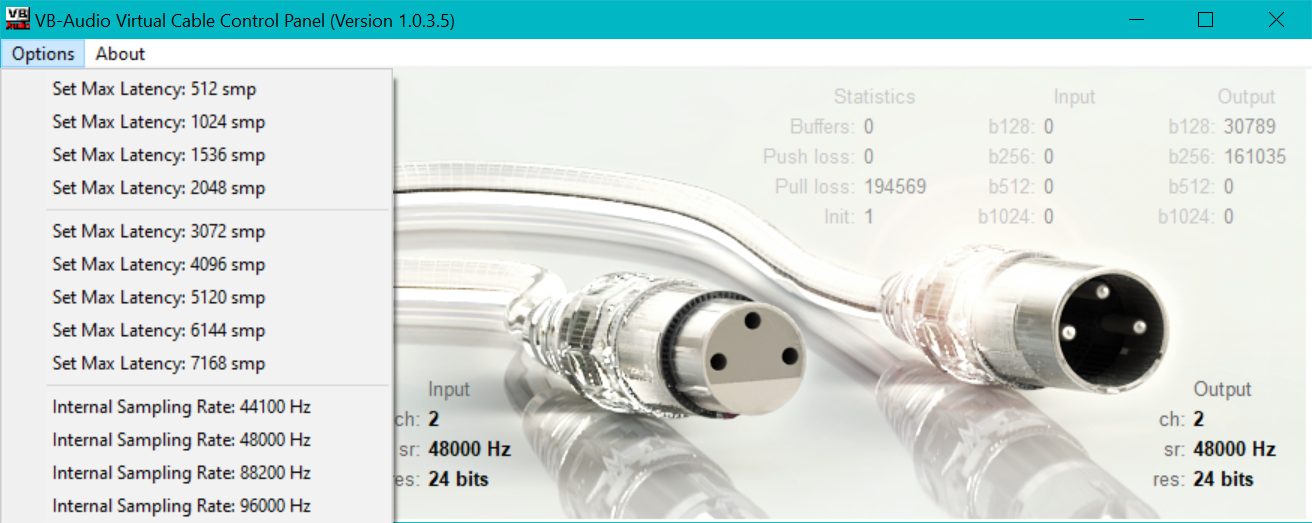
The computer must be rebooted after making these changes. -
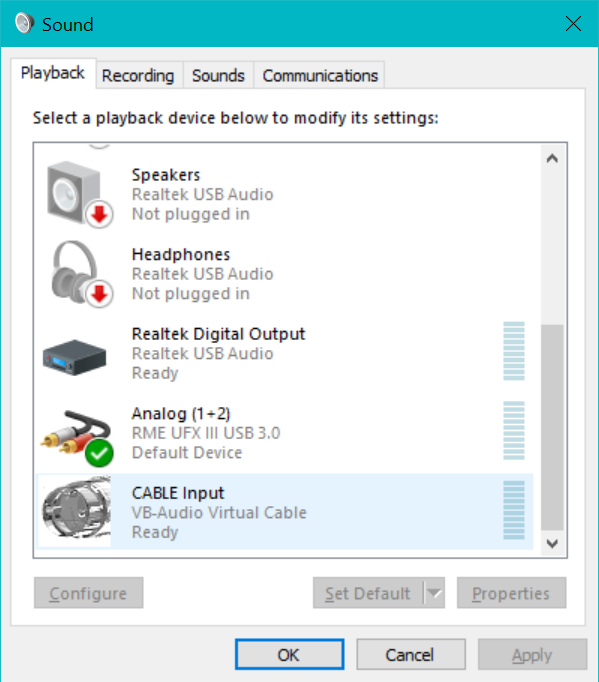
Press Windows-R then type
mmsys.cpl.-
Scroll down until you see CABLE Input:
-
Click on the Advanced Tab and select the desired bit rate and bit depth:
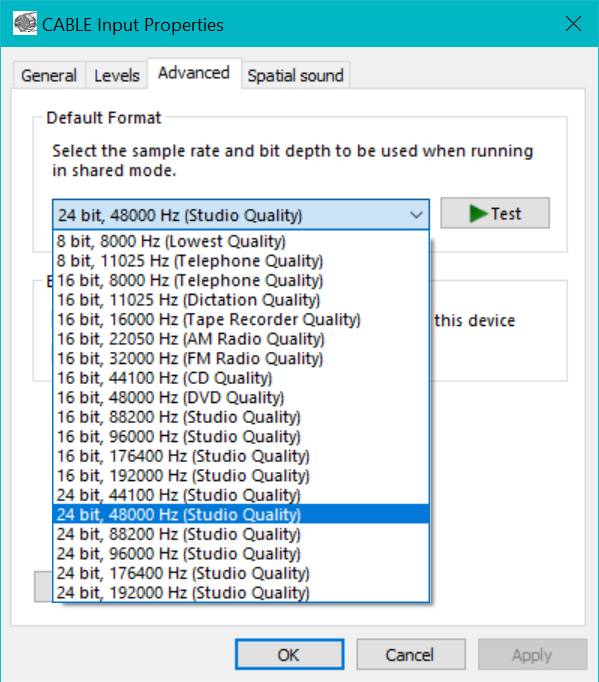
- Click OK.
- Click on the Recording tab and select the desired bit rate and bit depth.
- Click OK twice. There is no need to reboot the computer.
-
Scroll down until you see CABLE Input:
Ableton Setup Overview
The remainder of this article assumes that you have already installed ReaStream and VB-CABLE.
Ableton’s audio settings do not need to be changed. Instead, for each Ableton Live session that you want to connect with OBS Studio, the ReaStream VST2 plugin is placed on the Ableton Live session’s master channel. ReaStream broadcasts the Ableton Live session master channel throughout your computer’s internals.
The name for the broadcast is crucial, because the name is all that is used to route the
Ableton Live broadcast audio to OBS Studio.
Often the name is you give to things like audio clips and channels is relatively unimportant,
however this is not the case for ReaStream.
It is super important that the names you specify in both Ableton Live and OBS Studio match.
OBS Studio Setup Overview
OBS Studio also needs the ReaStream VST2 plugin, to receive the Ableton Live session broadcast audio. You just need to add a new Input Capture that uses ReaStream. You must ensure that the name of the broadcast set in Ableton Live matches the name of the broadcast in OBS Studio.
The weird thing about this setup is that the reastream audio is that it arrives by IP broadcast, not by a normal audio source. Just follow these simple instructions, and it should work.
Step by Step
Configure Ableton Live
- Open your Ableton Live session.
- Click on Collections / Categories / Plugins.
- Open ReaPlugs.
-
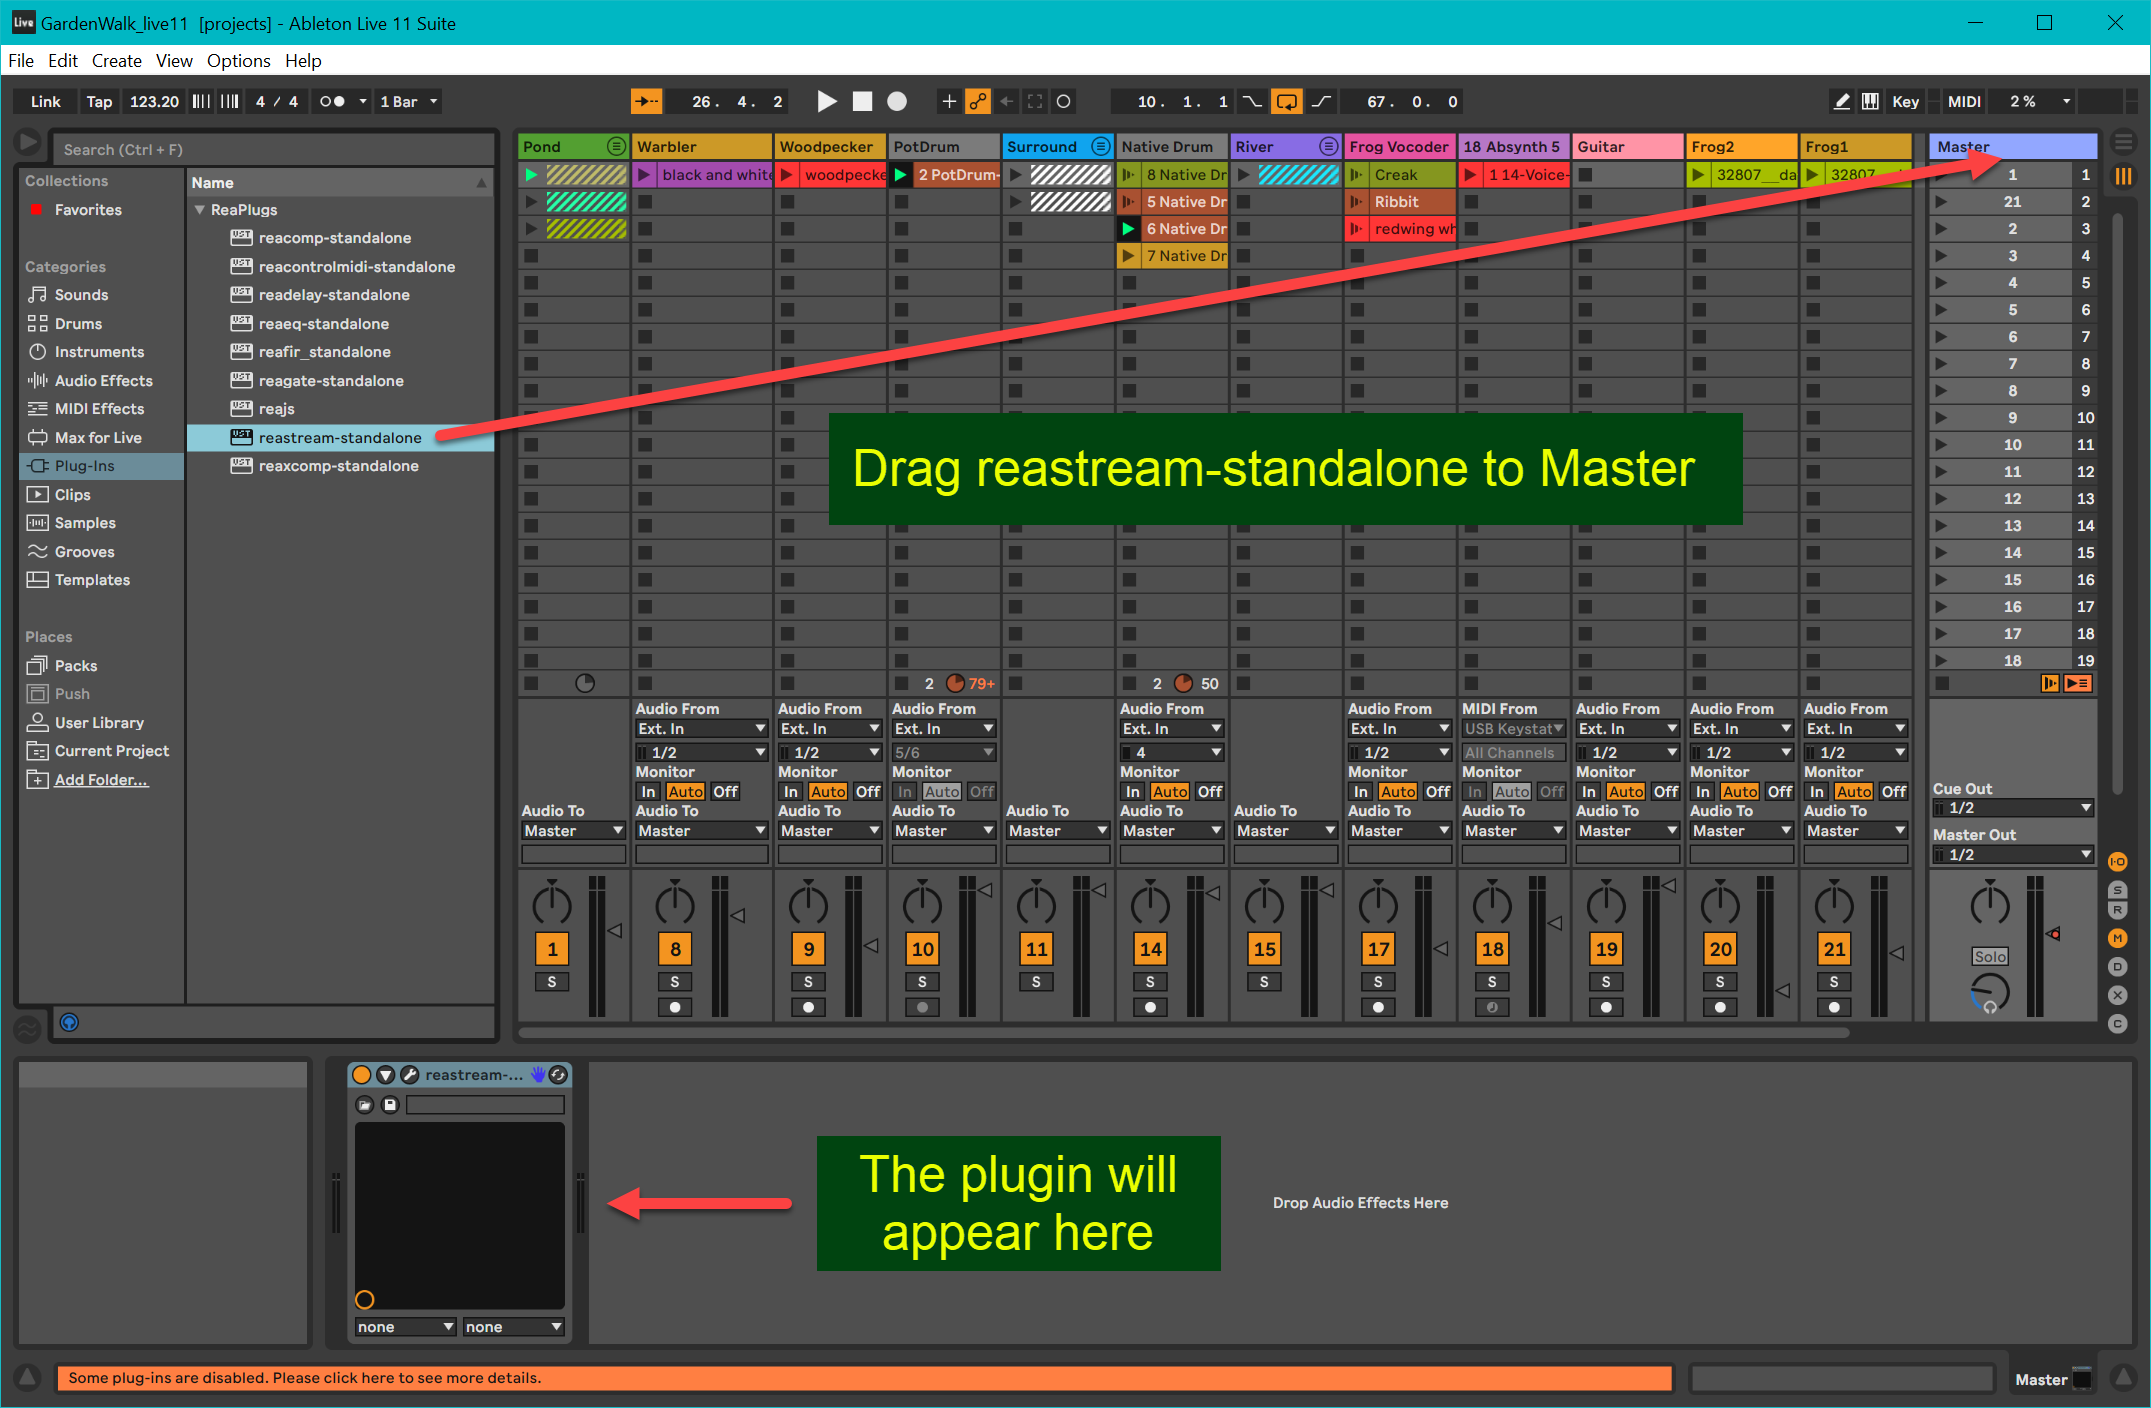
Drag reastream-standalone to the Master channel.
-
The configuration window for
reastream-standalonewill open:
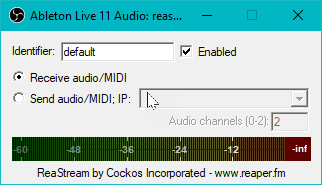
Thereastream-standalonemeter shown above should show audio when the session plays. Verify that is the case before going further.-
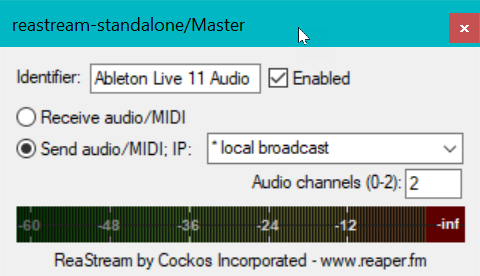
Set the name of the broadcast channel where it says Identifier:.
The default name is
default; I suggest you name itAbleton Live 11 Audio,Ableton Live 12 Audio, etc. - Ensure the Enabled checkbox is checked.
- Ensure that Send audio/MIDI; IP: is selected.
- The choices for Send audio/MIDI; IP: are * broadcast and * local broadcast. Select * local broadcast as shown.
- Set Audio channels (0-2): to 2 (stereo).
-
Now your
reastream-standaloneplugin should look like:
Close thereastream-standalone/Masterconfiguration window.
-
Set the name of the broadcast channel where it says Identifier:.
The default name is
-
Click on the top of the Master channel.
The plugin will appear as shown, at the bottom of the screen.
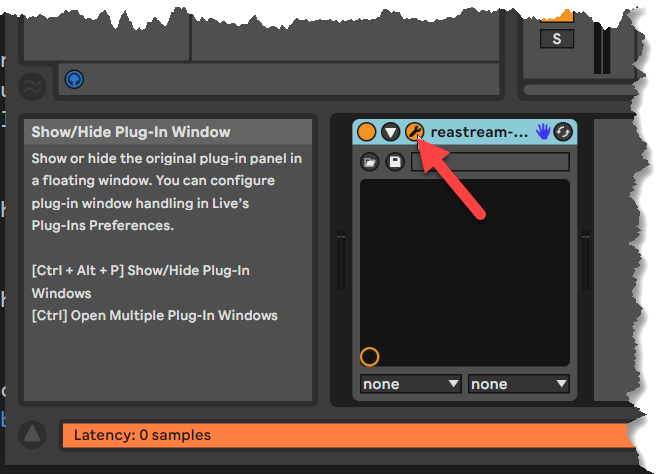
If you want to openreastream-standalone/Masterconfiguration window again, click on the little wrench icon in the plugin.
Configure OBS Studio
- Start OBS Studio and select or create the scene that you want to add Ableton Live audio to. I called my scene Ableton Live, Push and Talking Head. My scene already had a video capture device called Logitech Brio (a 4K webcam), and a window capture called Ableton Live 11 Video. Once these instructions were followed, I still needed to add an audio capture device for the webcam audio; that explanation is not part of this article.
- Click the Sources tab.
- Add a new Audio Input Capture and give it the same name as the Ableton Live broadcast channel (Ableton Live 11 Audio) to keep things neat and tidy. The actual name of the audio input does not matter, so long as it does not actually have any audio associated with it. The audio will routed from Ableton Live in the following steps. I had an unused virtual audio cable called CABLE Output (VB-Audio Virtual Cable), so I selected that.
-
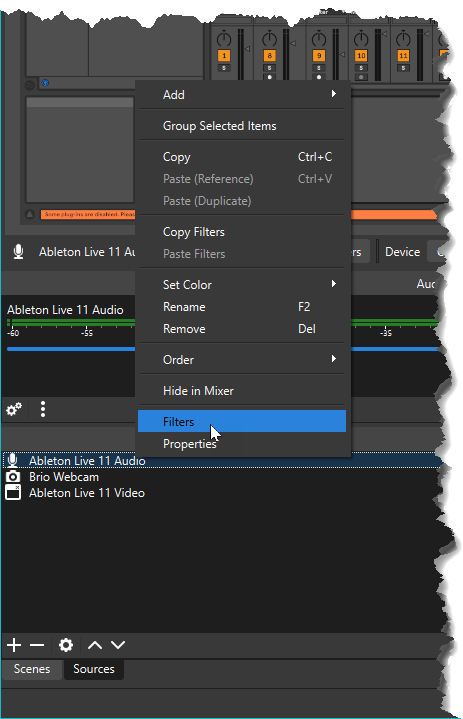
Right-click on the new audio input and select Filters.
This is how we will obtain the audio from Ableton Live.
-
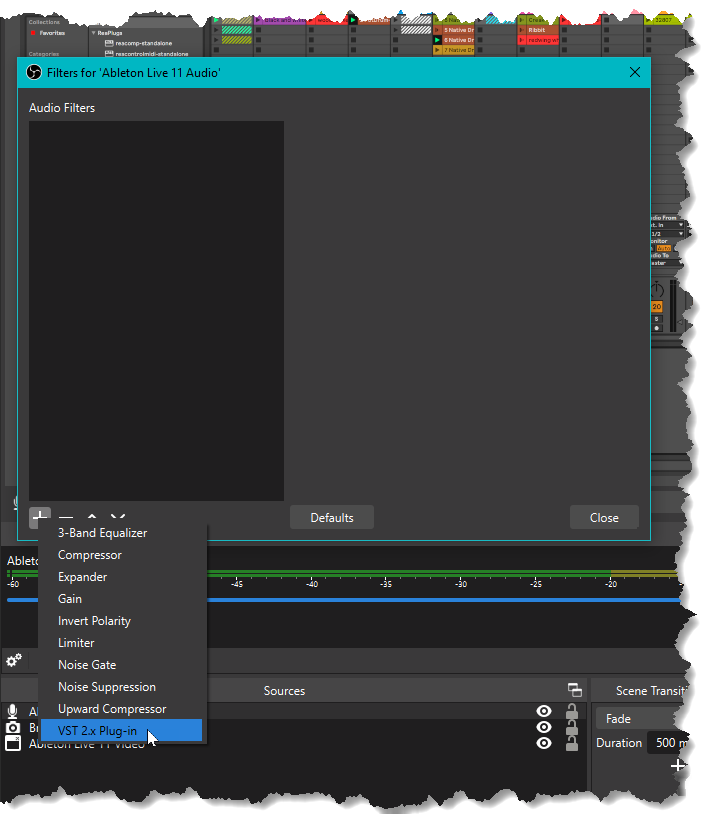
Click the + button and then select VST 2.x Plug-in to add a new audio filter.
-
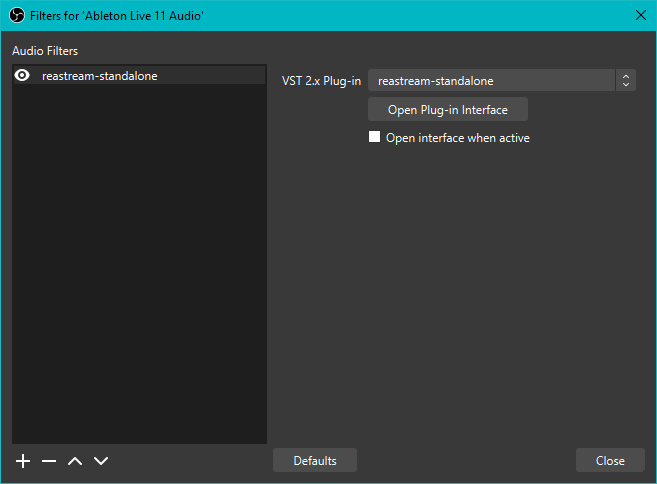
You are asked for the name of the filter, it does not really matter what you call it, but to keep things straight,
call it
reastream-standalone -
Now select the VST 2.x Plug-in called reastream-standalone from the pull-down menu.
This is what you should see once you have done that:
-
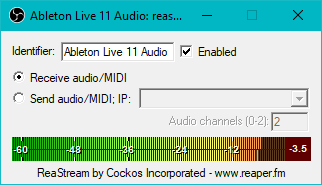
Click on the Open Plug-in Interface button, and then you should see:

The level meters should not show any audio yet. -
Change the Identifier: from default to exactly match the identifier that you used in Ableton Live for the broadcast channel.
As a reminder, I had recommended you name the broadcast channel
Ableton Live 11 AudioorAbleton Live 12 Audio. Leave Enabled and Receive audio/MIDI selected.
If Ableton Live is playing music, the meter in the OBS Studio ReaStream plugin should show audio now. You should verify that this is the case now.
-
You are done!
Close the ReaStream plugin window and the OBS Studio Filter window.
This is the completed result:


